Introduction
Are you looking for a way to decorate your home for the winter season that captures the beauty of snowflakes without the chill and mess of real snow? Do you want to engage in a fun and eco-friendly activity that involves cutting, folding, and creating intricate designs with paper and scissors? If so, you have come to the right place. In this comprehensive guide, we will explore the art and science of making snowflakes that are easy, fun, eco-friendly, and creative. Whether you are a beginner or an expert, there is something for everyone in this guide. Let’s get started by previewing the main topics that will be covered in this article:
- Basic Guide to Making Classic Paper Snowflakes
- Video Tutorial for Making Snowflakes with Scissors and Paper
- Science of Snowflakes and How to Mimic their Unique Shapes
- Personal Story and Tips for Making Snowflakes
- Creative and Unique Snowflake Designs to Try Out
- Eco-Friendly and Sustainable Snowflake Making
- How to Incorporate Handmade Snowflakes into Winter Crafts and DIY Projects
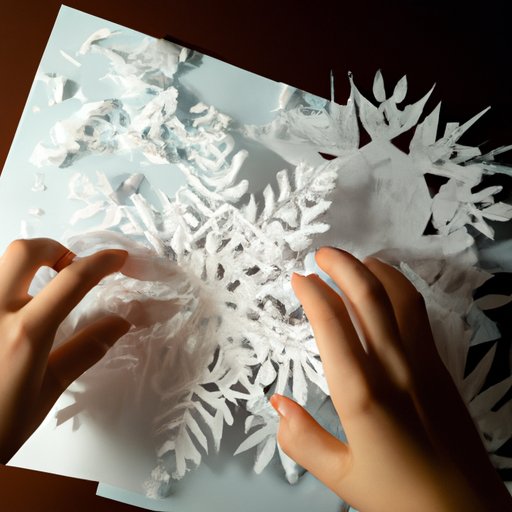
Basic Guide to Making Classic Paper Snowflakes
To make classic paper snowflakes, you will need the following materials:
- Square sheets of paper (white or colored)
- Scissors
- Pencil
- Ruler
Here are the steps to follow:
- Take a square sheet of paper and fold it in half diagonally to form a triangle.
- Fold the triangle in half again to form a smaller triangle.
- Divide the triangle into three equal sections by folding the right corner to the center of the edge opposite to it, and then repeat with the left corner.
- Use a ruler and a pencil to draw lines or dots on the folded edges to create a pattern. You can experiment with different shapes and sizes, such as triangles, squares, circles, or hearts. Remember that the patterns you create will be symmetrical, so you only need to draw on one side of the folded paper.
- Carefully cut along the lines or dots with scissors, taking care to keep the folded paper intact. You can use small or large scissors depending on the level of detail you want to achieve.
- Unfold the paper carefully to reveal your beautiful snowflake! You can flatten the snowflake by placing it under a heavy book for a few minutes.
Here are some tips and tricks to keep in mind when making snowflakes:
- Start with simple shapes and patterns before moving on to more complex ones.
- Use thin but durable paper, such as printer paper or origami paper, to make cutting easier and more precise.
- Keep your scissors sharp and clean to avoid tearing the paper or getting stuck in the middle of a cut.
- Experiment with different sizes of paper and scissors to create a variety of snowflakes. You can use small snowflakes for decorations or large ones as centerpieces.
Video Tutorial for Making Snowflakes with Scissors and Paper
If you prefer to learn by watching, you can follow this short video tutorial that demonstrates how to make snowflakes with scissors and paper:
As you can see, this method is fast, simple, and versatile. All you need to do is fold a square sheet of paper in half diagonally, and then in half again. Next, cut off the tip of the folded paper to create a cone shape. Finally, snip the edges of the cone with scissors to create a series of openings that resemble snowflake patterns. You can make these openings large or small, and angled or curved, to achieve different effects.
However, you should be aware of some safety concerns when using scissors to make snowflakes. Always hold the paper and scissors with one hand and cut with the other hand, keeping your fingers away from the blades. If you have young children or pets around, supervise them closely and provide them with safe scissors or paper punchers.
Science of Snowflakes and How to Mimic their Unique Shapes
Have you ever wondered why snowflakes look so different from one another, even though they are all made of the same substance? The answer lies in the science of crystal formation and growth.
Snowflakes are made of ice crystals that form in clouds when water vapor freezes onto particles of dust or pollution. As the crystals grow, they take on a variety of shapes and patterns depending on the temperature, humidity, and air pressure in the cloud. Some crystals form hexagonal shapes, while others branch out in dendritic or fern-like patterns. The exact shape and pattern of a snowflake is determined by a complex interplay of physical and chemical factors that are still not fully understood by scientists.
However, you can still try to mimic the geometry and texture of snowflakes by using folded paper or cutting techniques. One way to do this is to fold a sheet of paper into an accordion shape, and then cut out patterns along the edges. When you unfold the paper, you will see a repeating snowflake pattern that resembles the branching arms of a snowflake.
Another way to create snowflake-like shapes is to use kirigami, which is a variation of origami that involves cutting the paper as well as folding it. You can find many templates and tutorials online that show you how to make 3D or pop-up snowflakes that look like the real thing.
Personal Story and Tips for Making Snowflakes
As a snowflake enthusiast and a craft lover, I enjoy making snowflakes as a hobby and as a way to decorate my home for the winter season. Over the years, I have learned some tips and tricks that have helped me improve my snowflake-making skills:
- Don’t be afraid to make mistakes or try new things. Snowflakes are supposed to be unique and imperfect, just like real snowflakes.
- Use contrasting colors or textures to make your snowflakes stand out. You can add glitter, beads, or sequins to the paper, or use colored lights to illuminate them.
- Practice mindfulness while making snowflakes. Focus on the sound of the scissors cutting the paper, the feel of the paper folding and unfolding, and the joy of creating something beautiful and meaningful.
- Share your snowflakes with others. You can give them as gifts, use them to decorate your workplace or school, or donate them to a local charity or hospital. Snowflakes can bring warmth and cheer to people of all ages and backgrounds.
Creative and Unique Snowflake Designs to Try Out
If you are looking for some inspiration for your next snowflake project, here are some creative and unique designs to try out:
- 3D snowflakes: these snowflakes have multiple layers or levels that create a dimensional effect. You can stack them on top of each other or hang them at different heights to create a swirling snowflake cloud.
- Snowflake cutouts: these snowflakes have sections or shapes cut out of them, which create a lacy or delicate look. You can use them as window decorations or as wrapping paper accents.
- Snowflake chains: these snowflakes are linked together in a garland or chain, which creates a festive and colorful effect. You can use them as party decorations or as tree ornaments.
For each design, you can find templates or patterns online that show you how to cut and fold the paper. You can also customize the designs by combining different shapes and sizes, or by using different colors or materials.
Eco-Friendly and Sustainable Snowflake Making
One of the benefits of making your own snowflakes instead of buying store-bought decorations is that you can be more eco-friendly and sustainable.