Introduction
Snow globes are a charming keepsake that invoke feelings of childlike wonder and nostalgia. Whether it’s a cherished memento from a family vacation or a unique ornament to decorate your home, snow globes have been captivating both children and adults for generations. In this article, we’ll explore step-by-step instructions for making your own snow globe, unique DIY ideas, popular materials and tools, helpful tips and tricks, and some fun facts and history about snow globes.
Step-by-Step Guide
Making a snow globe is relatively easy and requires only a few simple materials and tools.
Materials:
- A glass jar with a tight-fitting lid
- Distilled water
- Glycerin (to make the glitter swirl and settle more slowly)
- Glitter (use multiple colors or just one, depending on your preference)
- Small figurine or decorative object to display inside the snow globe
- Super glue or waterproof epoxy to secure object to the jar lid
Tools:
- A pair of scissors
- A spoon or funnel
- Optional: hot glue gun and/or painter’s tape to seal the rim of the jar lid before screwing it on
Now that you have your materials and tools ready, follow these simple steps to make a basic snow globe:
- Glue your chosen object onto the inside of the jar lid, using super glue or waterproof epoxy. Allow the glue to dry completely before proceeding to the next step.
- Fill the jar almost to the top with distilled water, leaving a little space at the top for air and your glitter.
- Add a few drops of glycerin (4-5 drops per cup of water should suffice) to the jar. This helps to make the glitter move more slowly and settle back down without floating to the top too quickly.
- Add glitter to the water. Start with a small amount and adjust as you like. Test the mixture by shaking the jar to see how the glitter falls and swirls.
- Screw the lid onto the jar firmly, making sure it is tight enough to avoid leakage during shaking. Use hot glue or painter’s tape to seal the rim of the jar if necessary.
- Turn the jar upside down and shake it to watch your glittery creation come to life!
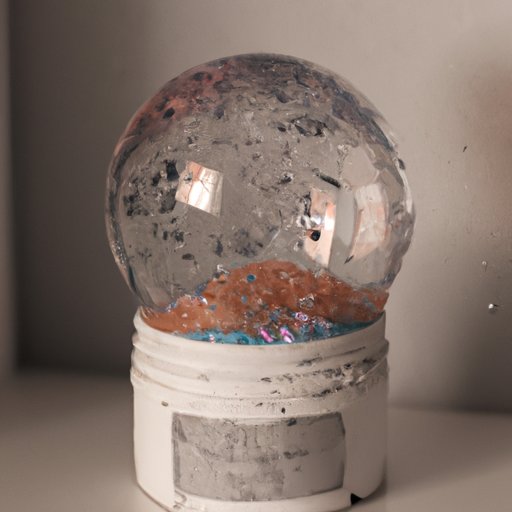
Voila! You have your own unique snow globe, perfect for displaying during the winter months or a fun craft with your family and friends.
Unique DIY Ideas
While making a basic snow globe is fun on its own, getting creative with your design can lead to charming and unique results. Here are a few ideas:
- Create a mini winter wonderland. Use miniature trees, a small snowman, and some tiny houses to create a wintry diorama.
- Take inspiration from your favorite holiday. Create snow globes that reflect your favorite holiday themes, such as Halloween or Christmas.
- Get whimsical with your designs. Add some fairy lights, dried flowers or leaves, or even a tiny boat to your snow globe to create a whimsical effect.
Remember that the possibilities are endless when it comes to DIY snow globes. Use your imagination and have fun!
Materials and Tools
When it comes to choosing materials and tools for your snow globe, there are a few things to keep in mind:
- Use materials that are lightweight and small enough to fit inside the jar. Miniatures work best.
- Choose glitter colors based on your personal preferences and the theme of your snow globe.
- Consider adding some glycerin to the water to slow down the glitter’s movement so it lasts longer.
- Use super glue or waterproof epoxy to secure objects to the jar lid.
When it comes to tools, a pair of scissors, spoon or funnel, and some glue should be sufficient. However, you can also use a hot glue gun to ensure a firm seal between the lid and the jar.
Tips and Tricks
For a successful DIY snow globe experience, here are some basic tips and tricks to keep in mind:
- Make sure all materials are completely dry before starting to assemble your snow globe. Moisture can cause the glitter to clump together or stick to the jar.
- Use distilled water to avoid clouding or bacteria buildup over time.
- Start with a small amount of glitter and adjust the amount based on your preferences.
- Test the glitter before putting it into the jar to ensure that it does not clump together.
- Consider experimenting with different materials, such as colored sand or small beads, to create a unique effect.
Experimenting and customizing your snow globe can result in a work of art you’ll be proud to display. Happy crafting!
History and Fun Facts
Snow globes have a fascinating history that spans over centuries. Originally invented in the 19th century, the earliest versions of snow globes were made of glass and contained a white powder that resembled snow. Over time, the powder was replaced with glitter and the water was made clear to provide a more vibrant effect.
Snow globes gained widespread popularity in the 20th century and have since become a beloved collector’s item. They have been featured in movies, music videos, and even as part of commercial marketing campaigns.
Did you know that the world’s largest snow globe was created in 2007 and measured over 15 feet tall and 11 feet wide? Or that the Guinness World Record for the largest collection of snow globes belongs to a woman in California who owns over 8,000 globes?
Snow globes have become an integral part of various cultures around the world, with variations that reflect different traditions and holidays.
Conclusion
Whether you are a seasoned DIY enthusiast or just starting out, making your own snow globe is a fun and easy project that can be enjoyed by people of all ages. With the step-by-step guide, unique DIY ideas, materials and tools information, tips and tricks, and history and fun facts, you’ll be well on your way to creating a wintery wonderland of your own.