Introduction
Have you ever tried making a ribbon bow before, only to have it turn out lopsided or too small? Don’t worry! You’re not alone. Many people struggle to create the perfect bow, but with a few simple tips, anyone can make a beautiful ribbon bow. In this article, we provide a step-by-step guide on how to make different types of ribbon bows, including special occasion bows and bowtie bows. So, grab some ribbon and let’s get started!
Step-by-Step Guide
To make a classic ribbon bow, you will need a length of ribbon and a pair of scissors. Here’s how to do it:

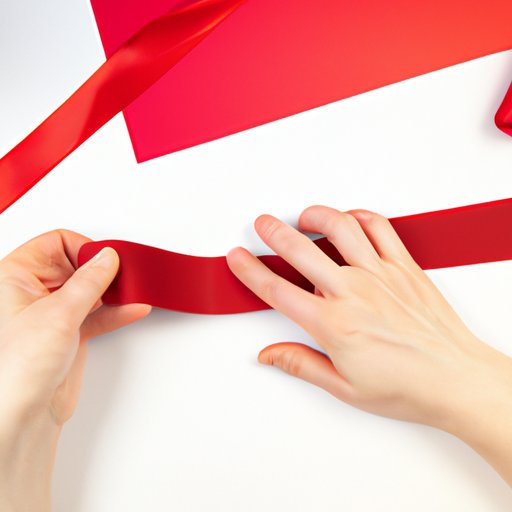
Step 1: Start by creating a loop with the ribbon. The size of the loop will determine the size of your finished bow.

Step 2: Hold the loop with your thumb and index finger, then create a second loop on the other side of the first loop.

Step 3: Continue creating loops on either side until you have the desired number of loops. We recommend using at least 3 loops on each side for a balanced bow.

Step 4: Once you have the desired number of loops, hold the center of the loops with your thumb and index finger, and tie a knot around the center using the ribbon tail.

Step 5: Trim the ends of the ribbon tail at an angle for a clean finish.
Remember to pull the loops tight before tying the knot to ensure a compact and neat end product. Additionally, use sharp scissors to get a clean cut on the ribbon tail.
Different Techniques
While the classic ribbon bow is a great option for many purposes, there are also various techniques available for creating different types of ribbon bows.
Layered Bow
The layered bow adds depth to your ribbon creation by using different ribbon sizes on top of each other.

Step 1: Cut two or three pieces of ribbon, each a little smaller than the last. Stack them together, with the biggest ribbon at the bottom.

Step 2: Follow the classic ribbon bow instructions from Step 2. Use the center ribbon for the loops, and the remaining top layer ribbons to create smaller loops on top.
Curly Bow
A curly bow adds a fun and whimsical touch to any gift or decoration with curly ribbon ends.

Step 1: Use a ribbon with wire edges to achieve the best curling results. Cut the ribbon to your desired length. Using a sharp pair of scissors, curl the edges by sliding the ribbon along the blade of the scissors.

Step 2: Once you have all the curls you want, gather them together in the middle, and tie a knot using another piece of the same ribbon.
Pinwheel Bow
The pinwheel bow creates a fun and playful look with its alternating loop lengths.

Step 1: Cut a piece of ribbon and form loops by following the classic ribbon bow instructions.
Step 2: Trim each of the loops to a different length, with the longest loop in the center, and the shortest loops on the outside.
Step 3: Hold the loops together and wrap the ribbon tail around the center, then tie a knot to secure it in place.
When selecting the right ribbon type and color, consider the occasion you’re making the bow for. For example, a red or green ribbon is perfect for Christmas, while a light pastel shade is ideal for a baby shower gift.
Special Occasion Bows
When it comes to special occasions like weddings or birthdays, a little effort is needed to make a bow that stands out. Here are some tips on how to create special occasion bows:
Wedding Bows
For weddings, simple yet elegant bows work best. To create bows that fit a wedding theme, consider using white or ivory ribbon, or matching the ribbon to the bridesmaid’s dresses.
Birthday Bows
To create birthday bows, use bright and playful colors that match the occasion. Add some ribbon streamers to make the bow even more festive.
Bowtie Bows
Bowtie bows are perfect for adding a touch of sophistication to gifts or dressing up a baby’s outfit. Here’s how to make them:

Step 1: Cut a piece of ribbon and tie a knot in the center.

Step 2: Cut two smaller pieces of ribbon and fold them in half to create loops on either side of the center knot.

Step 3: Wrap another small piece of ribbon around the center knot, covering up the ends of the loops. Tie a knot at the back to secure it in place.
Alternative Knots
Using an alternative knot to make a bow can give it a unique and interesting look. Here’s how to do it:
The Basic Knot
The basic knot creates a simple and elegant bow.

Step 1: Make a loop with the ribbon, leaving a long tail.

Step 2: Make a second loop on the other side, making sure the size matches the first loop.

Step 3: Tie the two loops together using the long ribbon tail.
The Twist Knot
The twist knot creates a more intricate and textured look.
Step 1: Make two loops that are the same size and twist one over the other.

Step 2: Hold the twisted loops in place with your thumb and your index finger, then make another loop with the ribbon to create a knot over the center of the twisted loops.

Step 3: Pull the knot tight, then adjust the loops to create a balanced look.
Video Tutorial
Here’s a video tutorial to help you master the art of making a ribbon bow.
Remember to start with a good quality ribbon that holds its shape well. Practice makes perfect, so don’t be discouraged if your first few bows don’t turn out perfectly. With these tips and techniques, you’ll be making beautiful ribbon bows in no time!
Conclusion
Creating a ribbon bow may seem intimidating at first, but with the right techniques and some practice, anyone can master the craft. We’ve outlined different types of ribbon bows to match various occasions, and provided step-by-step instructions and tips for each. Remember to choose the appropriate ribbon color and type to match the occasion.