Introduction
Grindstones are an essential tool for sharpening and maintaining the edges of different tools and objects. Made from stones like sandstone, it has been used for centuries by craftsmen to sharpen knives, axes, chisels, and other instruments. In this article, we will provide a comprehensive guide on how to make a grindstone in simple steps. We have included expert advice, tips on maintenance, materials and tools required, and historical context. This guide is perfect for anyone looking to make a grindstone and enhance their sharpening skills.
A Step-by-Step Guide
Making a grindstone is a simple but crucial process that requires patience and attention to detail. Here is a step-by-step guide to help you:
Step 1: Choose Your Stone
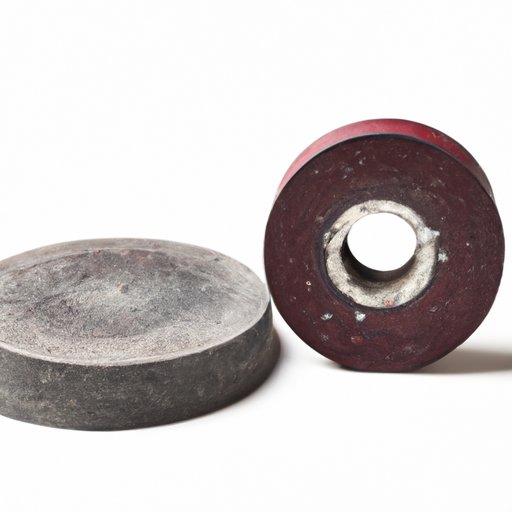
The first step to making a grindstone is choosing the right stone. Common stones used are sandstone, limestone, and granite. The sandstone is a popular choice because it has excellent abrasive qualities and also comes in different sizes. You can find suitable stones in building supply stores or online.
Step 2: Create the Shape of the Grindstone
The next step is to decide the shape and size of your grindstone. This will depend on the type of tool you plan on sharpening. Use a hand grinder to carve out the shape of the grindstone from the stone.
Step 3: Create the Grindstone Bit
After shaping the main body of the grindstone, you need to create the bit. This is the part of the grindstone where you will be sharpening your tool. Mark the shape of the bit on the stone with a pencil. Use a chisel and hammer to carve out the bit carefully. Wet the stone frequently to avoid dust from building up and to reveal the grindstone bit’s final form.
Step 4: Sharpen the Grindstone
Once the grindstone bit is formed, it is time to sharpen the grindstone. Use a chisel and hammer to carve out the grooves along the edges of the bit. These grooves are crucial because they keep the tool’s shape stable while sharpening. You can also use a diamond grinder to grind the bit and edges more precisely and evenly.
Step 5: Smooth the Grindstone
The final step is to smoothen the grindstone surface. You can use sandpaper to remove any rough edges on the surface. Start with a rough grit sandpaper and finish with a finer grit. Finally, wash the grindstone with water and dry it thoroughly.
Necessary Precautions
Here are some safety precautions to take while making a grindstone:
- Always wear protective goggles to avoid any eye damage from flying particles.
- Wear earplugs to avoid excess noise.
- Keep a bucket of water nearby to wet the stone while carving or sanding.
Expert Advice
Here are some tips from experienced makers:
- Choose a coarser stone for the grindstone bit so that the sharpness is not affected during the sharpening process.
- Avoid using sandpaper, if possible, to smooth the grindstone surface. Instead, use a cloth dipped in sand and water for better results.
- Never use oil while sharpening your tools, as it clogs the pores and dulls the edges of the tool.
Historical Context
Grindstones have a rich history and have been used for centuries to sharpen tools and weapons. These stones were first used in the Neolithic Era, around 10,000 BC. The technique of making a grindstone has evolved over time to create a flatter and smoother surface. The Ancient Egyptians were particularly skilled in making grindstones, using sandstone blocks quarried from Nubia.
In the Middle Ages, water-powered grinders were used to sharpen tools on a large scale. These grinders were often located near water sources, such as rivers or dams, and were powered by waterwheels. Grindstones were also used in creating flour and other food products during medieval times. Today, the use of electric grinders and sharpeners has made sharpening easier and faster.
Materials and Tools
Here is a list of the materials and tools required to make a grindstone:
- Stone (sandstone, limestone, granite)
- Chisel and Hammer
- Hand Grinder
- Diamond Grinder
- Bucket of Water
- Protective Gear (goggles, earplugs)
- Sandpaper
- Cloth and Sand Mixture
The cost of the materials and tools can vary depending upon the availability and quality of the stone and tools required.
DIY Project
Making a grindstone is a rewarding DIY project that can help you improve your sharpening skills. Here are some success stories of people who have tried making their own grindstones:
“I made my first grindstone last summer, and it was a lot of fun. I used a sandstone block from a local quarry and a chisel and hammer to carve out the shape of the grindstone. It was a bit challenging, but I’m very proud of how it turned out. It’s now one of my most used sharpening tools.” – John, 34
“I wanted to try my hand at making a grindstone, but I was intimidated by the process. So, I watched several YouTube videos and read different blog posts about it before starting. I followed the steps carefully and took my time, which made the process less daunting. Now, I have a beautiful grindstone that I use often.” – Sarah, 27
Troubleshooting and Maintenance
Here are some common issues that a reader may face once they have made their grindstone:
- The grindstone can become clogged with metal dust during sharpening, which can reduce its effectiveness. Clean the grindstone often to avoid this issue.
- The grooves on the grindstone can wear down over time from repeated sharpening. Use a diamond grinder or chisel to carve out new grooves for better results.
- Small chips or scratches may appear on the grindstone surface after several uses. It’s best to smoothen them out immediately to avoid damage to your tools.
Maintain your grindstone by cleaning it often and storing it in a dry place. A well-maintained grindstone will last for years and improve your sharpening skills.
Conclusion
Making a grindstone is an excellent DIY project that can help improve your sharpening skills and save money on hiring professional sharpeners. By following the simple steps we presented above, you can create a durable and efficient tool that will sharpen your tools and keep them in good condition for years to come. We hope this guide has been helpful and inspiring, and we encourage you to try making your own grindstone. If you have any questions or comments, please feel free to leave them below.