Introduction
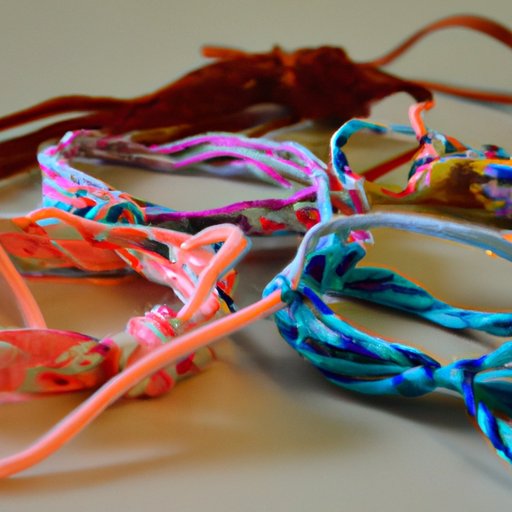
Friendship bracelets are great gifts for your friends, perfect for expressing love and gratitude without spending a fortune. They’re also a popular craft activity, especially among younger generations. These bracelets can be customized to each individual, and they’re relatively easy to make with the right instructions. In this article, we will cover all the basics of making friendship bracelets, with step-by-step guides, creative patterns, and eco-friendly ideas.
Step-by-step guide: How to make a friendship bracelet
First of all, you need a few materials:
- Cotton embroidery floss
- A pair of scissors
- A clipboard or tape
Follow these instructions:
- Choose three different colors of embroidery floss. Cut two strands of each color, about 24 inches long.
- Knot all six strands together at one end, leaving about an inch of tail.
- Hold all six strands, with one color on each side and two in the middle. Take the left-hand strand and cross it over the two middle strands, creating a “4” shape.
- Take the right-hand strand and place it over the left-hand strand, then bring it under the two middle strands, and up through the “4”. Pull the thread tight.
- Take the left-hand strand and repeat step 3 and 4.
- Repeat steps 3-5, switching sides each time.
- When you reach the desired length of the bracelet, tie a knot at the end, leaving about an inch of tail.
Helpful Tips:
- Use a clipboard or tape to hold the knot end, this will keep your bracelet stationary.
- Make sure each knot is tight, but not so tight that it bunches up the bracelet.
- Don’t worry if the bracelet twists at first – it will straighten out as you work.
- Experiment with colors and patterns for a unique bracelet
Get creative: Top 5 unique friendship bracelet patterns to try
If you’re feeling adventurous, here are five different friendship bracelet patterns to try:
- Stripes: use two colors and alternate them every time you knot
- Chevron: use three colors and knot a “V” shape with the bottom two strands, then knot a “V” backwards with the top two strands, and repeat this pattern.
- Heart: use three colors, knot two “V” shapes with the same middle string and then knot the middle strings together
- Zig-zag: use three colors, knot a “V” shape with all three strands and then create a backward “V” with two strands, and repeat this pattern.
- Rainbow: use six different colored strands and knot each color one after the other in order of the rainbow.
Difficultly level and time requirements:
- Stripes and Rainbow: Beginner, 20-30 minutes
- Chevron: Intermediate, 1-2 hours
- Heart and Zig-zag: Advanced, 2-3 hours
Eco-friendly and budget-friendly: Using recycled materials to make friendship bracelets
With a little creativity, you can make something beautiful and eco-friendly. Here are some materials you can repurpose for your friendship bracelets:
- Old t-shirts or fabric scraps, cut into thin strips
- Empty plastic containers, cut into long strips
- Recycled paper or magazine pages, cut into uniform strips and rolled tightly
Follow these instructions:
- Cut the material into strips about 1 inch wide and 24 inches long.
- Knot each strip end together and clip it to a sturdy surface with a clothespin or tape. If using fabric strips, you can sew the tips together instead of knotting them.
- Choose a starting point and begin knotting each strip together using the instructions from the previous section.
- Keep knotting until the bracelet reaches the desired length. Tie the end in a knot and trim any excess fabric.
Making memories: Host a friendship bracelet-making party with your friends
A friendship bracelet-making party is a fun and interactive way to create lasting memories with your friends. Here are some tips:
- Invite your friends to bring their favorite colors of embroidery floss and any additional materials they’d like to use, such as charms or beads.
- Set up a large table or workspace area for everyone to work on their bracelets.
- Prepare snacks and drinks for your guests, such as finger foods and non-alcoholic punch.
- Play some music in the background to create a relaxing, enjoyable atmosphere.
- Offer pattern ideas and help your friends with their bracelets as needed.
Required materials and tools:
- Embroidery floss in assorted colors
- Scissors
- A clipboard or tape
- Charms and beads (optional)
Fun ideas for party snacks:
- Assorted fruit skewers
- Mini quiches or finger sandwiches
- Cookies or cupcakes decorated with edible markers
- Fruit-infused water
Personalize your bracelet: Adding charms and beads to your friendship bracelets
Charms and beads can add a unique touch to your friendship bracelets. Here’s how you can add them:
- Select the charm or bead you’d like to add to your bracelet, and slide it onto one of the strands before you begin knotting.
- Knot the strands together as usual, making sure that the charm or bead is held securely in place.
- Repeat this process until you’ve added all of the desired charms and beads to your bracelet.
Helpful tips:
- Choose charms or beads that match the theme or color scheme of your bracelet.
- Add the charm or bead to only one strand if you want it to appear on a particular part of the bracelet.
- Don’t overcrowd the bracelet with too many charms.
Variety is the spice of life: Different types of string and materials to use for friendship bracelets
Here are different types of strings you can use:
- Cotton: The most popular material for friendship bracelets because it’s easy to work with and comes in many colors.
- Hemp: A durable, eco-friendly option that creates an earthy, natural look.
- Leather cord: Gives a bohemian or western vibe to your bracelet.
- Nylon: A slick, shiny material that creates a modern look.
- Embroidery ribbon: brings a unique texture to your bracelet
- Fabric Strips: create unique patterns with a softer texture
The pros and cons of using different types of string:
- Cotton and nylon are affordable and widely available, but they may wear out over time.
- Hemp and leather cords are durable and last a long time, but may be more expensive and harder to find.
- Embroidery ribbon and fabric strips offer unique textures, but can be harder to work with for beginners.
Going beyond the basics: Advanced friendship bracelet techniques for experts
If you’ve mastered the basics, here are some new techniques to try:
- Alpha pattern: this technique involves using different colored knots to create letters and numbers on your bracelet
- Double chain knot: similar to the basic knot, but involves knotting over two middle threads instead of one
- Nano/macramé knots: create a decorative, textured pattern on your bracelet
Recommended resources:
- YouTube tutorials
- Online friendship bracelet forums
- Friendship bracelet pattern books
Conclusion
Making friendship bracelets is a fun and rewarding craft that can be enjoyed by beginners and experts alike. Whether you’re creating something simple or complex, eco-friendly or budget-friendly, or hosting a party with friends, these bracelets are a great way to show others that they are loved. We hope this article has given you the inspiration and confidence to create something unique and special for your loved ones.