Introduction
Wired ribbon can be found in a variety of colors, patterns, and widths, making it a versatile option for DIY crafts and gift wrapping. However, making a perfect bow with wired ribbon can be a challenge if you don’t know the right technique. That’s why learning how to make a bow with wired ribbon is an important skill for any creative individual. In this article, we’ll provide a step-by-step tutorial on how to create a beautiful wired ribbon bow, as well as tips for measuring, cutting, and fluffing the loops. We’ll also show you how to use wired ribbon to create DIY holiday decor and upgrade your gift wrapping game.
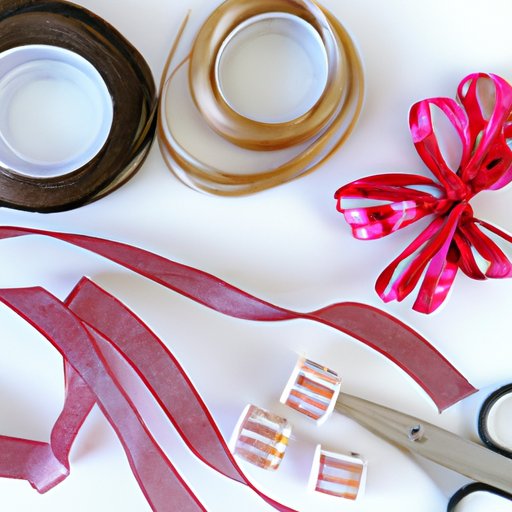
Step-by-Step Tutorial
Selecting the right wired ribbon
Before you get started, it’s important to choose the right wired ribbon. Look for ribbon that is at least 1.5 inches wide and is made from a material that will hold its shape when molded. Popular materials include satin, grosgrain, and velvet. Be sure to choose a color or pattern that suits your project or occasion.
Measuring and cutting the ribbon
Measure out the amount of ribbon you’ll need, keeping in mind that longer tails will create a more dramatic look. You can use a ruler or your fingers to estimate the length. Cut the ribbon at a diagonal angle, which prevents fraying and gives the bow a polished look.
Creating the loops
Start by creating a loop at one end of the ribbon, making sure that the tail is facing down. Hold the loop in place with your fingers and use the other hand to create a matching loop on the opposite side of the ribbon. The two loops should be the same size and shape.
Tying the knot
With the loops in one hand and the tails in the other hand, cross the loops over each other and tie them in a knot. Pull tightly to secure the knot, but be careful not to pull too hard, as this can cause the loops to twist or wrinkle.
Adjusting the loops
Once the knot is secure, adjust the loops so that they are evenly sized and shaped. You can gently tug on the tails to adjust the loops, or use your fingers to smooth them out. If necessary, you can also trim the tails to your preferred length.
Fluffing the loops
Using your fingers, gently fluff up the loops to give the bow volume and texture. Be sure to smooth out any wrinkles or creases in the ribbon. You can also manipulate the loops to create different bow styles, such as a pointed bow or a rounded bow.
Finishing the bow
To finish the bow, you can glue on a decorative embellishment, such as a jewel or a flower. Alternatively, you can use the tails to tie the bow onto your project or gift.
Video Tutorial
Advantages of a visual guide
If you’re a visual learner, or if you want to see the bow-making process in action, consider watching a video tutorial. Video tutorials provide a more detailed look at the process and can help you understand the nuances of bow making.
Using the video tutorial to supplement the step-by-step tutorial
You can use the step-by-step tutorial as a reference guide and the video tutorial as a visual aid. Follow along with the video tutorial to see how each step is done, and refer back to the written tutorial if you need clarification or more detail.
Top Tips
Measuring and cutting tips
When measuring and cutting your ribbon, be sure to use sharp scissors to prevent fraying. You can also use a ruler or a template to ensure that your bows are consistently sized. For larger bows, consider using a wire cutter to make cutting easier.
Creating different bow styles
Experiment with different styles and shapes of bows to create a custom look. For example, you can create a butterfly bow by using four loops instead of two, or a pom-pom bow by using multiple loops and fluffing them into a sphere shape.
Avoiding common mistakes
One common mistake when making a bow with wired ribbon is pulling the loops too tight, which can cause the ribbon to wrinkle. Another mistake is using ribbon that is too narrow or flimsy, which can make it difficult to mold the loops. Be patient and take your time when creating your bow to ensure a polished look.
Finishing touches
Once you’ve created your bow, consider adding additional embellishments to make it stand out. This can include glitter, sequins, or even small ornaments. You can also use a heat gun to shape the loops and create more depth.
DIY Holiday Decor
Advantages of using wired ribbon in holiday decor
Wired ribbon can be a great way to add color and texture to your holiday decor. Because it is flexible and moldable, it can be used to create wreaths, garlands, and even tree toppers. You can also coordinate your ribbon with your other holiday decor to create a cohesive look.
Decor ideas such as tree toppers, wreaths, and garlands
You can use wired ribbon to create a variety of holiday decor items, including:
- Tree topper: Create a large bow from wired ribbon and attach it to the top of your tree for a classic look.
- Wreath: Use wired ribbon to create a wreath base, and then add in other decorations such as pinecones, ornaments, and greenery.
- Garland: Twist wired ribbon around a garland to add color and texture, or create a DIY garland using multiple ribbon strands.
Tutorial for creating specific decor items
For detailed instructions on how to create specific holiday decor items using wired ribbon, check out online tutorials and DIY blogs. You can also experiment with different techniques and styles to create a custom look that suits your personal taste.
Upgrade Your Gift Wrapping
Benefits of adding bows to gift wrapping
Adding a bow to a gift can instantly elevate its presentation and show that you put extra thought and care into your gift. Wired ribbon bows are sturdy and can hold their shape throughout the gift-giving process. They can also be reused for future gift wrapping or crafting projects.
Tutorial for creating a basic wired ribbon bow
Follow the step-by-step tutorial above to create a basic wired ribbon bow. Once you’ve mastered the technique, you can experiment with different colors and patterns to create custom bows that match your gift wrapping theme.
More advanced bow designs
For more advanced bow designs, consider using multiple ribbon colors or patterns, or incorporating other materials such as tulle or lace. You can also layer different sizes of bows to create a dimensional look.
Conclusion
Learning how to make a bow with wired ribbon is a valuable skill for anyone interested in DIY crafts and gift wrapping. With the help of our step-by-step tutorial and top tips, you can create beautiful bows that add a touch of style to your holiday decor or gift wrapping. Remember to experiment with different styles and materials to create a custom look that suits your personal taste.