I. Introduction
Are you struggling to make a bow out of ribbon? Whether for gift wrapping, decorating floral arrangements, or simply accessorizing, creating the perfect bow can be a daunting task. But fear not! This article will provide simple, step-by-step instructions on how to make different types of ribbon bows. You will learn how to make a simple bow, a double bow, ribbon bows for gift wrapping, a ribbon bow for a headband, a ribbon bow tie, and even easy ribbon bow crafts for kids.
II. How to Make a Simple Bow Out of Ribbon
To make a simple ribbon bow, you will need a piece of ribbon and a pair of scissors. First, cut the ribbon to the desired length. Then, tie a knot in the middle of the ribbon, leaving two equal-sized loops on either side. Finally, adjust the loops to the desired size and trim the tails of the ribbon to the same length.
If you want to add an extra touch, try using ribbon of different colors or textures. You can also experiment with different bow shapes by adjusting the size of the loops or the length of the tails. Simple ribbon bows are perfect for adding a finishing touch to gift wrapping, decorating floral arrangements, or accessorizing your hair or clothing.
III. Step-by-Step Guide to Making a Double Bow
A double bow is a more intricate version of the simple bow, featuring two layers of loops. To make a double bow, you will need more ribbon and a bit of extra patience. First, cut two pieces of ribbon to the desired length. Then, follow the same steps as for a simple bow to create two separate bows. Finally, stack the two bows on top of each other and tie them together with a small piece of ribbon in the middle. Adjust the loops and tails to create a symmetrical shape.
Double bows can add an extra layer of elegance to gift wrapping or floral arrangements. They can also be used for accessorizing clothing or hair. Try experimenting with different color combinations or ribbon textures for a unique touch.
IV. DIY Ribbon Bows for Gift Wrapping
A special touch on any gift wrap is the ribbon bow that adorns the package. There are many different styles of ribbon bows that you can make to add some extra personality to gifts.
To make a classic bow, follow the steps for a double bow outlined earlier in the article. You can also make a pom-pom bow, which involves looping the ribbon around a fork or your fingers and then snipping the loops to create a fluffy effect. A twisted bow involves twisting the ribbon in opposite directions to create a unique texture. A rosette bow is made by folding the ribbon in a back and forth pattern and then securing it in the center with some thread or glue.
Be creative with pairing the right bow with the type of gift. For example, a twisted bow may go well with a gift for a friend, while a classic bow works for more formal occasions.
V. How to Make a Ribbon Bow for a Headband
Creating a ribbon bow to attach to a headband can be a fun and practical project. The materials needed for this type of bow include a headband and a piece of ribbon.
To make this type of bow, you need to wrap the ribbon around the headband and tie a knot in the middle. Next, create two loops on either side of the knot and secure them in the middle with a small piece of ribbon. Finally, adjust the loops and tails to your desired length and shape.
To add a personal touch, try experimenting with different colors or textures of ribbon. Ribbon bows can be used to add some extra style to any outfit, and they are also a perfect accessory for hairstyles.
VI. The Art of Making Ribbon Bow Ties
Ribbon bow ties can add an element of sophistication to formal occasions. The materials needed include ribbon, scissors, a hot glue gun, and a clip.
To make a ribbon bow tie, first, measure and cut the ribbon to the desired length. Then, tie a knot in the middle of the ribbon and create two loops on either side. Next, create two smaller loops on top of the larger loops and secure them in the middle with a small piece of ribbon. Finally, attach a clip to the back of the ribbon bow tie using a hot glue gun.
Ribbon bow ties can be worn to weddings or other formal events and can be paired with suits, tuxedos, or dresses.

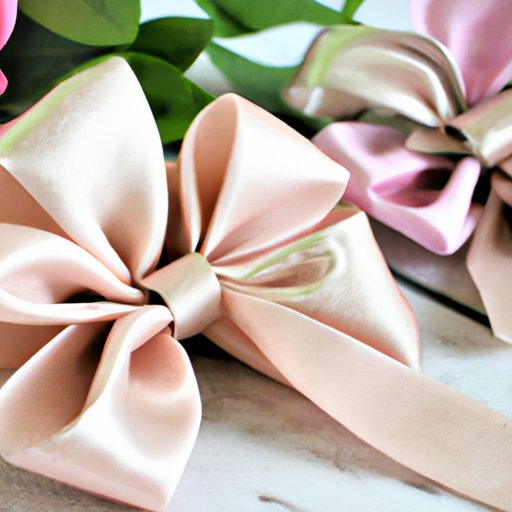
VII. Making Ribbon Bows for Floral Arrangements
Ribbon bows are essential for adding the finishing touch of elegance to floral arrangements. The materials needed for this type of bow include floral wire, scissors, and of course, ribbon.
There are several different styles of ribbon bows that can be used for floral arrangements, including a classic bow, a pouf bow, or a looped bow. To make a classic bow, follow the instructions outlined for a simple ribbon bow earlier in the article. For a pouf bow, create several layers of loops with different lengths of ribbon to create a dimensional effect. A looped bow involves creating several small loops with individual pieces of ribbon and then layering them on top of each other, securing them with floral wire.
Experiment with different styles of ribbon bows to create an eye-catching floral arrangement.
VIII. Easy Ribbon Bow Crafts for Kids
Creating ribbon bow crafts is a fun and easy activity for children. The materials needed include ribbon, scissors, and glue.
To make an easy ribbon bow, cut a piece of ribbon to the desired length. Then, create two loops on either side of the ribbon and secure them together in the center using glue. To create a more festive effect, add some glitter or other decorations.
Encourage children to experiment with making different shapes and colors of ribbon bows, and provide different items they can attach the ribbon bows to, such as hair clips or headbands.
IX. Conclusion
Now that you have learned how to make different types of ribbon bows, the possibilities are endless. Whether for gift wrapping, floral arrangements, or simple accessorizing, ribbon bows add an extra touch of elegance and style. Don’t be afraid to experiment with different colors, textures, and shapes of ribbon for a unique touch. If you want to learn more, there are many resources online for further learning.