I. Introduction: Explaining the Purpose and Audience of the Article
Building a bottle rocket is a fun and exciting activity for makers of all ages. In this article, we will explore the process of making a bottle rocket, from simple designs for beginners to advanced techniques for experienced makers. We will also discuss the science behind how a bottle rocket works, and provide tips for troubleshooting common problems. This article is intended for anyone interested in DIY projects and rocketry, regardless of skill level.
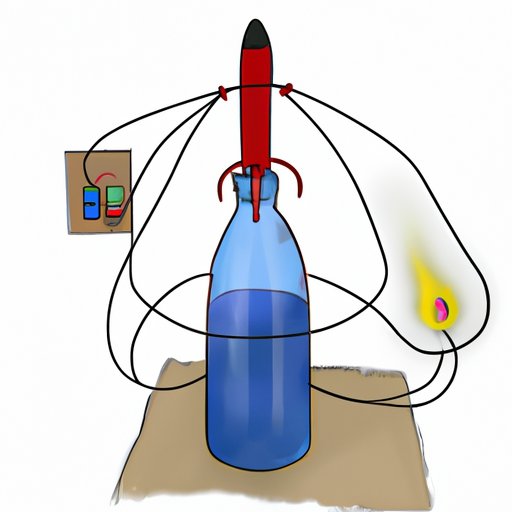
II. Beginner’s Guide to Making a Bottle Rocket: A Step-by-Step Tutorial
The first step in making a bottle rocket is to gather the necessary materials:
- A plastic soda bottle
- A cork that fits snugly in the bottle opening
- A bicycle pump or air compressor
- A launch pad or stand to hold the rocket
- A waterproof adhesive (such as epoxy or hot glue)
- A pair of scissors
- Craft paper or other lightweight materials for fins and decoration (optional)
Once you have gathered your materials, follow these step-by-step instructions to build your own bottle rocket:
- Remove the label from the soda bottle and cut off the bottom with scissors. This will serve as the nosecone of your rocket.
- Cut three or four fins out of craft paper or other lightweight materials. The fins should be roughly the same size and shape, and should be attached to the bottom of the bottle with waterproof adhesive.
- Attach the cork to the top of the bottle with adhesive, making sure it fits snugly.
- Decorate your bottle rocket as desired with paint, stickers, or other materials.
- Attach a bicycle pump or air compressor to the cork, and pump air into the bottle until it is pressurized.
- Place your rocket on a launch pad or stand and aim it vertically upwards. Finally, press the release button and watch your rocket soar!
III. Innovative Bottle Rocket Designs: Tips and Tricks for Better Flight Performance
If you are looking for ways to improve the flight performance of your bottle rocket, there are several innovative designs to consider. These include:
- The classic soda straw rocket, which uses a straw as the launch tube for added stability
- The parachute rocket, which uses a small parachute to slow the descent of the rocket after launch
- The glider rocket, which uses a winged design to allow the rocket to glide through the air
In addition to these designs, there are several tips and tricks you can try to improve the performance of your bottle rocket. These include:
- Adding weight to the rocket to improve stability and prevent it from spinning or tumbling in flight
- Adjusting the placement and size of the fins for optimal aerodynamics
- Using different types of fuel or propellant to increase the thrust and speed of the rocket
IV. Making Your Own Launch System: The Right Way to Launch a Bottle Rocket
Launching a bottle rocket can be just as fun and rewarding as building one. There are several different options for launching your rocket, including:
- A commercial launch system or stand, which can be purchased online or at hobby stores
- A homemade launch system, which can be built using PVC pipe, wood, or other materials
- A handheld launch tube, which requires a second person to hold the rocket for launch
For those interested in making their own launch system, here are some step-by-step instructions to follow:
- Choose your launch tube material (PVC pipe is a popular choice) and cut it to the desired length.
- Create a base for the launch tube using wood or another sturdy material.
- Attach the launch tube to the base, making sure it is secure and at a vertical angle.
- Attach a bicycle pump or air compressor to the base, allowing for easy pressurization of the rocket.
V. Science behind Bottle Rockets: Understanding the Physics of How They Work
At its core, the science behind a bottle rocket is based on the principles of Newton’s third law of motion: for every action, there is an equal and opposite reaction. In a bottle rocket, pressurized air or gas is released from the rocket and expels out of the bottom, creating a thrust force in the opposite direction. This thrust force propels the rocket upwards and into the air.
Other laws of physics that come into play during a bottle rocket launch include:
- Newton’s first law of motion, which states that an object at rest will remain at rest unless acted upon by an external force. In a bottle rocket, the cork serves as the external force that releases the pressurized air or gas and allows the rocket to launch.
- The law of conservation of momentum, which states that the total momentum of a system remains constant unless acted upon by an external force. During a bottle rocket launch, the momentum of the expelled air or gas propels the rocket upwards and maintains its trajectory until it reaches its peak altitude.
VI. DIY Rocket Fuel: Simple Recipes for Safe and Effective Propellants
While commercial rocket fuels and propellants should only be used by experienced rocket makers, there are several safe and effective ingredients that can be used to make your own DIY rocket fuel. These include:
- Potassium nitrate (found in fertilizer and stump remover)
- Sugar
- Baking soda
Here is a simple recipe for making your own rocket fuel:
- Mix together 60% potassium nitrate, 30% sugar, and 10% baking soda in a metal pot.
- Heat the mixture over low heat until it turns into a molten liquid.
- Pour the mixture into a mold or container and allow it to cool and harden.
- Place a small amount of the rocket fuel in the bottom of your soda bottle rocket and pressurize as usual.
VII. How to Build a High-Powered Bottle Rocket: Advanced Techniques for Experienced Makers
For advanced makers looking to build a high-powered bottle rocket, there are several techniques to consider. These include:
- Using multiple bottles or rocket tubes to increase the amount of fuel and pressurization that can be used
- Increasing the size and strength of the fins to improve stability and control
- Using alternative fuel sources, such as compressed air or solid fuel pellets, to increase the thrust and speed of the rocket
It is important to note that building high-powered rockets can be dangerous and should only be attempted by experienced rocket makers with proper safety equipment and training.
VIII. Troubleshooting Your Bottle Rocket: Common Problems and How to Fix Them
While building and launching bottle rockets can be a lot of fun, there are some common problems that may arise during the process. Here are some solutions to troubleshoot the most common issues:
- If the rocket does not launch or only goes a short distance, it may not be pressurized enough. Check to make sure the cork is secure and the bicycle pump or air compressor is functioning properly.
- If the rocket spins or tumbles during flight, it may not be weighted or balanced properly. Try adjusting the weight distribution or adding more fins for stability.
- If the rocket explodes or bursts during flight, it may be over-pressurized or using too much fuel. Reduce the amount of fuel or air pressure used and try again.
IX. Conclusion: Summarizing the key takeaways from the article and encouraging readers to experiment with building their own bottle rockets.
Building and launching bottle rockets is a fun and rewarding activity for makers of all skill levels. With the right materials, design, and technique, you can create a rocket that will soar into the sky and inspire your creativity and curiosity. Whether you are a beginner or an experienced maker, there are always new tips and tricks to learn, and problems to solve.