Introduction
Laying pavers can be a daunting task for many homeowners, but with the right approach, it can also be a rewarding DIY project that beautifies your outdoor space. In this article, we’ll guide you through the process of laying pavers step-by-step, with helpful advice and tips to ensure that your project is a success. Whether you’re an experienced DIYer or a beginner looking to tackle their first hardscaping project, you’ve come to the right place!
Step-by-Step Guide: How to Lay Pavers in Your Backyard
The first step in laying pavers is to gather all the necessary tools and materials. You’ll need pavers, sand, gravel, landscape fabric, a shovel, a wheelbarrow, a level, a mallet, and a broom. Once you have everything you need, it’s time to start the process. Here are the basic steps:
- Mark off the area where you want to lay the pavers.
- Remove any grass or plants from the area.
- Dig down to a depth of at least 6 inches and level the ground.
- Add a layer of gravel to the base and compact it firmly using a mallet.
- Add a layer of sand on top of the gravel and level it out.
- Add landscape fabric to prevent weeds from growing up between the pavers.
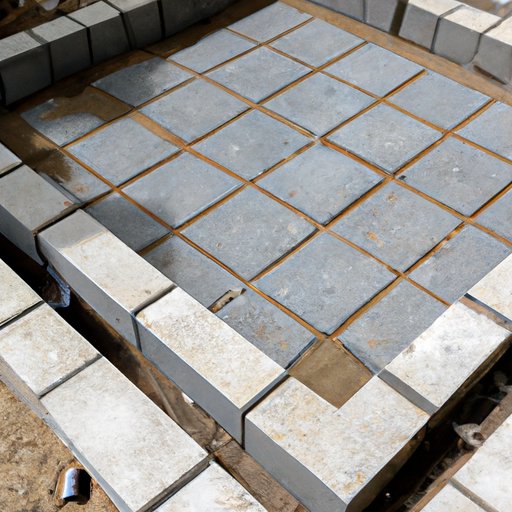
- Lay the pavers in the desired pattern, starting at one corner and working outward. Use a level to ensure that each paver is level and secure them in place with sand or gravel as needed.
- Add more sand or gravel to fill in any gaps between the pavers.
- Sweep the area clean and water the pavers to settle them in place.
- Seal the pavers to protect them from weather damage and erosion.
Remember to take your time and check your work as you go along. It’s better to make adjustments and corrections as you move forward, rather than trying to fix mistakes after the fact.
DIY Project: Laying Pavers Made Easy
Many homeowners shy away from DIY hardscaping projects like laying pavers because they think it’s too difficult or time-consuming. However, taking a DIY approach can save you money and provide a sense of accomplishment. Here are some tips for those who are new to paver installation:
- Start small: Choose a small area to pave for your first project, so you don’t feel overwhelmed.
- Get organized: Make a list of all the tools and materials you’ll need before you start, and have them all on hand to avoid mid-project runs to the hardware store.
- Take your time: Rushing through the process can lead to mistakes. Work methodically and check your work frequently.
If you do run into any issues during the installation process, don’t panic. There are many resources available online or at your local home improvement store that can help you troubleshoot common problems.
Master the Art of Laying Pavers with These Expert Tips
While the basic steps of laying pavers are relatively simple, there are many tricks and techniques that can help you achieve a more professional-looking result. We spoke with a professional hardscaping expert to get their top tips:
- Use proper drainage: Make sure your paver installation allows for proper drainage, or you’ll experience issues with standing water.
- Mix and match: Don’t be afraid to mix and match different styles of pavers to create a unique design.
- Think vertical: Incorporate raised garden beds or retaining walls made from pavers to add visual interest to your space.
By incorporating these tips into your paver installation project, you can create a truly stunning outdoor space that will impress your friends and neighbors.
5 Common Mistakes to Avoid When Laying Pavers
While the process of laying pavers is relatively straightforward, there are a few common mistakes that can lead to poor results. Here are some of the most common mistakes to avoid:
- Skipping the base preparation: Failing to properly prepare the area before laying the pavers can lead to shifting or sinking over time.
- Not using enough sand or gravel: Without enough material to secure them in place, your pavers will shift and move over time.
- Ignoring drainage issues: Improper drainage can lead to standing water and damage to your pavers.
- Not sealing the pavers: Without sealing, your pavers will be vulnerable to weather damage and erosion.
- Not taking your time: Patience is key when it comes to laying pavers. Rushing through the process can lead to costly mistakes.
If you’ve already made one of these mistakes, don’t worry – most issues can be corrected with some additional work. However, it’s best to avoid making these mistakes in the first place by taking your time and following best practices for paver installation.
Beautify Your Outdoor Space with These Creative Paver Design Ideas
Pavers come in a variety of colors, shapes, and sizes, making it easy to create a unique design that fits your outdoor space and personal style. Here are some creative design ideas to get you inspired:
- Use different paver colors to create a geometric pattern, like a checkerboard or herringbone.
- Create a pathway using irregularly shaped pavers to create a natural-looking design.
- Add visual interest by incorporating circular or curved shapes into your paver design.
Remember that your paver design should be customized to fit your space and individual preferences. Don’t be afraid to experiment with different styles and ideas until you find the perfect look for your outdoor oasis.
The Ultimate Paver Installation Checklist: Everything You Need to Know
To help you stay organized and ensure a successful paver installation project, we’ve put together a comprehensive checklist:
- Safety gear (gloves, safety glasses)
- Pavers
- Sand
- Gravel
- Landscape fabric
- Shovel
- Wheelbarrow
- Level
- Mallet
- Broom
- Sealer
By checking off each item on this list before you begin your project, you can be sure that you have everything you need for a successful installation. You may also want to print this list out and bring it with you to the hardware store to ensure that you don’t forget anything.
Conclusion
Congratulations – you’re now equipped with all the knowledge and tools you need to lay pavers in your backyard like a pro. With the tips and techniques outlined in this article, you can avoid common mistakes, troubleshoot issues that arise, and create a beautiful outdoor space that you can enjoy for years to come.