Knitting 101: A Beginner’s Guide to Knitting Stitches and Techniques
Knitting can be a relaxing and creative hobby that is enjoyable for people of all ages. It is a craft that allows you to create anything from cozy blankets to fashionable scarves and hats. This guide is designed for aspiring knitters who are eager to learn the basics of knitting stitches and techniques.
Getting Started
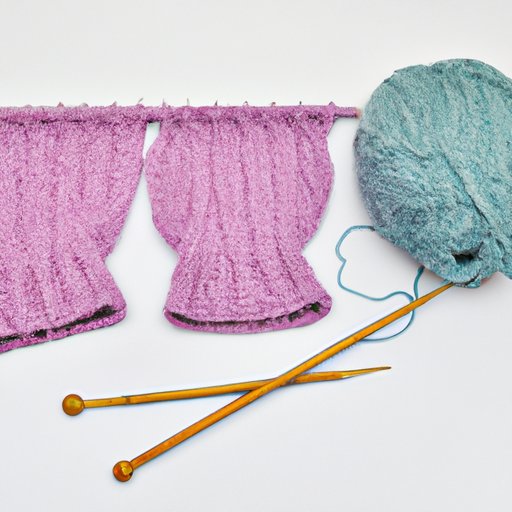
The first step in knitting is to gather your supplies. To get started you will need needles, yarn, and a pair of scissors. Knitting needles are available in different materials such as wood, metal or plastic. Choose a lighter material and a size that feels comfortable in your hands. They come in different lengths, but for a beginner, it is recommended to use shorter ones as they are more manageable.
Now that you have your needles, you need to choose the right yarn. Again, this will depend on your personal preference, but for beginners, it is best to use a light-colored worsted weight yarn. A thicker yarn can be hard to handle and see the stitches, while a lighter yarn may be too thin. When choosing colors, consider ones that will be easy to see so you can keep track of your stitches.
Once you have your needles and yarn ready, you can start practicing the knit stitch, which is the foundation of knitting.
The Knit Stitch
The knit stitch is the first stitch you will learn in knitting. This stitch creates a V-shape and is usually the base for most patterns. To knit, hold the needle with the stitches in your left hand and the empty needle in your right hand. Make a slipknot and place it on your left-hand needle. With your right-hand needle, insert it into the first stitch on the left-hand needle as if you were going to knit it. With your yarn behind the needles, wrap the yarn around the right-hand needle from the back to the front using your right hand and slide the right-hand needle through the stitch, pulling the yarn through it. Slip the stitch that just got knitted from the left-hand needle to the right-hand needle. That’s it; you just made a knit stitch!
The Purl Stitch
Another fundamental stitch you need to learn is the purl stitch. Different from the knit stitch, the purl stitch creates horizontal lines instead of V-shaped stitches. To execute a purl, hold your needle with the stitches in your left-hand, and the empty needle in your right hand. Insert the right-hand needle into the first stitch from the front to the back, keeping the yarn in front of the needles. Wrap the yarn around the right-hand needle from the front to the back. Slide the right-hand needle through the stitch and then slip the stitch that you are working on from the left-hand needle to the right-hand needle. Congratulations, you made a purl!
Casting On and Binding Off
Cast on is a technique that refers to how you add stitches to your needles in preparation for knitting. Binding off is how you end your knitting project or when you finish part of it. Both techniques are essential for any beginner to learn.
To cast on your initial stitches, you will need to make a slip knot around your first needle. Pass the second needle behind the first, then up from underneath the slipknot, then down over the top of the slip knot, pulling the loop that will form the first stitch onto the second needle. Repeat until you have your desired number of stitches.
When it comes to binding off, it is easy. After you have finished the final row of stitches, cut the yarn from the ball leaving around six inches. Thread the six inches of yarn through the loop of the last stitch tightly then pull the yarn through the loop. Cut the excess yarn left.
Tips and Tricks for Knitting Beginners
Before taking a step into practicing these stitches, here are some tips that will help any beginner:
- Create a comfortable setting. Find a space in your home for knitting that is cozy and quiet, which will help you relax and focus. It’s also essential to have good lighting.
- Use needles correctly. It’s important to hold your needles correctly while knitting. The correct gauge is also important to keep in mind when selecting needles and yarns so that your project will turn out the right size.
- Practice, practice, practice. Your knitting skills will improve with practice. The more you knit, the more comfortable and confident you’ll become.
- Determine a budget. It’s essential to determine how much you want to invest in knitting. While it’s not an expensive hobby, luxurious materials can add up quickly.
Start Simple: Easy Knitting Patterns for Beginners
Now that you know the basics of knitting, it is time to apply your skills to your first project. Below are three simple knitting patterns that are perfect for beginners. Each pattern is easy to follow and will help you advance your knitting techniques.
Scarf Pattern
For a beginner scarf, choose a simple stitch like a garter stitch. To make a scarf, cast on 30 stitches using size eight needles and knit every row until the scarf is about five feet long. Bind off and sew in any loose ends. Choose a soft, chunky yarn to make the project comfy and cozy.
Coasters Pattern
For a quick project, you can try making coasters. Cast on 10 stitches using size eight needles. Continue knitting every row until the coaster measures about 4-5 inches. Bind off and sew in any loose ends. Pick up colorful cotton yarn that will make the coasters look gorgeous on your dining table.
Hat Pattern
To make a simple hat, cast on 64 stitches using size eight needles. Knit every row until the hat measures about seven inches. Then, start decreasing each row by knitting together two stitches until you’re left with eight. Draw the yarn through the remaining stitches and then sew in any loose ends. Choose a chunky wool blend for a warm and cozy hat.
Tools of the Trade
As a beginner, the essential tools you’ll need to start knitting include needles, yarn, scissors, and measuring tape. When choosing your equipment, make sure to have the right size of needles, with the right yarn for your project. While certain materials can be more comfortable to work with, feel free to experiment to determine what works best for you personally.
When selecting your needles, keep in mind that different types of needles can lead to different tension, which refers to how tightly your stitches are spaced apart horizontally. Bamboo needles are great for tight knitters while plastic needles are fantastic for faster knitters. Steel needles are great for precise knitting while wooden needles are perfect for beginners as they are easier to handle.
Troubleshooting Common Knitting Mistakes
One of the challenges of learning knitting is that mistakes are inevitable. Don’t let this stop you from exploring the world of knitting, though! There are easy ways to fix common knitting mistakes like dropped stitches, twisted stitches, and uneven rows. Don’t panic if you make a mistake, it can easily be fixed.
If you drop a stitch, insert your left-hand needle into the stitch just below where the dropped stitch occurred, then insert the right-hand needle through the loop on the next stitch above the dropped stitch and catch the dropped stitch. Place the loop on the left-hand needle, and you’re good to go.
Explore the World of Knitting: Learn Tips from the Pros!
Learning from other experienced knitters in the community can be the best way to improve your knitting skills. They can offer useful tips, advice, and even inspiration for your next knitting project.
One experienced knitter suggests using a color-coding system to keep track of where you are in a pattern. Assign each color to a different part of the pattern so you can easily tell where you left off, and what needs to be done next. Using this method, you can avoid any confusion while creating beautiful works of art.
Conclusion
Knitting can be a fulfilling and rewarding hobby with many benefits. With this guide, we hope you have learned the necessary knitting techniques and stitches to get started with your first project. Remember, be patient, and don’t hesitate to ask help from the people around you or an online community.