I. Introduction
If you’re looking to pick up a new hobby, knitting is a great place to start. Not only is it a soothing and meditative pastime, but it’s also a useful skill that allows you to create beautiful, handmade items. One of the best projects for beginners is knitting a scarf. In this article, we’ll guide you through the steps to knit a cozy scarf, offer tips for choosing the perfect yarn, and provide inspiration for adding texture and color to your project.
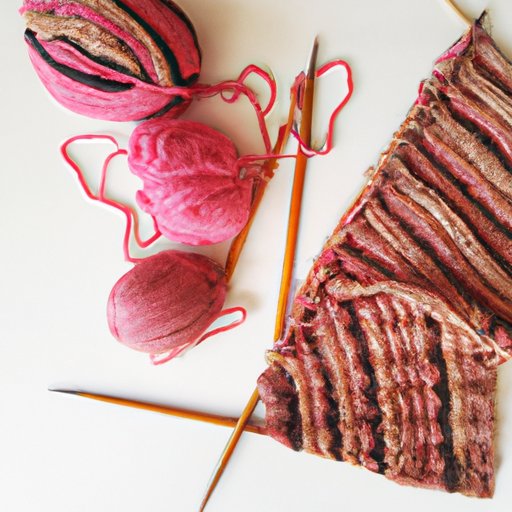
II. Step-by-Step Guide to Knitting a Cozy Scarf for Beginners
The first step in knitting a scarf is to cast on, which is essentially creating the first row of stitches on your needle. From there, you will knit each row until your scarf is the desired length. Finally, you’ll bind off, which means finishing and securing your stitches. Don’t worry if this all seems overwhelming – let’s break it down.
To cast on, you’ll need to create a slipknot and place it on one of your needles. Then, using your other needle, you’ll create the first row of stitches. For a scarf, you’ll likely want to use the basic knit stitch for each row. Once you’ve reached your desired length, it’s time to bind off. This involves knitting a few stitches, then passing the first stitch over the second stitch and off the needle. Repeat this until you’ve reached the end of your row.
Remember, as a beginner, it’s important to practice your tension and be patient with yourself as you learn to develop the basic techniques. You’ll soon see how everything comes together into a beautiful scarf!
III. The Ultimate Knitting Pattern to Make a Chunky Scarf under an Hour
If you’re looking for a quick and easy knitting project, a chunky scarf is a great option. To create this type of scarf, you’ll need to use heavier weight yarn and larger needles. Here’s our recommended pattern:
Materials:
- 2 skeins of super bulky weight yarn
- US scarf-sized needles (size 15)
Pattern:
- Cast on 15 stitches.
- Knit each row until you reach the end of your yarn.
- Bind off and weave in ends.
With this pattern, you can create a cozy, chunky scarf in just under an hour. It’s perfect for a last-minute gift or for those who are just starting out with knitting.
IV. How to Choose the Perfect Yarn for Your Knit Scarf Project
There are hundreds of different types of yarn available, each with its own unique characteristics. When choosing yarn for a scarf, you’ll want to consider factors such as color, texture, and weight.
Some of the most popular types of yarn for scarves include:
- Merino wool: Soft and warm, merino wool is a popular choice for cozy scarves.
- Alpaca: Alpaca yarn is incredibly soft and has a luxurious feel.
- Cotton: Breathable and lightweight, cotton is a great option for warmer weather scarves.
- Acrylic: Acrylic yarn is affordable and easy to care for, making it a good choice for beginners.
When selecting a yarn, be sure to also consider the yarn weight. The weight refers to how thick or thin the yarn is, and will affect the overall look and feel of your scarf. A scarf made with a bulky weight yarn will be thick and warm, while a scarf made with a lightweight yarn will be more delicate.
Finally, don’t be afraid to select a Yarn with different textures and colours.
V. 10 Unique Ways to Add Texture to Your Homemade Scarf
Once you’ve mastered the basic techniques of knitting, you can start to experiment with different textures. Here are ten techniques to try:
- Cables: Knit patterns that create twisted, rope-like cables.
- Lace: Knit patterns that create delicate, lacy designs.
- Ribbing: Create a raised pattern by alternating knit and purl stitches.
- Moss stitch: A textured pattern created by alternating knit and purl stitches.
- Seed stitch: Similar to moss stitch, seed stitch is created by alternating knit and purl stitches, but in a different pattern.
- Garter stitch: A basic stitch pattern that creates a thick, squishy scarf.
- Stockinette stitch: A basic stitch pattern that creates a smooth, flat surface.
- Slip stitch: A simple pattern that creates a raised surface by slipping stitches instead of knitting them.
- Cluster stitch: A textured pattern created by knitting multiple stitches together.
- Eyelets: Create holes in your scarf by knitting yarn overs.
Combining different textures can create a visually interesting scarf
VI. Expert Tips for Fixing Common Knitting Mistakes when Making a Scarf
As with any new skill, mistakes and errors may occur when knitting. Here are some tips for fixing common knitting mistakes when making a scarf:
- Dropped stitches: Use a crochet hook or extra needle to pick up the dropped stitch and return it to your needle.
- Wrong stitch: You can “tink” (knitting backwards) to undo a few stitches until you reach the mistake, and then redo them the right way.
- Uneven tension: Make sure to keep your tension consistent throughout the project. If you notice uneven stitches, try again with more or less tension.
- Hole in your fabric: Use a needle to pull the surrounding stitches closer to the hole and then work additional stitches around the area to close the hole.
Remember, everyone makes mistakes, and fixing them is an essential part of learning and improving
VII. Knit a Scarf with a Pop of Color – Ideas and Inspiration
Adding color to your scarf can make it truly unique. Here are some ideas for incorporating color into your homemade scarf:
- Stripes: Alternate different colors for a classic, timeless look.
- Gradient: Use yarns that gradually shade from one color to the next for a bold, modern look.
- Multicolored yarn: Use yarns that have multiple colors included in the same strand or skein.
- Fair Isle: Create patterns using multiple colors to add contrast and interest to your scarf.
- Colour blocking.
Be sure to choose colors that complement each other and create a cohesive look.
VIII. Making a Sustainable Scarf by Recycling Old Yarn from Unused Projects
When you recycle old yarn (the process is called “frogging”), you not only save money but also reduce waste. Here are some tips for recycling old yarn:
- Begin by unraveling the stitches, taking the yarn off the needles and wrapping it into skeins.
- Wash and dry your unravelled yarn, this will also remove any kinks in the yarn.
- Rewind the yarn into balls if necessary and store them.
You can then use recycled yarn to start a new project such as to knit a scarf, to make a hat or to knit hand warmers.
IX. Conclusion
Knitting a scarf is a great way to learn to knit while also creating a beautiful and functional accessory. With our step-by-step guide, pattern recommendations, yarn selection tips, and ideas for adding texture and color, you’ll be able to make a scarf that’s uniquely yours. We hope you’ll find joy and relaxation in this new hobby, and that you’ll continue to explore all the possibilities of knitting.
Remember to always keep practicing, and don’t be afraid to ask for help – there are lots of online communities and instructional videos to help you along the way.