I. Introduction
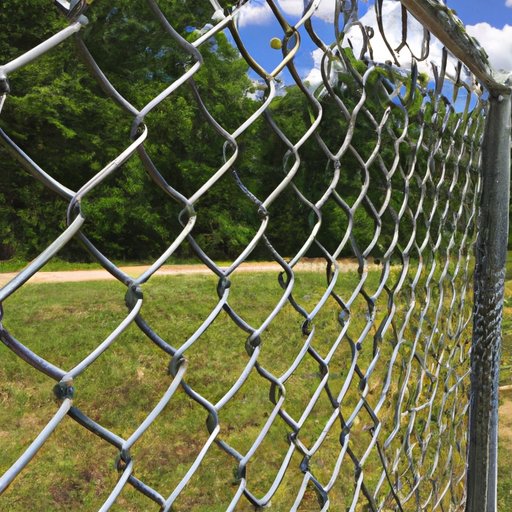
If you’re planning to install a fence around your yard, a chain link fence is a popular and practical option.
Not only is it durable and long-lasting, but it’s also cost-effective and easy to install. With some basic tools and materials, you can install your own chain link fence with plenty of satisfying results to show off.
This comprehensive guide is designed to help DIY beginners tackle their own chain link fence installation with ease. You’ll also learn tips, tricks, and techniques for success, and discover the potential challenges you may face.
II. Outlining Tools and Materials
Before you begin, it’s important to gather all the necessary tools and materials for your installation. Here’s a list of what you’ll need:
- Chain link fence material (including posts, rails, and chain link fabric)
- Tension bands
- Loop caps
- Gate and latch hardware
- Concrete
- Gravel/crushed stone
- Tools: pliers, wire cutters, post-hole digger, level, hammer, measuring tape, string, shovel, wheelbarrow
- Safety gear: gloves, safety glasses, ear protection
It’s important to have all the tools and materials on hand before you start, to reduce the likelihood of any delays or mishaps during the installation process.
III. Step-by-Step Guide
Now that you have your tools and materials, it’s time to start the installation process:
A. Preparation
Start by measuring and marking out the area where you want to install your fence. Then, dig the post holes to the appropriate depth and diameter specified for your fence. Mix the concrete in accordance with the manufacturer’s instructions and fill in the post holes with the concrete, making sure each post is level and plumb. Let the concrete set for at least 24 hours before moving forward.
B. Installing the Chain Link Fabric
Once the concrete has set, it’s time to attach the chain link fabric to the posts with tension bands. Start at one end and unroll the chain link fabric along the length of the fence line, making sure it’s taut. Securely attach the tension bands to the post at regular intervals, using pliers to tighten as needed. Once the chain link fabric is securely attached to one side of the fence, roll it out along the rest of the fence line, repeating the procedure until it is completely attached to all the posts.
C. Installing the Rails
Next, roll out the rails along the length of the fence, securing them to the posts with loop caps. Make sure the rails are evenly spaced and level, using a measuring tape and level to ensure accuracy.
D. Installing the Gate and Latch Hardware
Finally, it’s time to install the gate and latch hardware. Start by attaching the gate hardware to the post where the gate will be located, using screws or bolts as needed. Then, attach the gate to the hardware. Finally, install the latch hardware on the gate and post, making sure it’s secure and easy to use.
Tips and Tricks for Each Step
While each step might seem straightforward, there are a few tips and tricks you should keep in mind for a successful outcome.
- When measuring and marking out the fence area, be sure to add a few extra inches on each side to account for variable terrain and slope.
- When digging the post holes, make sure they’re deep enough to reach the recommended depth for your area. A good rule of thumb is to dig a hole that’s about 1/3 the length of the post above ground.
- When attaching the chain link fabric to the posts, use pliers to tighten the tension bands as much as possible, to prevent the fabric from sagging over time.
- When attaching the rails and loop caps, make sure they’re level and straight to ensure the fence looks uniform and professional.
- When installing the gate and latch hardware, follow the manufacturer’s instructions carefully, and double-check the alignment of the gate before attaching the latch.
Following these tips and tricks should ensure a clean, professional-looking installation.
IV. Video Tutorial
If you’re more of a visual learner, or you want additional support, you can watch a video tutorial on chain link fence installation. Video tutorials can be helpful for getting a better sense of the installation process and for seeing different techniques and tips in action.
Many video tutorials also include additional information, such as how to properly use tools and equipment or how to troubleshoot common problems. Some websites that showcase video tutorials include YouTube, Vimeo, and Howcast.
While video tutorials can be incredibly helpful, it’s important to remember that they’re not a substitute for careful preparation and reading the manufacturer’s instructions. Make sure to research the specific model and brand you’re using, and follow all safety precautions.
V. Comparing Fencing Options
Chain link fence isn’t the only fencing option available; several other popular alternatives include wood, vinyl, and wrought iron. Before committing to a chain link fence, it’s a good idea to compare your options to make sure you’re getting the best fence for your needs.
So, how does the chain link fence compare to other fencing options?
- Cost: Arguably, the biggest advantage of chain link fencing is that it is a cost-effective option compared to other fencing options. While it may not have the curb appeal of a wood or wrought iron fence, it is generally significantly cheaper to install. The savings over other fencing options can be considerable, especially if your property has a large perimeter.
- Durability: Chain link fences can last for decades, making them a long-term investment. They are also stronger and more resistant to the elements, such as wind and rain, compared to wood fences. Vinyl and wrought iron are also durable options, with vinyl providing greater weather resistance and wrought iron offering better protection against wild animals or intruders.
- Maintenance: Chain link fences require minimal maintenance compared to wood and wrought iron. They don’t require painting or staining like wood, and they are resistant to rust and corrosion. Vinyl fences require no maintenance, while wrought iron fences need to be repainted periodically to prevent rust.
- Appearance: While appearance is subjective, many homeowners prefer the natural look of a wood fence over the utilitarian look of a chain link fence. Wrought iron is also a popular option for its ornate appearance. Vinyl fencing is available in a variety of colors and styles, which can complement the aesthetic of your home.
While chain link fencing may not be the most glamorous option, it is still a popular choice for many homeowners who prioritize cost-effectiveness and durability over looks.
VI. Tips for Success
Now that you’re ready to install your own chain link fence, here are some essential tips for success:
- Be patient: Installing a fence is a time-consuming process, especially if you’re a DIY beginner. Give yourself plenty of time to complete the project and don’t rush the process. Taking your time will ensure a successful outcome.
- Stay safe: As with any DIY project, safety should be a top priority. Be sure to wear proper safety gear and follow all manufacturer’s instructions.
- Read the instructions: Make sure to read the instructions that come with your fence material and hardware, and follow them carefully. If you’re unsure about any step, don’t hesitate to reach out to customer support or an expert for advice.
- Ask for help: Don’t be afraid to ask for help when you need it. Installing a fence is often a two-person job, especially when it comes to handling large fence panels or digging post holes.
By following these essential tips, you can ensure a successful and stress-free installation experience.
VII. Potential Challenges
Like any DIY project, chain link fence installation can pose challenges. Here are some common challenges you may encounter when installing a chain link fence:
- Uneven ground: If the area where you’re installing the fence has uneven ground, it can be a challenge to get the posts level. To overcome this, you can purchase special brackets that allow you to adjust the height of the fence. Alternatively, you can dig deeper post holes on the lower end to keep the fence level.
- Obstacles: If there are trees, rocks, or other obstacles in the way of your fence, it can be a challenge to get around them. You may need to cut down trees or blast through rocks to make way for the fence, which can add time and expense to the project.
- Neighbor issues: If your fence borders a neighbor’s property, it’s important to communicate with them beforehand. You may need their permission to install the fence or to coordinate with them to ensure the fence is located properly on the property line.
If you encounter any challenges during your installation, don’t panic. There are always solutions and experts available to help you overcome them.
VIII. Conclusion
Installing a chain link fence can be a worthwhile DIY project that can save you money and provide a satisfying sense of accomplishment. With the right tools, materials, and preparation, a chain link fence can be a durable and long-lasting option for your home.
Remember to follow the manufacturer’s instructions carefully, use proper safety precautions, and be patient and persistent throughout the installation process. If you use these tips and tricks, you’re sure to achieve a successful outcome.
So, go ahead and try your hand at installing your own chain link fence.