Introduction
Prehung doors are an easy and convenient way to upgrade your home’s interior. They come pre-assembled in a frame, making installation simpler and faster. However, proper installation is crucial to ensure the door functions correctly and lasts for years to come. In this article, we’ll cover all the steps and tips you need to know to properly install a prehung door.
Pre-installation preparation guide
Before you begin installing your prehung door, there are a few important preparation steps to follow.
Measuring the opening
To ensure your prehung door fits properly, you’ll need to measure the opening first. Here’s what you’ll need:
- Tape measure
- Level
- Pencil
- Safety goggles
Use your tape measure to measure the width and height of the opening at three different points: top, middle, and bottom. Take the smallest of these measurements and subtract 1/4-inch from the width and 1/2-inch from the height to get your door’s exact size.
Removing old hardware
Before you install your new prehung door, you’ll need to remove the old door and hardware first. Here are the tools you’ll need:
- Hammer
- Screwdriver
- Pry bar
Use the pry bar to remove the trim around the door frame. Then, use the screwdriver to remove the hinges and latch from the old door. Finally, use the hammer to remove the hinge pins.
Inspecting the frame
Now is the time to inspect the frame to ensure there is no damage or rot. If there are any issues, repair them before proceeding with installation.
Step-by-step instructional guide
Now that you’re prepared, let’s move on to the step-by-step instructions for installing your prehung door.
Creating a level opening
First, you’ll need to make sure the opening is level. Here’s what you’ll need:
- Shims
- Level
Use the level to ensure the opening is level both vertically and horizontally. If it’s not, use shims to adjust it. Make sure the shims are placed every 10-12 inches and are not too tight, as this can cause the frame to bow.
Fitting the door into the frame
Next, fit the door into the frame. Here’s what you’ll need:
- Painters tape
Use the painters tape to temporarily secure the door in place. Then, check to make sure there are no gaps between the door and the frame.
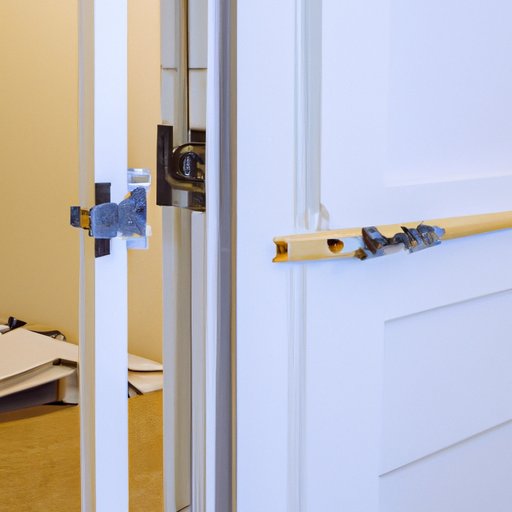
Securing the door in place
Once you’ve checked for gaps, it’s time to secure the door in place. Here’s what you’ll need:
- Screwdriver
Begin by securing the top hinge, then the middle, and finally the bottom hinge. Make sure the hinges are flush with the door frame and that the screws are tightened securely. Finally, attach the latch to the door frame, making sure it’s flush and secure.
Simple and quick tips guide
These additional tips can help make your prehung door installation more successful.
Using shims
When using shims, make sure they’re not too tight or too loose. You want them to provide support without causing the frame to bow.
Checking the door’s swing
Check the door’s swing by opening and closing it. If it’s not swinging correctly, adjust the hinges until it does.
Proper weatherstripping
Make sure your door is properly weatherstripped to prevent drafts and energy loss. Check the seal around the entire door, including the bottom and sides.
Specific door type guide
Different types of prehung doors may require additional steps. Here are some tips for double-door and storm door installations.
Double-door prehung doors
To install double prehung doors, install one door first and secure the hinges. Then, install the second door by checking the spacing between the two doors and securing the hinges.
Storm doors
To install a storm door, refer to the manufacturer’s instructions for any additional steps. Typically, you’ll need to attach the door hardware and hang the door in place before securing the frame.
Video tutorial with written guide
Watching a video tutorial can be extremely helpful when it comes to installing a prehung door. Here’s what you need to know.
Explanation of the importance of a video tutorial
A video tutorial can show you exactly how each step of the installation process should be done. This can help you avoid mistakes and ensure a successful installation.
Links to the video tutorial
Here’s a great video tutorial to get you started: https://www.youtube.com/watch?v=AnwrC9XnphY
Supplemental written guide for additional details and clarification
Don’t forget to refer back to this written guide for additional details and clarification on each step of the installation process.
Common mistakes and how to avoid them guide
Even with the best preparation and instructions, mistakes can still happen during prehung door installation. Here’s how to avoid some common ones.
Checking the door’s levelness
Make sure the opening is level before installing the door. If you skip this step, the door can become misaligned, making it difficult to open and close.
Properly securing the hinges
If the hinges are not installed flush with the door frame, it can cause the door to hang unevenly and open or close improperly.
Properly weatherstripping the door
Not properly weatherstripping the door can cause drafts, energy loss, and even moisture damage. Make sure the entire door is sealed tightly.
Conclusion
In conclusion, properly installing a prehung door takes a little preparation and attention to detail, but the results are worth it. Remember to measure the opening, inspect the frame, ensure the door is level, and double-check each step along the way. With these tips and the proper tools, you can install your new prehung door with confidence.
Always remember that proper installation is essential for a well-functioning door. Following these guidelines and tips can help you avoid common mistakes and ensure a successful installation.