I. Introduction
If you’re looking to make your kitchen a cleaner and more efficient place, installing a garbage disposal is an excellent option. A garbage disposal machine helps in food waste management, and you no longer have to dump all the food scraps on the bin – which can result in unpleasant smells inside and outside your home. Instead, you can get an environmentally friendly solution by learning how to install a garbage disposal. This article is a step-by-step guide on how to install a garbage disposal for the DIY enthusiast who wants to save money.
B. Importance of Knowing How to Install a Garbage Disposal
Knowing how to install a garbage disposal will save you money by harnessing your DIY skills instead of hiring a professional plumber. Additionally, you get a chance to manage your kitchen waste and keep your sink clean. You can compost waste or grind it up into small, manageable pieces that are less likely to block your pipes.
II. Step-by-Step Instructions
A. Preparing for Installation
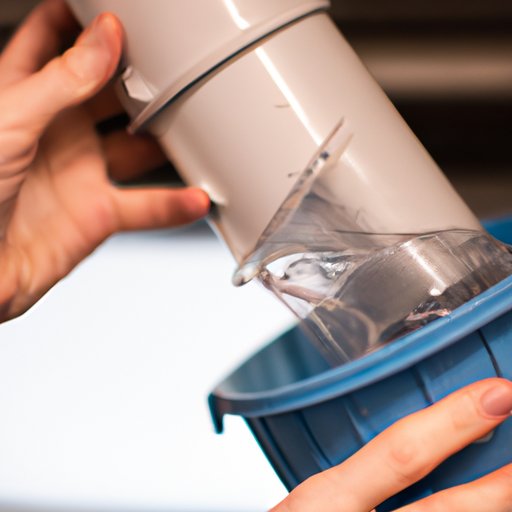
Step one is to make sure you have all the tools and materials required. These are usually specified in the product package instructions. The tools required include pliers, a screwdriver, a flashlight, and a bucket or container for catching debris. Dispose of any water left in the sink before you begin.
B. Removing Your Existing Sink Flange
The next stage is to remove your existing sink flange so that you can fit in the mounting assembly. First, turn off power to the garbage disposal – You can flip the electrical switch on the circuit breaker or unplug it. Then, turn off your sink’s main water supply valve. Use a flat head screwdriver or pliers to move the flange counterclockwise to remove it. Remove any excess putty or debris from the sinkhole.
C. Preparing the Mounting Assembly
The third stage is to prepare the mounting assembly. Assemble the backup flange, gasket, mounting ring, and mounting bolts as detailed in the product manual. Fortunately, most garbage disposals come with complete instructions for installation, and you can follow them without a problem.
D. Mounting the Garbage Disposal
The fourth stage is mounting the garbage disposal. Hold the mounting assembly up to the sinkhole, ensuring that it is level. Tighten all three mounting bolts to secure it in place. Your new unit should be adequately anchored, and it should not swivel or move when you touch it.
E. Attaching the Drain Assembly
The fifth stage is attaching the drain assembly. Begin by attaching the drain piece and flange to the mounting ring. Insert the upper gasket above the flange. Then, place the mounting plate onto the mounting assembly. Fit the lower gasket, backup flange, and locking ring onto the flange. Use pliers or a wrench to tighten everything securely.
F. Wiring the Garbage Disposal
The sixth stage is wiring the garbage disposal. Look at the wire connections in the unit’s enclosure before making any wires connection. Connect the black wire from the disposal wire to the wire from the switch. The white wire should then connect to the white wires from the power source and switch. Use wire connectors to connect the wires safely and correctly.
G. Testing the Unit
The seventh stage is testing the unit. Turn on the power and try running the water for around a minute. Check all connections for leaks or drips. Make sure that the garbage disposal is securely mounted. Finally, turn it on to see whether it is working correctly.
III. Video Tutorial
A. Introduction to the Host
If you need more visual guidance on how to install a garbage disposal, we recommend checking out this YouTube video tutorial demonstrated by a DIY expert.
B. Step-by-Step Video Demonstration of the Installation
The video tutorial is a friendly and straightforward demonstration of what the written instructions emphasized. The host takes you through each stage, offering additional tips and tricks.
C. Tips and Tricks Highlighted by the Host
The video tutorial highlights tips such as measuring before cutting, securing the unit tightly, checking for leaks, and labeling wires correctly.
D. Video Conclusion Summarizing the Installation and its Key Points
The video concludes by summarizing the key points from the installation process to ensure that the viewers understand the process’s accomplishment.
IV. Troubleshooting Tips
A. Common Problems That Arise During Installation
Every installation process is different, and you might experience some challenges depending on your experience level and garbage disposal model. Some common challenges people face are leaks, electrical wires short circuits, and the unit jamming.
B. How to Fix a Leak
If you have a leak, ensure that all connections are tight and secure. Check if the cause is due to the nut on the drain. If so, try tightening the nut on the drain. If the leakage persists, remove the entire flange assembly and reassemble it, and then check for any dimples in the putty.
C. How to Adjust the Disposal
The installation process may leave you with a unit that is not level, resulting in the disposal jamming. If that happens, switch off power to the unit, insert an Allen wrench into the center hole on the underside of the unit, and turn it manually to dislodge any debris.
D. Testing Wiring and Connections
Electric wiring testing is crucial. Ensure that power is off before testing. Use a voltage meter to make sure everything is connected correctly.
V. Important Safety Precautions
A. Turning off the Power
Always turn off the power; If you are working with an electrical appliance, ensure that power is off to avoid electrocution.
B. Wearing Protective Gear
Protect yourself with safety glasses and gloves. Goggles will protect your eyes while gloves from cuts when handling sharp components.
C. Being Cautious with Sharp Blades
Ensure you’re cautious when dealing with sharp blades. It is advisable to use a spoon or tongs instead of your hands when dislodging bits.
D. Best Practices for Avoiding Danger
When handling the unit, avoid sudden movements, and always secure it correctly to prevent falls or movement.
VI. Choosing the Right Garbage Disposal
A. Overview of Key Features
Giving your kitchen an upgrade might mean replacing the existing unit. When looking for a new unit, factors to consider include horsepower, noise, size, ease of use, and durability. This is to ensure that the unit you buy will satisfy your kitchen’s unique conditions.
B. Different Models and Their Benefits
The three common types of garbage disposal units available are the continuous-feed, batch feed, and septic-friendly models. Continuous feeds are the most common, with their benefits being affordability and durability. Batch feeds are ideal for low-volume use rooms and are safe to use as they need a cover to operate. Septic units are for septic systems and use enzymes to break down food waste.
C. Different Price Points and their Advantages
The price point of garbage disposals varies depending on the factors mentioned above. Cheaper models ($80-$150) have lower horsepower and fewer features. On the other hand, more expensive models ($250-$400) have better noise insulation, more horsepower, and multiple grinding stages.
D. How to Select the Best Disposal for Your Needs
When selecting the best disposal unit, you need to consider your kitchen’s specific needs. You can also consider the type of food you dispose of, the noise level that you are comfortable with, durability, and even warranty coverage. Ensure that you take your time to research before getting a unit to get the best value for your money.
VII. Frequently Asked Questions
A. List of Frequently Asked Questions
Q: How much does it cost to install a garbage disposal?
A: Installation cost varies depending on the unit and if you are doing it yourself or hiring a professional plumber. However, the general installation cost is between $150-$500.
Q: What tools do I need to install a garbage disposal?
A: You will need pliers, a screwdriver, a flashlight, and a bucket or container for catching debris.
Q: How long does it usually take to install a garbage disposal?
A: The installation process takes between two and four hours depending on the experience level and the unit you are installing.
B. Tools Required for Installation
Tools required include pliers, a screwdriver, a flashlight, and a bucket or container for catching debris.
C. Time Required for Installation
The installation process takes between two and four hours depending on the experience level of the installer and the unit you are installing.
D. How Much it Costs to Install a Garbage Disposal
Installation cost varies depending on the unit and if you are doing it yourself or hiring a professional plumber. However, generally, the installation cost is between $150-$500.
VIII. Conclusion
A. Recap of Key Points
Installing a garbage disposal is an excellent option for providing a cleaner and more efficient kitchen environment. It is advisable to follow the above step by step installation guide while taking necessary safety precautions to ensure a successful installation.
B. Encouragement to Tackle This DIY Project
You can take up this DIY project to enjoy the cost benefits while customizing it to serve your specific needs. You also contribute to an eco-friendly environment by reducing the amount of waste that goes to your landfill.
C. Call to Action for Readers to Leave Questions or Feedback
If you have any questions regarding the installation process or any feedback, kindly share your concerns in our comment sections.