I. Introduction
Do you have a pair of pants that are too long and dragging on the ground? Hemming pants might seem like a daunting task, but with the right tools and techniques, you can achieve a professional-looking finish. In this article, we will provide a step-by-step guide on how to hem pants like a pro, whether you own a sewing machine or not. We’ll cover the basic steps involved in hemming, from measuring to stitching, and offer tips and tricks on achieving a flawless hemline. By the end of this article, you’ll have the skills and confidence to hem pants like a pro.
II. A Step-by-Step Guide: How to Hem Pants Like a Pro
Hemming pants may sound complicated, but it’s a simple process involving measuring, cutting, and stitching. Whether you’re using a sewing machine or doing it by hand, the steps remain the same. Here’s a step-by-step guide on how to hem pants like a pro.

To get started, you’ll need a tape measure, scissors, and matching thread and needle. Begin by putting on the pants and folding up the excess fabric to your desired length. Make sure both legs are folded evenly and pinned in place.
Next, measure the distance between the folded edge and the original hemline, which should be the same length on both legs. If the pants have a decorative hem, you may need to remove it before measuring. Once you have your desired length, add an extra inch or two for the hem.
Using your tape measure and a ruler or straight edge, mark the new hemline with a line of chalk, pins, or a fabric marker. This line should be parallel to the original hemline and straight all the way around.
With the excess fabric still folded up, cut along the chalk line to create the new hemline. Make sure you cut both legs evenly and accurately.
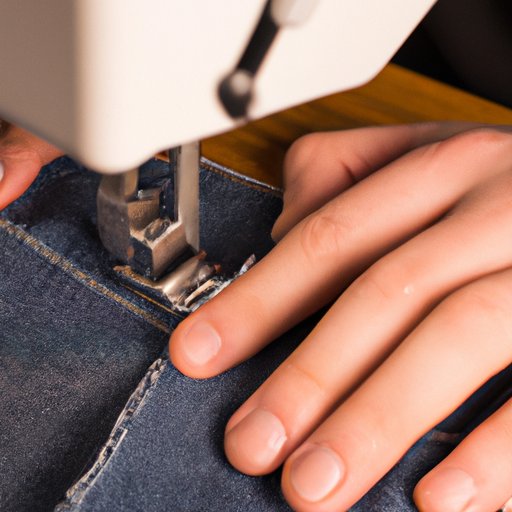
To finish the hem, fold the raw edge of the fabric up by 1/4 inch and iron it. Fold it up again by another 1/4 inch and iron it again. Now, stitch the folded fabric in place, using a straight stitch for a sewing machine or a slip stitch for hand stitching. Make sure your stitches are even and secure, and use the same color thread as the pants for a seamless finish.
III. Hemming 101: From Measuring to Stitching
Hemming pants can be done in a variety of ways, depending on the tools and materials you have on hand. Here are some common methods and tips for measuring, marking, and stitching a hemline.
When marking the hemline, use a ruler or straight edge to ensure a straight, even line. You can also use pins or a fabric marker, but make sure the markings won’t be visible once the pants are hemmed.
The type of stitching you use will depend on the type of pants and fabric you’re working with. A straight stitch works well for most fabrics, but a zigzag or overcasting stitch may be better for more delicate or stretchy fabrics.
When selecting thread, opt for a color that matches the fabric or the original stitching. Use a thread that’s suitable for the type of fabric you’re working with, as heavier fabrics may require a thicker thread. Adjust your machine’s tension as needed to achieve even stitches.
IV. Don’t Let Your Pants Drag on the Ground: A DIY Hemming Tutorial
If you don’t have a sewing machine, or prefer to do your hemming by hand, don’t worry. Hemming pants by hand can be just as easy and effective as hemming by machine. Here’s a step-by-step guide for hemming pants by hand.
Start by folding up the excess fabric to your desired length, making sure both legs are even and symmetrically folded. Pin the fabric in place to hold the fold.
Thread a needle with matching thread and tie a knot at the end. Beginning at the inside seam, insert the needle through the fabric in a straight line, pulling it through until the knot is flush against the fabric. Take another stitch and continue this process until you’ve stitched all the way around the leg, making sure your stitches are even and tight.
To finish the hem, fold the raw edge of the fabric up by 1/4 inch and iron it. Fold it up again by another 1/4 inch and iron it again. Using a slip stitch, stitch the folded fabric in place, being careful not to sew through both layers. Keep your stitches even and tight, and don’t forget to knot the thread when you’re done.
V. Perfectly Hemmed Pants: Tips and Tricks for a Professional Finish
Here are some tips and tricks for achieving a professional-looking hemline on your pants.
Use an iron to press the hem before stitching it in place. This will ensure a crisp, clean line and make it easier to fold the fabric up evenly.
If you’re having trouble folding the fabric evenly, use a fork as a guide. Simply place the prongs of the fork at the desired hemline and fold the fabric up around them, using the fork as a guide for even folds.
If you have access to an overlocker or serger, use it to finish the raw edge of the fabric before hemming. This will create a clean edge and prevent fraying over time.
Always test the length of the hem before finishing it to avoid any errors. Put the pants on and walk around in them to make sure they’re the right length. Make any necessary adjustments before stitching the hem in place.
Once you’ve finished the hem, press it again with an iron to set the stitches and give it a professional finish. Store your pants properly to prevent wrinkles and maintain the hemline.
VI. 5 Common Hemming Mistakes to Avoid and How to Correct Them
Mistakes happen, but they don’t have to ruin your pants. Here are some common hemming mistakes to avoid, and tips on how to correct them.
Mistake #1: Cutting the pants too short. If you’ve accidentally cut the pants too short, don’t panic. You can add length back in by using fusible webbing or a piece of extra fabric. Simply iron the webbing or fabric in place, making sure it’s flush against the raw edge of the fabric, and then fold and stitch the hem as usual.
Mistake #2: Creating an uneven hemline. If you’ve created an uneven hemline, use a seam ripper to remove the stitches and start over. Make sure you measure and mark the hemline carefully this time, and double-check your work before stitching in place.
Mistake #3: Getting puckers or gathers in the fabric. If your fabric is bunching up or creating puckers, you may need to adjust your tension or stitch length. Try using a longer stitch length or adjusting the tension until the fabric feeds through the machine evenly.
Mistake #4: Using the wrong type of needle or thread. Make sure you’re using the right type of needle and thread for the fabric you’re working with. Using the wrong type can result in broken threads, skipped stitches, or uneven stitches.
Mistake #5: Skimping on the prep work. Remember to measure and mark the hemline carefully, and press the fabric before and after stitching. Skipping these steps can result in an uneven or unprofessional-looking hemline.
VII. Conclusion
Hemming pants may seem like a challenging task, but with the right tools and techniques, anyone can do it. Whether you’re hemming pants by hand or by machine, following these basic steps and tips will help you achieve a perfect hemline every time. Remember to measure carefully, use the right supplies, and take your time with each step. With a little practice, you’ll be hemming pants like a pro in no time.
If you’re interested in learning more about sewing and hemming techniques, there are plenty of resources available. Check out online tutorials or classes at your local fabric or craft store to hone your skills and learn new techniques.