I. Introduction
If you’re looking to add some greens to your diet, microgreens are growing in popularity and are a great option. These tiny plants are packed with flavor and nutritional value. Not only are they good for you, but they’re also easy to grow at home. In this step-by-step guide, we’ll cover everything you need to know to get started growing your own microgreens.
II. Step-by-Step Guide
A. Selecting the Right Seeds
The first step in growing microgreens is selecting the right seeds. Many seed companies offer microgreen seed mixes or you can choose individual varieties. Popular varieties include arugula, kale, chia, broccoli, and radish. Look for seeds labeled specifically for microgreens, as they are meant to be grown in a small space and harvested early.
B. Preparing the Soil
Microgreens can be grown in soil or a soilless medium like coconut coir or vermiculite. Fill your container with the soil or medium and level the surface. Water the soil to make it slightly damp but not soaked.
C. Planting the Seeds
Spread the seeds evenly over the soil or medium. You don’t need to bury the seeds; just press them gently into the soil or medium. For best results, plant the seeds densely so they grow as one solid mat. Cover the seeds with a thin layer of soil or medium.
D. Watering the Microgreens
Water the microgreens gently using a misting spray bottle or by pouring water from a watering can with a narrow spout. Do this daily or as needed to keep the soil or medium moist. Be careful not to overwater, as this can lead to fungal growth.
E. Caring for the Microgreens
Microgreens need good air circulation and bright, indirect light. Place the containers near a window or use a grow light if you don’t have a sunny spot. Thin the plants if they grow too thickly, so each plant has room to grow. Remove any yellow or brown leaves. Watch out for pests like aphids or spider mites and take steps to prevent and control infestations.
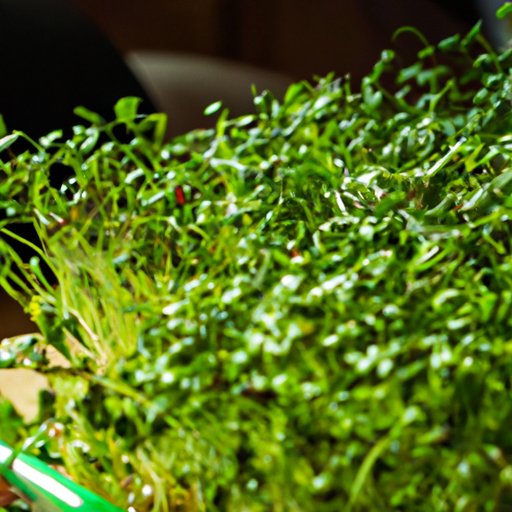
F. Harvesting the Microgreens
Microgreens are ready to harvest when they have their first set of true leaves. This is usually about two weeks after planting. Cut the plants just above the soil or medium using scissors or a sharp knife. Rinse the greens gently and use them immediately or store them in an airtight container in the refrigerator for up to a week.
III. Benefits of Growing Microgreens
Aside from being delicious and easy to grow, microgreens offer numerous benefits:
A. High Nutritional Value
Microgreens are packed with vitamins and nutrients, making them a healthy addition to any diet. They can contain up to 40 times the nutrients of their mature counterparts.
B. Ease of Cultivation
Microgreens are easy to grow, even in small spaces like apartments. They don’t require much equipment or maintenance, making them perfect for beginners.
C. Satisfaction of Growing Own Food
Growing your own food can be very rewarding. Microgreens grow quickly, so you can see the results of your hard work in just a few weeks.
D. Fun Facts About Microgreens
Did you know that microgreens were originally used as a garnish in fancy restaurants? They were prized for their vibrant colors and unique flavors. Today, they’re enjoyed in a variety of dishes and have become a staple in health-conscious diets.
IV. Types of Microgreens
There are many different varieties of microgreens to choose from. Some popular varieties include:
A. Popular Varieties
- Kale
- Chia
- Broccoli
- Radish
B. Unique Flavors and Nutritional Profiles
Try some less common varieties for different flavors and nutritional profiles:
- Cilantro
- Mustard greens
- Pea shoots
- Red Amaranth
C. Pairing Microgreens with Certain Dishes
Microgreens can be used in a variety of dishes, but some pair particularly well with certain foods:
- Arugula microgreens are great on sandwiches or in salads
- Kale microgreens go well in smoothies or on pizzas
- Radish microgreens add a zing to tacos or omelets
V. Tips for Success
Here are some tips to help ensure your microgreens grow successfully:
A. Using a Grow Light
Microgreens need bright, indirect light to grow properly. If you don’t have a sunny spot, consider using a grow light to provide the necessary light.
B. Harvesting at the Right Time
Harvest your microgreens two weeks after planting or when the first set of true leaves appear. Harvesting them too early or too late can affect their flavor and nutritional value.
C. Not Overwatering
Microgreens need to be kept moist, but be careful not to overwater them. Overwatering can lead to mold or fungal growth and can harm the plants.
VI. Growing Microgreens Indoors
Microgreens can be grown indoors year-round, even in apartments or other small spaces. Here are some things to keep in mind:
A. Getting Enough Light
Microgreens need bright, indirect light to grow properly. If you don’t have a sunny spot, consider using a grow light to provide the necessary light.
B. Maintaining the Right Temperature
Most microgreens grow best in temperatures between 60-75°F. Keep the room where you’re growing them in this temperature range.
C. Best Containers to Use
You can use any type of container to grow microgreens, but shallow containers like baking trays or plant saucers work well. Make sure the container has drainage holes.
VII. Recipes Using Microgreens
Microgreens can be used in a variety of dishes. Here are some ideas to get you started:
A. Salads
Add microgreens to your favorite salad for some extra nutrition and flavor.
B. Smoothies
Add some kale microgreens to your morning smoothie for a healthy boost.
C. Sandwiches
Add arugula or radish microgreens to your sandwich for some crunch and flavor.
D. Soups
Top your favorite soup with some pea shoot or cilantro microgreens for some added texture and nutrition.
E. Quick and Easy Recipes
Sprinkle some microgreens on top of scrambled eggs or avocado toast for an easy breakfast or snack.
F. More Elaborate Dishes
Get creative and experiment with using microgreens in stir-fries, pizzas, or even as a garnish for cocktails.
VIII. Conclusion
Microgreens are a tasty, nutritious addition to any diet. With this step-by-step guide, you now have all the information you need to grow your own microgreens at home. Remember to pick the right seeds, water them carefully, and provide adequate light and care. And don’t forget to enjoy the fruits of your labor by trying out some of the delicious recipes mentioned in this article. Happy growing!
Thank you for taking the time to read this article. We hope you found it informative and helpful.