Introduction
If you love cooking with ginger, you might be surprised to learn that it’s fairly easy to grow your own at home! Cultivating your own ginger plants not only yields a fresh and abundant source of the spicy root, but it’s also a great way to learn more about plant care and gardening.
This beginner’s guide to growing ginger will take you through the entire process, from selecting and planting healthy rhizomes to harvesting and storing your ginger crop. Whether you’re a seasoned gardener or just starting out, with a little patience and effort, you can enjoy the rewards of your own homegrown ginger.
Beginner’s Guide to Growing Ginger: A Step-by-Step Tutorial
Growing ginger requires some patience, as the plants can take several months to mature. But if you follow these simple steps, you’ll soon have a thriving ginger crop.
1. Best Time to Plant Ginger
The best time to plant ginger is in the spring, once the soil has warmed up and there’s no risk of frost. In cooler regions, you may need to start your ginger plants indoors a few months before the last frost date and transplant them outside once the weather warms up.
2. Preparation of Soil for Planting
Ginger plants thrive in nutrient-rich, well-draining soil that’s slightly acidic. Before planting your ginger rhizomes, prepare your garden bed or container by loosening the soil to a depth of about 6 inches. Add some well-rotted compost or aged manure to the soil to improve its fertility.
3. Selection of Healthy Ginger Rhizomes
To grow ginger, you’ll need some fresh, healthy rhizomes, which are the knobby brown roots you’re used to cooking with. Look for ginger rhizomes that are plump and firm, with several eye buds, which will sprout into new leaves and eventually flowers.
4. Planting Ginger in Containers or Garden Beds
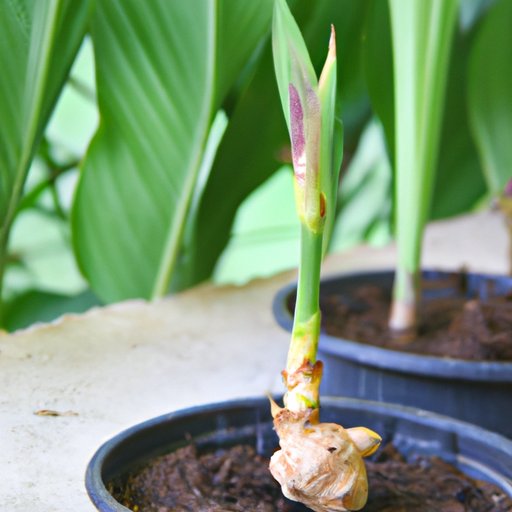
Ginger can be grown in containers or directly in the ground. If growing in containers, plant your ginger rhizomes about 2 inches deep in a well-draining potting mix. Be sure to choose a container that’s at least 12 inches deep and wide enough to accommodate multiple plants.
If planting directly in the ground, space your ginger rhizomes about 8 inches apart in rows that are about 1 foot apart. Plant each rhizome with its eye bud facing up and cover it with soil.
5. Caring for Ginger Plants
After planting your ginger, keep the soil moist but not waterlogged. Ginger plants prefer consistently moist soil, but overwatering can lead to root rot. As your ginger plants grow, they’ll need regular fertilization with a balanced fertilizer specially formulated for root crops.
Ginger plants can grow up to three feet tall and wide, so be sure to provide ample space. If you’re growing ginger in containers, rotate your pots every few weeks to ensure all sides get enough sunlight.
6. Harvesting Ginger When it’s Ready
Ginger plants are ready for harvest once their leaves turn yellow and begin to die back. This typically occurs around 8-10 months after planting. To harvest your ginger, carefully dig it up with a garden fork, being sure not to damage the rhizomes.
The Benefits of Growing Your Own Ginger: How to Do it at Home
Not only is growing your own ginger a fun and rewarding experience, but it comes with a host of benefits that extend beyond the kitchen.
1. Advantages of Growing Ginger at Home
Growing your own ginger allows you to enjoy a fresh and abundant supply of the flavorful root, free from any pesticides or other chemicals that may be present in store-bought ginger. Additionally, cultivating your own ginger plants can help you save money, as fresh ginger can be quite expensive to buy.
2. Tips for Successful Ginger Cultivation
To ensure successful ginger cultivation, it’s important to choose healthy rhizomes, provide your plants with plenty of sunlight and moisture, and fertilize regularly. Consider using a fertilizer that’s specifically formulated for root crops.
3. Cost Savings of Growing Your Own Ginger
One of the biggest advantages of growing your own ginger is the cost savings. A pound of fresh ginger can cost upwards of $20 at the grocery store, but with your own plants, you can potentially enjoy an endless supply for just the cost of soil, fertilizer, and a few rhizomes.
4. How to Store Ginger After Harvesting
After harvesting your ginger, be sure to clean it thoroughly and dry it in a cool, dark place for several days. To store ginger long-term, wrap it in plastic and place it in the refrigerator or freezer. Alternatively, you can also preserve it by pickling or candying.
Tips and Tricks for Growing Ginger: From Choosing the Right Soil to Harvesting
To get the most out of your ginger plants, it’s important to provide them with the right growing conditions.
1. Importance of Using Quality Soil for Growing Ginger
Ginger plants thrive in soil that’s rich in organic matter and has good drainage. Consider amending your soil with a high-quality compost or fertilizer to ensure your plants receive the nutrients they need.
2. Factors to Consider When Choosing Soil for Ginger
When selecting soil for your ginger plants, it’s important to consider factors like soil texture, pH level, and drainage. Ginger plants prefer slightly acidic soil with a pH of around 6.0-6.8.
3. Importance of pH Levels in Soil
Maintaining the right pH level in your soil is critical to the success of your ginger plants. If your soil is too acidic or alkaline, your plants may struggle to absorb the nutrients they need. Be sure to test your soil regularly and make any necessary adjustments.
4. How to Fertilize Ginger Plants
To keep your ginger plants healthy and strong, fertilize them regularly with a balanced fertilizer that’s specifically formulated for root crops. Be sure to follow the manufacturer’s instructions carefully, as overfertilization can damage your plants.
5. Signs Ginger is Ready for Harvesting
Ginger plants are ready for harvest once their leaves begin to yellow and dry out. This typically occurs around 8-10 months after planting.
6. Proper Way to Harvest Ginger Root
When harvesting your ginger, be sure to use a garden fork to gently loosen the soil around the plant and lift it out of the ground. Be careful not to break or bruise the rhizomes, as this can damage your crop.
Growing Ginger Indoors: Making the Most of Limited Space
If you’re short on outdoor space or live in a cooler climate, you can still grow ginger indoors. Here’s how:
1. Benefits of Growing Ginger Indoors
Growing ginger indoors allows you to enjoy a fresh supply of ginger year-round, regardless of the weather outside. Additionally, ginger plants can help purify the air indoors, making them a great choice for homes and apartments.
2. Tips on Growing Ginger in Containers
When growing ginger in containers, be sure to choose a pot that’s at least 12 inches in diameter and 12 inches deep. Fill the pot with a well-draining potting mix and plant your ginger rhizomes about 2 inches deep. Place the pot in a warm, sunny location that receives plenty of natural light.
3. Best Location for Growing Ginger Indoors
Ginger plants thrive in warm, humid environments, so it’s best to place your containers in a bright, warm location like a kitchen or bathroom. Be sure to keep the soil moist but not waterlogged, and fertilize your plants regularly with a balanced fertilizer.
4. How to Care for Ginger Plants Indoors
To care for your ginger plants indoors, be sure to provide them with plenty of natural light, warmth, and humidity. Water your plants regularly and fertilize once every few weeks with a balanced fertilizer.
Problem-Solving in Ginger Growing: How to Tackle the Most Common Challenges
Growing ginger can come with its fair share of challenges, but by taking proactive steps to prevent and address common issues, you can keep your plants healthy and strong.
1. Pest Control for Ginger Plants
Some common pests that can affect ginger plants include spider mites, aphids, and whiteflies. To prevent and address infestations, it’s important to inspect your plants regularly and take steps like introducing beneficial insects or using organic pesticides.
2. Fungal Infestations and How to Prevent Them
Fungal diseases like root rot and leaf spot can affect ginger plants, particularly if they’re planted in soil that’s overly moist or poorly drained. To prevent fungal infestations, be sure to provide your plants with good drainage and avoid overwatering.
3. How to Deal with Ginger Plant Diseases
If your ginger plants do become affected by disease, it’s important to take action quickly to prevent it from spreading. Consider removing affected leaves or rhizomes, and treat remaining plants with a fungicide or other appropriate treatment.
Ginger Recipes to Make with Your Homegrown Harvest: A Delicious Way to Enjoy the Fruits of Your Labor
After harvesting your ginger crop, you can put it to use in a variety of delicious recipes! Here are a few ideas to get you started:
1. Ginger Tea
To make ginger tea, slice fresh ginger root and steep it in hot water for several minutes. Add a dash of honey and lemon juice for a soothing, aromatic drink.
2. Ginger Salad Dressing
For a delicious and healthy salad dressing, whisk together fresh ginger, olive oil, honey, and vinegar.
3. Ginger Stir-Fry
In a wok or large skillet, stir-fry sliced ginger root with your favorite vegetables and protein for a flavorful and healthy meal.
Conclusion
Growing ginger is a fun and rewarding experience that can yield a fresh and abundant supply of this flavorful root. By following these simple steps and taking proactive steps to address common issues, you can successfully cultivate ginger in your own backyard.