I. Introduction
Getting a splinter is a common issue that most of us are familiar with. However, if not removed promptly, splinters can cause pain, swelling, and even infection.
In this article, we will explore five effective and painless methods for removing splinters so that you can deal with this issue quickly and safely.
II. 5 Easy Ways to Remove a Splinter: Tips and Tricks
There are several general methods for removing splinters that are easy and accessible. These include:
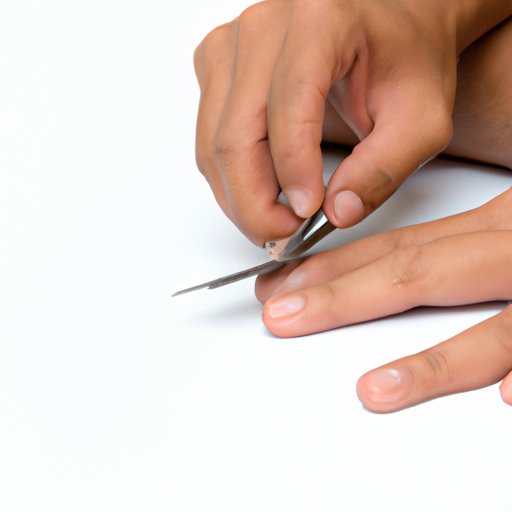
- Using sterilized tweezers
- Applying adhesive tape
- Using a sterilized needle
- Soaking the affected area in warm water
- Using baking soda and water paste
Here are step-by-step instructions for each method:
Sterilized tweezers:
- Clean the affected area with soap and water
- Sterilize a pair of tweezers with rubbing alcohol or boiling water
- Gently grasp the end of the splinter with the tweezers and pull it out in the same direction it entered the skin
- Once the splinter is removed, clean the area with rubbing alcohol or an antiseptic ointment
Adhesive tape:
- Clean the affected area with soap and water
- Cut a piece of adhesive tape that is slightly larger than the splinter
- Place the tape over the splinter
- Press down on the tape and then lift it off quickly in the opposite direction the splinter entered the skin
- The splinter should come out stuck to the tape
Sterilized needle:
- Clean the affected area with soap and water
- Sterilize a needle with rubbing alcohol or boiling water
- Gently pierce the skin at one end of the splinter
- Use the needle to lift the splinter out of the skin
- Once the splinter is removed, clean the area with rubbing alcohol or an antiseptic ointment
Warm water:
- Soak the affected area in warm water for 10-15 minutes
- After soaking, dry the area and use sterilized tweezers or a needle to remove the splinter as described above
Baking soda paste:
- Mix baking soda and water to form a paste
- Apply the paste to the affected area and cover it with a bandage
- Leave the bandage on for a few hours, then remove it
- The splinter should be easier to remove now with sterilized tweezers or adhesive tape
Remember, if the splinter is located deep in the skin or causing significant pain, it may be best to seek medical attention.
III. The Most Effective Methods to Get a Splinter Out
While all of the above methods are effective, there are a couple of methods that are more commonly recommended by medical professionals:
- Using sterilized tweezers
- Soaking the affected area in warm water
Sterilized tweezers can be highly effective in removing the splinter if done correctly, without any pain or infection risks. Soaking the affected area in warm water can help to soften the skin and make the splinter easier to remove.
IV. How to Remove a Splinter Painlessly: 5 Simple Techniques
Removing a splinter can often be a painful experience. However, there are strategies you can use to minimize or prevent the pain:
- Use ice to numb the area before attempting to remove the splinter
- Apply a topical anesthetic cream to the affected area
- Soak the affected area in Epsom salt solution
- Apply a bandage or adhesive tape before bedtime, to try and allow the splinter to come to the surface
- Use a magnifying glass to help you see the splinter more clearly before attempting to remove it
It’s essential to remember to still sterilize your tools before attempting to remove the splinter, following the same instructions as above.
V. DIY Techniques for Removing a Stubborn Splinter
Sometimes a splinter is more challenging to remove, especially if it’s small or fragile. So, we recommend a few unconventional methods that might help:
- Apply a paste of honey, flour, and water, cover the splinter, and wait for few hours
- Use white vinegar or apple cider vinegar to soften the skin by soaking it for 20-30 minutes, then use tweezers to remove it
- Soak the affected area in vinegar and baking soda solution
- Use a drop of superglue or adhesive on the end of the splinter to form a small ball that is easier to grab onto with tweezers
Remember always to clean the affected area area with an antiseptic ointment after attempting to remove the splinter, and if the splinter still won’t come out, seek medical attention.
VI. The Ultimate Guide to Removing Splinters: 5 Practical Ways
Now that we have covered all the different methods of removing splinters, here are some general tips to help you minimize the risk of getting splinters in the first place:
- Wear gloves when working with wood, gardening, or handling rough materials
- Avoid walking or running barefoot in areas with rough surfaces, especially outdoors
- Check your skin regularly for splinters that you may not feel right away
- If you get a splinter, don’t ignore it given, remove it quickly as possible to avoid further complications
- If there are any signs of redness, swelling, or infection, seek medical attention immediately
Remember, removing a splinter can be tricky and sometimes painful, but it’s essential to remove it to avoid infection. However, if you are struggling or the splinter is located in a sensitive area or causing considerable pain, it’s best to seek medical attention.
VII. Conclusion
Removing a splinter is a common issue that most of us experience at some point in our lives. With proper tools and techniques, we can minimize any pain and reduce the risk of infection. The 5 effective and painless methods explained in this article should help you in dealing with splinters without facing any risks. However, should you struggle with removing a splinter or have any concern, seek medical attention right away to avoid further complications.