How to Get a Shovel in Animal Crossing: A Comprehensive Guide
Animal Crossing: New Horizons is a popular game that prompts players to explore and build their own virtual island paradise. However, before you can embark on any major landscaping projects, you’ll need a shovel to start digging. Obtaining a shovel can be challenging, especially for new players. This article aims to provide a comprehensive guide on how to obtain a shovel in Animal Crossing, including step-by-step instructions, tips and tricks, and personal experiences.
Step-by-Step Guide
There are several ways to obtain a shovel in Animal Crossing: New Horizons. The first and most common method is by purchasing it from the store for 1000 bells. This option becomes available after you have upgraded Resident Services from a tent to a building, which happens after a few days of playing. The store is available inside the Resident Services building, and you can select the shovel from the list of available items.
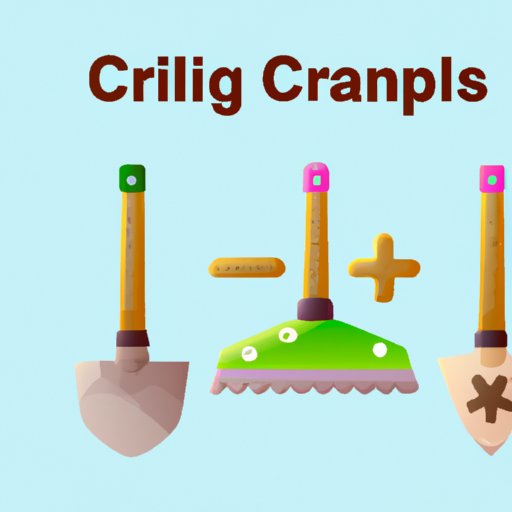
The second method is by crafting your own shovel using a DIY recipe. To do this, you need to find Blathers, a character who’s interested in bugs and fossils, and give him five different bugs or fish. He will invite you to donate them to the museum and give you access to the DIY recipe for a flimsy shovel. You can then gather tree branches and iron nuggets to craft your own shovel. The recipe requires 5 hardwoods, which can be easily obtained from shaking trees around your island. Iron nuggets can be mined by using a shovel or an axe on rocks scattered around your island.
Once you craft your flimsy shovel, you can use it to dig up fossils, collect fruit, and plant new trees. But it’s important to note that a flimsy shovel is not very durable and will break after a few uses. To prevent this from happening, you can upgrade your shovel to a sturdier version.
The third method is by upgrading your flimsy shovel to a sturdier version that’s more durable and can dig out larger holes. To do this, you need to talk to Blathers again and donate a total of 15 fossils to the museum. After fulfilling this requirement, he’ll invite you to create a better shovel. The DIY recipe will be available to you, and you’ll need a flimsy shovel and one additional iron nugget to create the sturdier version.
Lastly, if you’re playing the game with multiple players, you can share a shovel, and each player can have their own. This approach will save you the bells and resources needed to get your own shovel, but you’ll have to communicate with each other to ensure it’s available when you need it.
Mission-Style Article
Getting a shovel in Animal Crossing can be an exciting mission that requires patience, resourcefulness, and persistence. To complete this task, you need to gather resources, find a DIY recipe, and learn how to use your shovel effectively. Here are some tips, tricks, and strategies to help you accomplish this mission successfully.
Firstly, it’s essential to save up your bells to buy the shovel from the store. You can do this by selling fish, bugs, fruit, and other items you collect around your island. It’s easier to do this after you’ve upgraded Resident Services to a building and Nook’s Cranny is open. When the shop is open, you can sell your items for better prices and get more bells in return.
Secondly, it’s essential to get to know the Blathers character. You’ll encounter him early on in the game when he’s looking for bugs and fish to populate the museum. When you collect five unique bugs or fish and donate them to Blathers, he will give you the DIY recipe for a flimsy shovel. This recipe will enable you to craft your own shovel and start digging up fossils, fruit trees, and more.
Thirdly, be sure to gather resources such as tree branches, stones, and iron nuggets to craft your shovel. You can get tree branches by shaking trees around your island, and you can get stones and iron nuggets by hitting rocks with your shovel or axe. Keep in mind that rocks can only be hit once per day and will respawn in a different location after being destroyed. Therefore, it’s best to hit as many rocks as you can every day until you get the resources you need.
Lastly, be sure to upgrade your shovel to a sturdier version once you get the opportunity. This will allow you to dig out larger holes, which is useful when creating paths or removing trees. It will also save you from having to replace the shovel frequently, making it more efficient in the long run.
Tips and Tricks
Here are some tips and tricks that can help you get a shovel more efficiently and make the most out of using it:
1. Use your shovel to collect gold nuggets
Occasionally, rocks on your island will drop gold nuggets, which are a rare resource you need for some crafting recipes. Using a shovel instead of an axe when hitting rocks will increase your chances of getting a gold nugget.
2. Use a shovel to create paths
You can use your shovel to create paths on your island by removing the grass and revealing the dirt underneath. This can make your island look more organized and create clear routes for your villagers.
3. Use a shovel to remove trees and plant new ones
When you want to remove a tree from your island or plant a new one, you need to use a shovel to dig out the entire tree. This will leave a hole that you can fill with dirt or other items.
4. Use your shovel to dig for fossils
One of the primary uses of a shovel is to dig up fossils, which can then be donated or sold for bells. They can also be used to complete the museum’s fossil collection, which is a rewarding task that takes time and commitment.
5. Use your shovel to dig up buried treasure
Occasionally, there will be buried treasure on your island that you can only get by using your shovel to dig it up. The treasure can be anything from bells to rare items, so keep an eye out for those glowing spots on the ground!
Frequently Asked Questions
Q: How do I get a shovel in Animal Crossing?
A: There are several ways to get a shovel, including purchasing one from the store, crafting one using a DIY recipe, upgrading your flimsy shovel to a sturdier version, or sharing a shovel with other players.
Q: How do I upgrade my shovel?
A: To upgrade your shovel, you need to donate a total of 15 fossils to the museum, talk to Blathers, and get the DIY recipe for a sturdier shovel. You’ll need a flimsy shovel and one additional iron nugget to craft the sturdier version.
Q: How do I use my shovel?
A: You can use your shovel to dig up fossils, collect fruit, plant new trees, and remove trees or bushes. To use it, select the shovel from your inventory, stand next to the object you want to dig, and press A.
Q: Can I share my shovel with other players?
A: Yes, you can share your shovel with other players if you’re playing on the same island. To do this, drop the shovel on the ground, and another player can pick it up. However, this means you’ll need to coordinate and communicate to ensure each player has access to the shovel when they need it.
Q: Can a shovel break?
A: Yes, a flimsy shovel is not very durable and will break after a few uses. To upgrade to a sturdier version, follow the steps outlined above.
Personal Narrative
When I started playing Animal Crossing, I was excited to explore the island and start building my paradise. However, I soon realized that I needed a shovel to start digging and collecting resources. I tried buying one from the store, but it was too costly for me at the time.
After some research, I realized that I could get a DIY recipe for a flimsy shovel by donating five unique bugs or fish to Blathers. I quickly started collecting the necessary items and was thrilled when I finally obtained the recipe. Crafting my own shovel was satisfying, and I started using it to collect fossils and fruit around my island.
When I realized that the flimsy shovel wasn’t very durable, I decided to upgrade it to a sturdier version. I donated a total of 15 fossils to Blathers and finally obtained the DIY recipe for a better shovel. It was nice to have a more robust and efficient tool that I could use on my island without worrying about replacing it all the time.
Overall, obtaining a shovel in Animal Crossing takes time, patience, and resourcefulness. But it’s an essential task that opens up new opportunities for exploration and customization. I encourage new players to follow the steps outlined in this article and personalize them according to their preferences.
Video Tutorial
Below is a step-by-step video tutorial on how to get a shovel in Animal Crossing. The tutorial covers the different methods outlined in this article and provides clear and concise instructions on how to obtain and use a shovel effectively.
Conclusion
Getting a shovel in Animal Crossing is an essential task that opens up new opportunities for exploration and customization. Whether you choose to buy a shovel, craft one using a DIY recipe, or upgrade to a sturdier version, the options available allow for resourcefulness and creativity. Try out each method and see what works best for you. Don’t forget to use the tips and tricks outlined in this article and share your personal experience with others.