Introduction
If you’re a coffee or tea lover, you know how important it is to have a perfectly frothed milk to add to your brew. A frother is a great tool for the job, but what if you don’t have one? You might be surprised to know that there are some techniques you can use to achieve the perfect froth without a frother. In this article, we will go over the classic whisk method, the jar technique, the French press technique, the hand blender technique, the milk frother substitute, and the steam wand technique. This article is for anyone who wants to learn how to froth milk without a frother.
The Classic Whisk Method
The classic whisk method is the most basic technique for frothing milk. All you need is a whisk, a container, and some hot milk.
1. Heat your milk on the stove or in the microwave until it’s hot but not boiling.
2. Pour the hot milk into a container with deep sides to prevent splashing.
3. Hold the container steady with one hand and use the whisk to stir the milk with a back and forth motion.
4. As you whisk the milk, lift the whisk towards the surface of the milk to create foam.
5. Continue whisking until the foam reaches your desired consistency.
Pros: This method is budget-friendly and doesn’t require any special tools.
Cons: It can be tiring to whisk for an extended period of time, and it may not be as efficient as other methods.
Tips: Use a whisk with fewer wires for a more balanced result. You can also froth cold milk with this method, but it takes longer.
The Jar Technique
The jar technique is an easy and efficient way to froth milk, especially if you don’t have a whisk.
1. Pour the hot milk into a jar that can hold at least twice the volume of milk.
2. Close the jar tightly and shake it for 30 seconds to a minute.
3. Open the jar and microwave the milk for 30 seconds to stabilize the foam.
4. Skim the foamy milk off the top of the jar and add it to your beverage.
Pros: This technique is easy to execute, and you don’t need any special tools.
Cons: It can be difficult to achieve the right consistency of foam, and some jars may not seal tightly.
Tips: Use a jar that is not too shallow to prevent spilling. You can also use cold milk with this technique, but it may not produce dense foam.
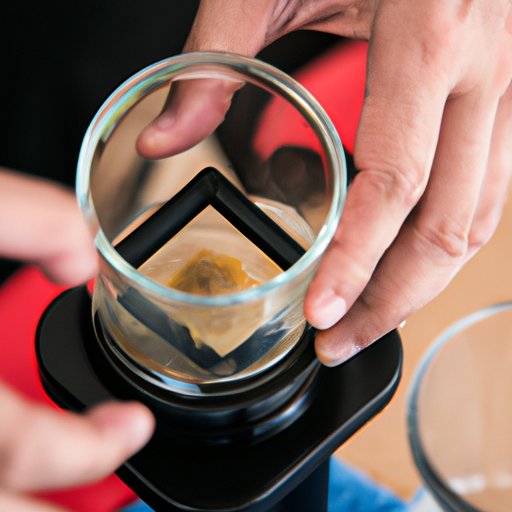
The French Press Technique
The French press technique is not just for coffee. You can also use it to froth milk for your favorite drinks.
1. Heat your milk on the stove or in the microwave until it’s hot but not boiling.
2. Pour the hot milk into a French press, but don’t fill it all the way up.
3. Replace the lid and pump the plunger up and down for 30-60 seconds.
4. Open the lid and pour out the foamy milk.
Pros: The French press method creates dense foam that’s perfect for lattes and cappuccinos.
Cons: It can be difficult to control the amount of foam, and it’s not the most efficient method.
Tips: Use a French press that’s at least 16 ounces to ensure there’s enough space for the milk to foam. You can also use cold milk with this method, but you may need to pump the plunger longer.
The Hand Blender Technique
A hand blender is a versatile tool that can also be used to froth milk.
1. Heat your milk on the stove or in the microwave until it’s hot but not boiling.
2. Pour the hot milk into a container that’s deep enough to prevent splashing.
3. Submerge the hand blender in the milk and turn it on.
4. Move the hand blender up and down to froth the milk.
5. Continue blending until the foam reaches your desired consistency.
Pros: This technique is fast and efficient, and you don’t need to exert as much effort as you do with a whisk.
Cons: You need a hand blender, which is an additional tool you may not have.
Tips: Use a container with a spout to make it easier to pour the milk into your drink. Don’t use a glass or mug that’s too shallow. You can also use cold milk with this method.
The Milk Frother Substitute
If you have a handheld mixer, you can use it as a substitute for a milk frother.
1. Heat your milk on the stove or in the microwave until it’s hot but not boiling.
2. Pour the hot milk into a container with deep sides.
3. Submerge the handheld mixer in the milk and turn it on.
4. Move the mixer up and down to froth the milk.
5. Continue blending until the foam reaches your desired consistency.
Pros: If you already have a handheld mixer, this is a convenient option.
Cons: You need a handheld mixer, which is an additional tool you may not have.
Tips: Start with a low-speed setting and gradually increase the speed to froth the milk. Use a container that’s deep enough to prevent splashing. You can also use cold milk with this method.
The Steam Wand Technique
If you have an espresso machine with a steam wand, you can use it to froth milk.
1. Fill a pitcher with cold milk up to the bottom of the spout.
2. Place the pitcher under the steam wand and turn on the steam.
3. Keep the wand just below the surface of the milk as you steam.
4. As the milk warms up, lower the pitcher to keep the wand just below the surface of the milk.
5. Stop steaming when the milk has reached your desired temperature.
6. Use a spoon to skim off any large bubbles.
Pros: The steam wand technique creates the most dense and consistent foam.
Cons: You need an espresso machine with a steam wand, which is an expensive tool to invest in just for frothing milk.
Tips: Keep the pitcher at an angle to create a whirlpool effect that helps distribute the foam. Don’t overheat the milk, or it may taste burnt. Practice makes perfect with this method.
Conclusion
Now you know that you don’t need a frother to get the perfect frothy milk for your drinks. Whether you’re using the classic whisk method, the jar technique, the French press technique, the hand blender technique, the milk frother substitute, or the steam wand technique, there’s a method that will work for you. Each technique has its pros and cons, so don’t be afraid to try them all out to see which one works best for you. With a little practice, you’ll be a pro at frothing milk without a frother in no time.