How to Frame a Window: A Step-by-Step Guide for DIY Home Improvement
Fr framing a window can sound like a daunting task, but it can also be a rewarding DIY home improvement project that adds value and personality to your home. By framing a window, you not only enhance its aesthetic appeal but also reinforce its structure and insulation.
This article provides you with a comprehensive guide on how to frame a window, including step-by-step instructions, necessary tools and materials, expert insights, common mistakes to avoid, and creative ideas that make your window frames stand out.
Step-by-Step Guide
Before you start framing a window, you need to take a few preparatory steps to ensure that your project runs smoothly.
First, measure the window to determine its size and shape so that you can cut the appropriate lumber that fits into the rough opening. Prepare the rough opening by removing any debris, aligning the edges, and adding sill plates and header. Next, decide on the frame size and mark the lumber according to the dimensions.
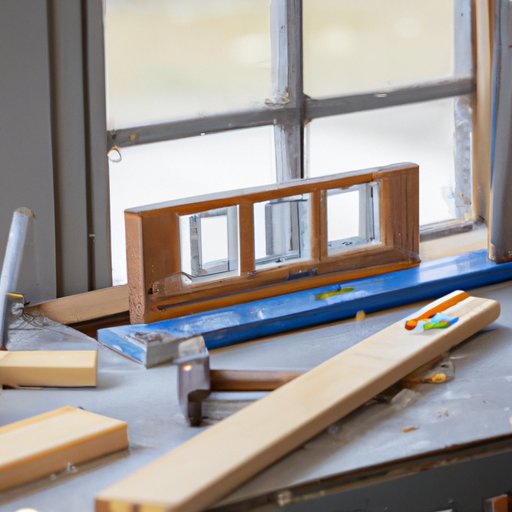
The following tools and materials are essential in framing a window:
- Lumber
- Nails and screws
- Hammer
- Drill
- Saw
- Sill plate
- Header
- Studs
- Strapping
- Insulation
Once you have the necessary tools and materials, you can follow these steps:
- Install the Sill Plate
- Add the Header
- Install the Studs
- Add Trimmers
- Insulate the Frame
- Add Exterior Sheathing
- Add Exterior Trim
Place the sill plate above the rough opening and secure it in place using screws. Make sure it’s levelled so that the window frame sits flat on it.
The header supports the weight of the window frame. Install it on top of the frame and make sure it’s levelled and securely nailed or screwed in place.
Attach the studs to the header and sill plate using nails or screws. Make sure they’re straight and properly spaced (usually 16 inches apart).
Trimmers are vertical studs on each side of the window frame and help to secure its placement. Attach them to the sill plate and the header using screws or nails.
Insulation helps to regulate the temperature and reduce noise levels. Install insulation between the studs and trimmers, and remove any excess.
Sheathing protects the window frame from moisture and helps keep insulation in place. Install it over the insulation and secure it using nails.
The trim adds a finishing touch to your window frame. Install it over the siding and sheathing, and make sure it’s securely nailed.
You can add a coat of paint or any other finish to match your home’s décor and personal preferences.
It’s essential to emphasize safety precautions throughout the framing process, including using protective gears such as goggles, gloves, and safety shoes. Also, ensure that the power tools are correctly connected and unplugged when not in use.
Tools and Materials
When shopping for framing tools and materials, consider factors such as quality, price, and user-friendliness. Wooden lumber is a popular choice for window framing due to its insulating properties. Other materials include steel, aluminum, vinyl, fiberglass, and composite materials.
For lumber, you can choose from a variety of wood types such as pine, cedar, redwood, and oak. Consider the wood’s texture, color, and cost when making your choice.
When it comes to power tools, some of the options include cordless drills, nail guns, circular saws, and reciprocating saws. You can also rent these tools from home improvement stores if you don’t intend to use them frequently.
Other essential framing materials include nails, screws, joist hangers, metal brackets, and masonry screws. Be sure to buy these in the right sizes and quantities to avoid running out of supplies before completing your project.
Expert Insights
DIY window framing can present several challenges, especially if you’re not familiar with the process. Interviewing framing, carpentry, or DIY home improvement experts can offer useful insights and best practices for window framing.
One of the experts we talked to is John Davis, a framing contractor with over fifteen years of experience. According to him, “Pre-planning is key to a successful framing project. Measure twice, cut once, and take the time to understand the entire process before starting.”
Experts like John can offer valuable advice on choosing the right materials, cutting lumber to the right size, and obtaining permits from local authorities. Other professionals include online forums, YouTube channels, and DIY blogs that offer step-by-step instructions and tutorials.
Common Mistakes
DIY enthusiasts often make mistakes that can set back their window framing project or negate its results. Some of the most common mistakes to avoid include:
- Incorrect measurements
- Using the wrong size nails or screws
- Overcutting or under cutting lumber
- Misaligned header and sill plates
- Ignoring building codes and regulations
One way to avoid or fix these mistakes is to plan your project meticulously and seek advice from experts or online resources. If necessary, hire a professional contractor to assist you or assess your work before progressing further.
Creative Ideas
Once you have framed your window, you can add a few creative touches that make it stand out from the rest. Some of the creative ideas for window frames include:
- Choosing unique designs or color themes to match your home décor or personal preferences
- Adding artwork or decals on the window frame
- Installing LED lights around the window frame for a cozy feel
- Decorating the window frame with a window box containing flowers or plants
You can experiment with various ideas and designs to make your window frame unique and personalized.
Conclusion
Framing a window can be a rewarding DIY project that enhances your home’s aesthetic appeal and adds value. By following the step-by-step guide provided in this article and avoiding common mistakes, you can easily achieve this goal. Remember to take safety precautions, use the right tools and materials, seek expert insights when necessary, and add a touch of creativity to your finished work.