I. Introduction
Have you ever been fascinated by the beauty of wings? Do you want to learn how to draw them in a realistic and imaginative way? Drawing wings can be challenging, but with the right technique and practice, you can create stunning designs that will impress your friends and loved ones. This article will provide you with a step-by-step guide on how to draw different types of wings, from bird and butterfly wings to dragon and angel wings. Get ready to spread your creative wings and soar to new heights!
II. Step-by-Step Tutorial on How to Draw Realistic Bird Wings
Bird wings are unique and come in different shapes and sizes. Drawing them can be challenging, but the results can be breathtaking. To draw realistic bird wings, you need to pay attention to the feather structure and placement. Here’s a step-by-step guide:
- Start with a basic outline of the wing.
- Add the primary feathers located at the tip of the wing.
- Add the secondary feathers located in the middle of the wing.
- Add the coverts, which are the small feathers that cover the base of the primary feathers.
- Shade the feathers to add texture and depth to the wing.
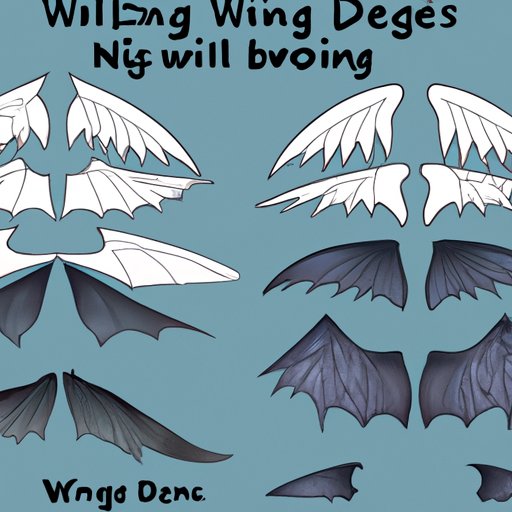
III. How to Draw Fantasy Wings, including Dragon and Angel Wings
Fantasy wings come in different shapes and sizes and can be inspired by different creatures, such as dragons and angels. To draw dragon wings, you need to pay attention to the scales and the bat-like appearance. To draw angel wings, you need to pay attention to the feather structure and glow. Here’s a step-by-step guide:
- Start with a basic outline of the wing.
- Add scales or feathers depending on the type of wing.
- Add texture to the scales or feathers to create a sense of motion.
- Add shadows to add depth to the wing.
- Highlight the wing to create a glow effect (for angel wings).
IV. Guide to Drawing Butterfly Wings, from Symmetry to Coloring
Butterfly wings are known for their symmetrical shapes and vibrant colors. To draw butterfly wings, you need to pay attention to the symmetry and coloring. Here’s a step-by-step guide:
- Start with a basic outline of the wing.
- Draw the veins that run through the wing.
- Add the color to the wing, paying attention to the pattern and gradient.
- Blend the colors to create a realistic effect.
V. Tips and Tricks for Drawing Feathered Wings, including Shading Techniques
Feathered wings are known for their soft and fluffy appearance. To draw feathered wings, you need to pay attention to the texture and shading. Here are some tips and tricks:
- Start with a basic outline of the wing.
- Add the primary and secondary feathers.
- Shade the feathers to create a sense of depth and texture.
- Use cross-hatching to create the illusion of feathers overlapping.
- Use a blending tool to soften the shading.
VI. Video Tutorial on Drawing Bat Wings, including how to depict the texture of the wings
Bat wings are known for their unique shape and texture. To draw bat wings, you need to pay attention to the texture and shading. Here’s a video tutorial on how to draw bat wings:
VII. Guide to Drawing Winged Characters, including how to incorporate the wings into the overall design
Winged characters can be found in different forms of media, such as movies, TV shows, and comics. To draw a winged character, you need to pay attention to the species and the overall design. Here’s a step-by-step guide:
- Start with a basic outline of the character.
- Add the wings, paying attention to the species and the size.
- Incorporate the wings into the overall design, making sure they are balanced and proportional.
- Add texture and shading to the wings to make them stand out.
VIII. Breakdown of the Anatomy of Wings, including Muscles and Bone Structure, to help with Realistic Drawing
To draw realistic wings, it’s important to understand the anatomy of wings, including the bone structure and muscles. Here’s a breakdown:
- The humerus bone is the upper bone of the wing that connects to the bird’s body.
- The ulna and radius bones are the two lower bones of the wing that connect to the wrist.
- The primary feathers are the longest feathers located at the tip of the wing.
- The secondary feathers are the shorter feathers located in the middle of the wing.
- The alula is the small feather located at the base of the primary feathers.
- The coverts are small feathers that cover the base of the primary and secondary feathers.
- The pectoral muscles are the main muscles that control the movement of the wings.
IX. Conclusion
Drawing wings can be challenging, but with the right technique and practice, you can create stunning designs that will impress your friends and loved ones. In this article, we covered different types of wings, including bird, butterfly, dragon, angel, bat, and feathered wings, as well as the anatomy of wings. We hope this article has inspired you to spread your creative wings and explore the world of winged art. Remember, practice makes perfect, so keep practicing and experimenting with the different techniques covered in this article.