Introduction
Hello Kitty has become one of the most well-known and beloved characters around the world. With her trademark bow and adorable face, she has become an icon of cuteness and charm. This article will explain how to draw Hello Kitty in a step-by-step guide that is perfect for beginners. Whether you are a fan of Hello Kitty or just looking to improve your drawing skills, this article will help you create your own cute and charming version of the character.
Why Hello Kitty is an Easy Character to Draw
Hello Kitty’s simple design makes her a great subject for beginner artists. Her round face, lack of a mouth, and simplified features make her easy to replicate. Plus, with her basic design, it’s easy to customize her outfit, accessories, and background to suit your individual taste.
Step-by-Step Guide to Drawing Hello Kitty
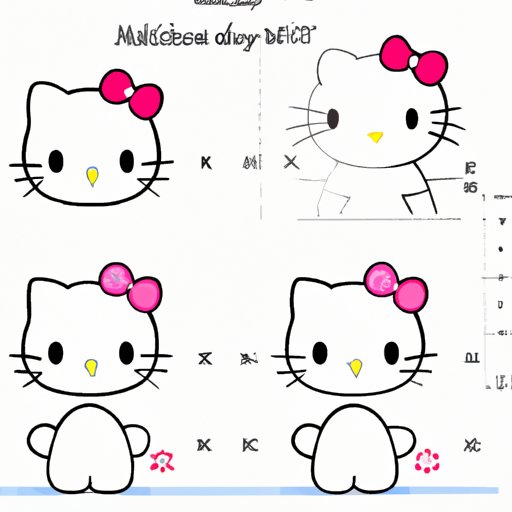
To begin, start with a circle for the head and a smaller circle for the nose. Next, draw two vertical lines for the eyes and a horizontal line for the nose. Fill in the eyes with ovals and add dots for the pupils. Draw two triangles for the ears and add a bow in the center of the head. Draw two small circles at the bottom of the head for the feet and add two small lines for the arms.
Next, draw a slightly curved line just below the nose. This will be the top of the mouth. Then, draw a small half-circle for the tongue and two curved lines for the whiskers. Connect the arms to the body with small round circles.
Finally, draw two curved lines for the body and add a rectangle for the dress. Finish off with two curved lines, one on each side of the dress, for the arms.
Tips for Customizing Hello Kitty
Once you have the basic design down, it’s time to have fun customizing Hello Kitty. You can create a unique look for your character by adding different accessories, outfits, or backgrounds. Consider giving her a hairstyle, such as pigtails or bangs. You can also add a collar or necklace around her neck.
For a more creative touch, try designing a background that complements Hello Kitty’s cuteness. You could add flowers, hearts, or other cute elements to complete your drawing.
Refining and Perfecting the Final Product
Once you’re finished with your drawing, it’s important to refine and perfect the final product. One way to add depth and nuance is to add shading, highlights, and texture to the drawing. Use a 2B or 4B pencil to add shading to the various parts of Hello Kitty’s body. This will create a more three-dimensional look.
You can also add highlights by using an eraser to lighten certain areas of the drawing, such as the top of Hello Kitty’s head or the top of the bow. Finally, you can add texture, such as fur or fabric, by using small flicks of the pencil.
Conclusion
Now that you’ve learned how to draw Hello Kitty, it’s time to put your new skills to the test. With her simple design and charming personality, Hello Kitty is the perfect subject for aspiring artists. Remember to practice often and keep refining your skills. Who knows, maybe one day you’ll create your own iconic character.