Introduction
Whether you’re sketching anime characters or creating realistic portraits, knowing how to draw hair is an essential skill for every artist. Hair can set the tone and attitude for a portrait and be a significant differentiator between unique character designs. This guide provides beginners with a step-by-step tutorial on how to draw hair that looks realistic and expressive. It also covers common mistakes to avoid, picking the right tools, creating texture, different hair styles, shading techniques, and drawing different hair types.
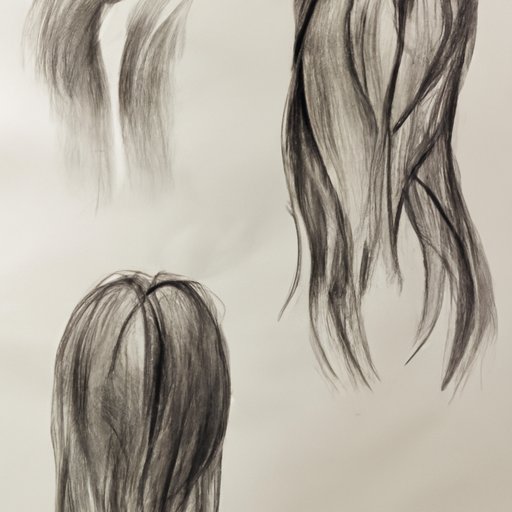
Step-by-Step Tutorial
The first thing to do when learning to draw hair is to break it down into basic shapes and create a foundation for the hair. Start by drawing an outline of the shape of the head and where you want the hair to fall. Once you have established the shape, start drawing simple shapes that will be composed of different hair strands.
Next, focus on adding more details to the basic shapes to illustrate the texture and style of the hair. Determine whether you want the hair to be straight, wavy, or curly. Start adding more strands to the foundation of the hair, moving from the base to the end of the hair. Remember to add highlights and shadows to add depth and dimension to the hair.
Observing real-life hair can help you get a sense of different textures, shapes, and styles. Studying hairstyles and lengths can help you develop a sense of the movement and flow of hair. Internet searches and photograph references can help you find inspiration for a wide range of hair types, textures, and styles.
Common Mistakes to Avoid
One of the most common mistakes made by beginners when drawing hair is focusing too much on the details, especially with the strands of hair. Ensuring that the hair flows in a natural and organic capacity is essential as almost nobody’s hair looks stiff like cardboard. Without natural flow, the hair will appear mechanical and mess up the entire portrait.
Another mistake beginners make is drawing hair too flat and not adding enough depth and dimension. When there’s no sense of where the light comes from, even the most stylized of hair will lose its rumpled volumes and appear flat.
Picking the Right Tools
The right tools for drawing hair depends on individual preference and desired outcome. Graphite pencils are ideal for creating realistic hair, while mechanical pencils can be suitable for sketching. Ink pens can create intriguing line art and help create different looks like hatching or crosshatching.
Digital tools can provide several advantages over traditional pencil and paper methods. Tablets and drawing software like Adobe Illustrator allow artists to create art digitally, providing more flexibility and the opportunity to experiment with different techniques without wasting paper and ink. They offer an endless range of layers for an adequate workflow and, obviously, the ability to undo or delete a stroke, which is not possible when working traditionally.
Creating Texture
Texture is crucial when drawing hair to create depth and detail within the piece. Depending on the hair type, whether straight, curly or wavy, it’s necessary to add several lines to the hair strands to reflect this. Curly hair, for example, has spiralled tufts that require small, spiral lines to be added to the hair for a more visually apparent as opposed to straight hair which would require smoother strands.
Different Hair Styles
Hairstyles can help define a character or subject, adjust the mood of portraits, and highlight different facial features. Ponytails look good on people with strong facial features as it pinpoints the shape of their face. Braids are usually seen on people with long hair; however, they can also be used to frame a face.
Shading Techniques
There are several shading techniques that you can use when drawing hair to create more realistic, dimensional-looking pieces. Determine the direction of light that you want the drawing to show, and then use shading to mimic how light falls across the hair. Use hatching and cross-hatching techniques to create darker areas, shadows, and create a sense of three-dimensionality.
Drawing Different Hair Types
Each hair type demands different approaches when drawing hair. Straight hair strands would work smoothly in a vertical form whereas curly hair strands would be smaller, twisty, and more organic. Afro hair would require the most significant amount of volume, and you have to construct this little by little to achieve a look that is both realistic and elegant.
Conclusion
Drawing hair accurately can take practice and a sharp eye for details. Artists need to consider the characteristics of the hair type, style, and context when creating hairstyles in a character portrait. Understanding the different tools, textures and techniques for drawing hair can provide you with a wealth of new options and help bring your art to the next level.