Introduction
Drawing eyes is an essential skill that every artist should master, regardless of their niche. Whether you’re painting portraits or creating illustrations, realistic eye-drawings can take your artwork to the next level. Knowing how to draw eyes realistically is important because the eyes are the window to the soul, and they play a critical role in depicting the emotions and personality of your subject.
This article will provide you with a comprehensive guide on how to draw eyes realistically. We will cover everything from the anatomy of the eye to eye-drawing styles, mistakes to avoid, and a 30-day sketchbook practice challenge.
Step-by-Step Guide for Drawing Eyes Realistically
Before we dive into the step-by-step guide, it’s important to understand the basic elements of drawing realistic eyes. The key elements include the iris, pupil, eyelashes, and tear duct.
Drawing the Iris
The iris is the colored part of the eye that surrounds the pupil. To draw a realistic iris, start by drawing a circle in the center of the eye. Then add a darker ring around the circle to represent the pigmentation of the iris. Finally, add slight variations in color and texture to create depth and realism.
Drawing the Pupil
The pupil is the black part of the eye that dilates or constricts based on lighting conditions. To create a realistic pupil, start by drawing a small black circle in the center of the iris. Then add a reflection on the top of the pupil to create the illusion of moisture and depth.
Drawing the Eyelashes
Eyelashes frame the eyes and add definition and depth to your drawing. Use short, wispy lines to create a more natural look. Start with a thicker line near the eyelid and gradually taper the lines towards the edge of the eyelid.
Drawing the Tear Duct
The tear duct is located at the corner of the eye closest to the nose. Use light strokes to create a subtle curve at the corner of the eye and blend it in with the skin around the eye.
Techniques Suitable for Realistic Eye-Drawings
Various techniques can be used while drawing realistic eyes, including shading, cross-hatching and stippling. Shading can add dimension and depth, while cross-hatching and stippling create texture and detail. Also, blending with a blending stump or a soft brush can soften the edges and create a smooth transition between tones.
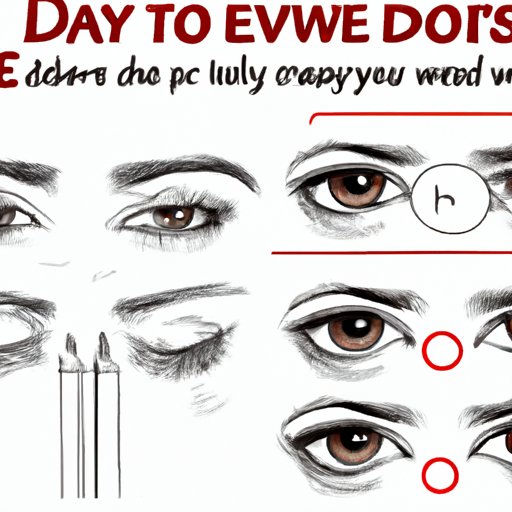
Descriptive Diagrams
Here’s a descriptive diagram of a realistic eye-drawing process:

Video Tutorial for Drawing Eyes Realistically
Sometimes, a visual and auditory learning experience can be helpful. If you’re new to eye-drawing or looking for additional guidance, I recommend this video tutorial featuring easy-to-follow, step-by-step instructions for drawing eyes realistically.
Click HERE to watch the tutorial now.
Sketchbook Practice Challenge for Improving Eye-Drawing Skills
The key to improving your eye-drawing skills is constant practice. Here’s a 30-day challenge to help you practice drawing eyes in different styles and angles:
Day 1: Draw a realistic eye from a straight angle.
Day 2: Draw a realistic eye from a side angle.
Day 3: Draw a realistic eye with highlights.
Day 4: Draw a realistic eye with shadows.
Day 5: Draw a realistic eye with tears.
Day 6: Draw a realistic eye with eyelashes.
Day 7: Draw a realistic eye in black and white.
Day 8: Draw a realistic eye in color.
Day 9: Draw a realistic eye from a bird’s eye view.
Day 10: Draw a realistic eye from a worm’s eye view.
Continue practicing from day 11-30 with different styles and angles.
Anatomy of the Eye
To draw realistic eyes, it’s important to know the key components and their functions. Here’s a breakdown:
Cornea:
Clear, dome-shaped tissue on the front surface of the eye that covers the iris and pupil.
Sclera:
The white outer layer of the eye that protects it and helps maintain the shape.
Iris:
The colored part of the eye that surrounds the pupil and controls the amount of light entering the eye.
Pupil:
The black hole in the center of the iris that lets light enter the eye.
Retina:
The layer of tissue lining the back of the eye that contains photoreceptor cells that sense light and send signals through the optic nerve to the brain.
Optic Nerve:
The nerve that transmits visual information from the retina to the brain.
Comparison of Eye-Drawing Styles
There are different eye-drawing styles based on different art styles. Here are some of them:
Realistic:
Realistic eye-drawing has a lot of detail and follows accurate proportions, giving the eye a lifelike appearance.
Cartoonish:
Cartoonish eye-drawing appears in simpler forms and brighter colors, usually exaggerated to match the tone of the character they belong to.
Exaggerated:
Exaggerated eye-drawing involves transforming the eye into an exaggerated, anatomically-impossible shape. It is used in storybooks and comics.
To achieve each style, experiment with line thickness, facial expressions, and subtle details.
Materials Guide for Drawing Eyes Realistically
The type of materials you use can greatly affect the quality and style of your eye drawing. Here’s a guide to some of the best materials to use while drawing eyes realistically:
Pens:
Fineliners and technical pens are perfect for creating fine lines and details.
Inks:
India ink and alcohol-based markers provide a wide range of colors and add a professional look to your drawing.
Papers:
Smooth and heavyweight drawing papers work best with pens and inks. Watercolor papers can be used for watercolor pencils and gouache.
Brushes:
Synthetic brushes are perfect for applying ink or watercolor for fine lines and details.
Choose materials that match your personal style and preference.
Mistakes to Avoid When Drawing Realistic Eyes
Here are some common mistakes to avoid while drawing realistic eyes:
Overusing Shading:
Overusing shading can make the eye look dirty.
Inaccurate Proportioning:
Inaccurate proportioning of the eye elements can make the eye unrealistic or distorted.
Mismatched Eyelids:
Mismatched eyelids on both eyes can make the face look asymmetric and odd.
To avoid these mistakes, it’s important to observe real-life references while drawing.
Conclusion
Drawing eyes realistically can elevate your artwork skills to the next level. By following our step-by-step guide, practicing, and experimenting with different styles and materials, you can become a pro at eye-drawing. Remember, practice and patience are the keys to mastering any skill, so keep practicing and experimenting until you find your unique eye-drawing style.