I. Introduction
Getting eyelashes right can make or break a beautiful drawing of an eye. Drawing eyelashes adds depth and dimension to any eye artwork, but many people struggle with it. In this article, we’ll guide you through the process of drawing eyelashes, including tips, tricks, and techniques for creating realistic and beautiful illustrations. Let’s get started!
II. A Step-by-Step Guide to Drawing Eyelashes
Before you start drawing, you should have the right tools. Here are some general materials that you’ll need to have on hand:
- Pencils (H, HB, 2B)
- Eraser (kneaded eraser or gum eraser)
- Blending tool (tortillon or blending stump)
- Paper (sketchbook paper or Bristol board paper)
A. Steps to Follow
Now we’ll walk you through the steps to draw eyelashes:
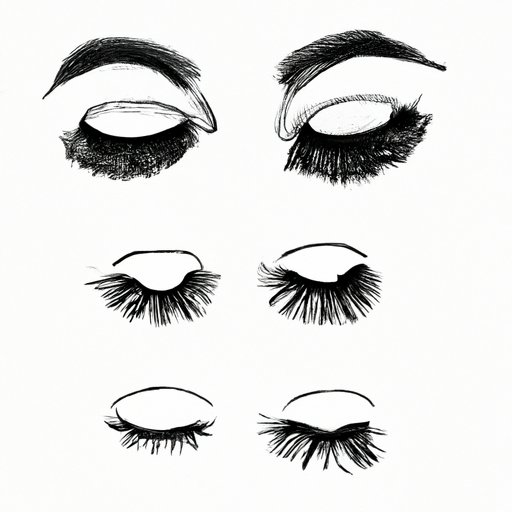
1. Basic Strokes
Start by drawing a line for the base of the eyelashes. Draw the upper and lower eyelashes with short, sharp lines, keeping them pointed in the direction you want the eyelashes to go. These short lines should be thin towards the base, but gradually become thicker toward the tips. Be sure to leave space between the eyelashes to create a natural look.
2. Creating Different Styles and Effects
To create different styles and effects, vary the length, curl, and thickness of the lashes. Longer eyelashes make the eyes look more dramatic, while shorter eyelashes create a natural look. For a more glamorous look, make the eyelashes curl upwards. To create thicker eyelashes, draw wider strokes or darker lines. You can even add mascara by darkening the tips of the lashes with a softer pencil.
B. Tips and Tricks
Here are some tips and tricks to keep in mind when drawing eyelashes:
- Start by drawing the general shape of the eye before adding in eyelashes.
- Study real eyelashes to get a better understanding of their shape, thickness, and curl.
- Use an eraser to refine the shape of the lashes and remove any unwanted lines.
- Use a blending tool to create a smooth transition between the eyelashes and the rest of the eye.
- Experiment with different pencil grades and shading techniques to add depth to your drawings.
III. Comparison of Media for Drawing Eyelashes
Different media can be used to draw eyelashes, including pencils, pens, and paints. Here’s an overview of the pros and cons of each:
A. Different Types of Media
- Pencil – versatile and easy to control for beginners, but not as bold as other media.
- Pen – creates bold, precise lines, but less room for error and harder to blend.
- Paint – a great way to create a soft and realistic look, but can be challenging for beginners.
B. Best Mediums for Beginners
If you’re a beginner, we recommend starting with pencils. They’re easy to control and have a soft texture that can be used to create a range of different effects. Once you’ve mastered pencils, try experimenting with pens or paint.
C. Tips for Experimenting with Different Media
When experimenting with different media, play around with the pressure and stroke of the tool to create different effects. Blend with your fingers or a blending tool to create soft lines and shades.
IV. Common Mistakes and How to Avoid Them
A. Common Mistakes While Drawing Eyelashes
Some common mistakes people make while drawing eyelashes include:
- Drawing lashes that are too long or too thick, which can make the eye look unnatural.
- Drawing the lashes too close together, which can make the eye look too crowded.
- Not leaving enough space between the eyelashes, which can make them look clumped together.
B. Tips to Avoid Them
To avoid these mistakes, take your time and study the natural shape of eyelashes. Use short, sharp lines to create a natural look and vary the length, thickness, and curl of the lashes. Leave space between the lashes to create a natural appearance and refine the shape with an eraser.
C. Examples
Here are some examples of common mistakes when drawing eyelashes and how to fix them.

V. Adding Eyelashes to Different Eye Shapes
A. Different Eye Shapes
Different eye shapes require different techniques for drawing eyelashes. Here are some examples:
- Round eyes – draw longer lashes in the center of the eye with shorter lashes near the corners.
- Almond-shaped eyes – draw lashes that fan out, getting longer towards the outer corners.
- Hooded eyes – draw longer lashes in the center of the eye, but avoid drawing them too long on the outer corners, as this can weigh down the eye.
B. How to Adjust Eyelash-Drawing Technique
To adjust your technique for different eye shapes, study the natural shape of the eye and draw your lashes to complement it. Use longer lashes to create a more dramatic look or shorter lashes for a more natural look. Be sure to adjust the length and curl of the lashes to suit the shape of the eye.
C. Examples
Here are some examples of how to draw eyelashes for different eye shapes.

VI. Creative Ideas and Inspiration
A. Different Art Styles
Drawing eyelashes can be used in a variety of art styles, including realism, comics, and cartoons. Experiment with different styles to find the one that best suits your art style.
B. Creative Ideas for Incorporating Eyelashes
Here are some creative ideas for incorporating eyelashes in your artwork:
- Use eyelashes to create animal portraits (like drawing a lion’s mane)
- Create a piece of art that focuses solely on eyelashes
- Draw eyelashes in unusual places, like on a tree or a leaf
C. Using Eyelashes to Convey Emotions
Eyelashes can also be used to convey emotions in your artwork. For example, long, thick lashes can make the eyes look sultry, while shorter lashes can make the eyes look more innocent or youthful.
VII. Conclusion
A. Recap of the Article
Drawing eyelashes can be a challenging aspect of eye artwork. We hope this guide has provided you with the knowledge and techniques you need to create beautiful and realistic eyelashes. We covered the basic steps to drawing eyelashes, compared different media, discussed common mistakes, explored techniques for different eye shapes, and provided creative inspiration for incorporating eyelashes in your artwork.
B. Final Thoughts
Remember, drawing takes practice and patience. Don’t get discouraged if you don’t get it perfect the first time. Keep experimenting with different techniques and media to find what works best for you. Drawing is an art that should be enjoyed, so have fun with it!
C. Encouragement to Try Out New Techniques and Experiment with Different Media
We encourage you to try out new techniques and experiment with different media to find your own unique style. Don’t be afraid to make mistakes, as they can often lead to unexpected and beautiful results. Keep practicing and soon you’ll be creating beautiful eyelashes that will bring your artwork to life.