I. Introduction
Butterflies are some of the most beautiful insects on the planet. Their vibrant colors and intricate patterns make them the perfect subject for an artist’s drawing. However, the process of drawing a butterfly may seem daunting to beginners. That’s why we’ve put together this comprehensive guide to show you how to draw a butterfly step-by-step. In this article, we will cover everything from basic shapes to butterfly anatomy, mixed media, and incorporating symbolism. By the end of this article, you will feel confident in your ability to draw a stunning butterfly.
II. Step-by-Step Guide on Drawing a Butterfly
Before you start drawing, you need to gather the necessary materials. This includes pencils, erasers, papers, tracing paper, drawing compass, watercolors, and markers.
Start with basic shapes and lines to create an outline of the butterfly. Draw a rectangle to represent the body, and add circles for the head and antennae. Then, add the wings using simple shapes. Next, add details and color gradually. Use shading techniques to give your butterfly depth and dimensionality, and don’t be afraid to experiment with colors.
Helpful tip: Use a light hand when drawing the initial outline, and gradually add darker lines as you refine the drawing. This will help you avoid mistakes and make changes as you go.
III. Learn to Draw Butterfly Wings
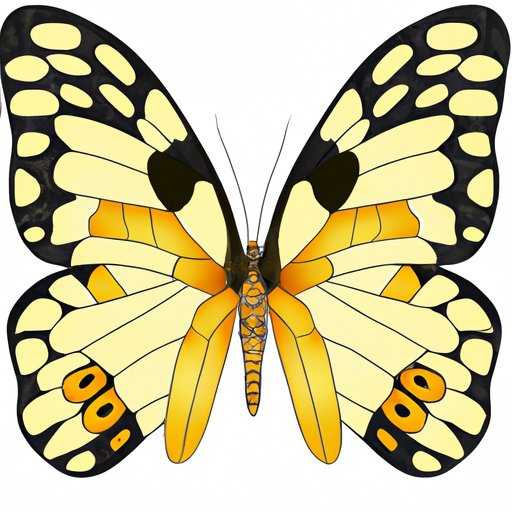
Butterfly wings are what make this insect so unique and beautiful, making them a crucial part of your drawing. To start, you need to understand the anatomy of a butterfly’s wings. They consist of the forewings and hindwings and are composed of delicate scales. These scales give butterflies their unique patterns and colors.
Once you understand the anatomy of the wings, it’s time to start adding color and patterns to your drawing. Use pencils, markers, and other drawing tools to get the colors and patterns right. Draw a variety of wings, from basic to advanced, until you are comfortable with your abilities.
Step-by-Step guide to drawing different types of wings:
- Basic butterfly wings – Start with a simple V-shape to represent the wing, and add curves to each side to create the shape of the wing
- Advanced butterfly wings – Use the same basic V-shape, but add more curves and angles to make the wing more realistic.
- Moth wings – Moths have feathery wings that look different from butterfly wings.
- Butterfly wings with an open surface: These wings give you a great chance to experiment with colors and patterns.

IV. Creating Butterfly Art Using Mixed Media
To make your butterfly-themed art stand out, you can use various materials, such as glitter, collage, and watercolors. Mixed media artwork is a great way to add a personal touch to your drawing. There are numerous ways to combine media, and it’s all up to your creativity.
The first step to creating mixed media butterfly art is to gather your materials. You can use glitter, buttons, beads, and fabric in your art. Cut out butterfly shapes from paper and glue them to your canvas. Fill in the white spaces with watercolors or markers. You can incorporate collage pieces or construct a three-dimensional butterfly using layers of paper.
Encouragement to personalize your drawing through creative expression:
- Experiment with different color combinations.
- Add texture and depth to your drawing.
- Explore various media and techniques to create a unique masterpiece.
V. Master the Art of Symmetry
To create a perfect butterfly drawing, you need to understand symmetry. Butterfly wings are a great opportunity to practice symmetry skills. Symmetry is a crucial element in creating a visually pleasing composition. Even though butterflies have some irregular patterns and shapes, the symmetry makes them look visually appealing.
To achieve balance and symmetry while sketching butterfly wings, start by drawing one half of the butterfly wing. Use a piece of tracing paper to trace the same half of the butterfly wing, then flip it to make the opposite side. This will help ensure that both wings are symmetrical.
Tips and tricks to make your drawings a masterpiece:
- Use a soft pencil like 2B or 4B for shading.
- Avoid overblending to maintain a realistic texture.
- Study butterfly wings to understand the patterns and colors better.
VI. Butterfly Anatomy for the Artist
An in-depth look at a butterfly’s anatomy can provide you with a better understanding of how to create a realistic butterfly drawing. We’ve already discussed the components of butterfly wings, but there are other key features to keep in mind when drawing butterflies.
The antennae are one of the most recognizable features of butterflies. They are long and thin, with small knobs at the ends. The eyes of butterflies are large and colorful, and the body has various segments that are more prominent near the head. The legs are thin and feature three segments.
Highlight key features like antennae, eyes, and scales, and learn to integrate these details into your butterfly drawing. When drawing these details, be very detailed and use fine pencils or pens to ensure accuracy.
VII. Incorporating Butterflies into a Larger Piece
If you want to create a beautiful nature scene or pattern for home textiles, incorporating butterflies into a drawing can be an excellent idea. There are numerous ways to add one or many butterflies to a composition, such as drawing a group of butterflies flying above a garden or landing on flowers.
When drawing a larger scene, consider the other elements such as colors, textures, and shapes. It’s a good idea to plan out your composition before you start drawing. You can also add textures, such as patches of grass or flowers, to the background to add depth and dimension to your drawing.
VIII. Drawing Inspiration from Butterfly Symbolism
Butterflies have many meanings and symbolisms in various cultures. Butterflies represent personal growth and transformation, freedom, and renewal. Drawing inspiration from butterfly symbolism can add deeper meaning to your artwork.
When drawing a butterfly, think about the symbolism you want to incorporate. Consider the colors, patterns, and shapes. What message do you want to convey through your drawing? By incorporating butterfly symbolism, you can create a unique and meaningful artwork.
IX. Conclusion
In conclusion, learning how to draw a butterfly can seem intimidating at first, but with the right tools and techniques, anyone can do it. Use this step-by-step guide and the tips provided to create a visually appealing butterfly drawing. Remember to practice regularly and experiment with different media.
If you’re serious about improving your drawing skills, consider taking an online course or attending a local art class. Additionally, there are numerous resources online, such as art forums and instructional videos, that can help you improve your skills.
With hard work, dedication, and the right attitude, you can become an accomplished artist and draw stunning butterfly drawings.