Introduction
Bears are fascinating creatures, known for their strength and agility, and are often depicted in artwork as symbols of power and courage. Drawing a bear can be daunting for beginners, but with a bit of practice and patience, anyone can learn to do it. In this article, we will explore different approaches to bear drawing, from realistic portrayals to cartoon-style creations, line drawings, watercolors, and even collaborative techniques. Whether you want to create a fierce grizzly or a cuddly teddy bear, this guide has got you covered.
Step-by-Step Tutorial
Before diving into the different approaches to bear drawing, let’s start with a simple step-by-step tutorial that applies to any style you choose.
- Start with basic shapes: Draw a large circle for the bear’s head and a smaller circle for the body.
- Sketch the outline: Connect the two circles to form the bear’s body using curved lines. Add a small circle for the nose and two half-circles for the ears.
- Add details: Draw a line for the mouth and small circles for the eyes. For a realistic bear, add details such as the nose bridge, whiskers, and claws. For a cartoon-style bear, you can exaggerate the features, such as making the eyes larger or the nose rounder.
- Color and shade: Decide on the colors for your bear and fill it in, adding shading and highlights as necessary. For watercolors, start with light washes and build up the layers gradually.
- Final touches: Erase any unnecessary lines and add any finishing details, such as fur, shadows, or backgrounds.
Practice this tutorial a few times on your own before moving on to the other approaches.
Cartoon-style Drawing
If you want to create a bear drawing that is playful and whimsical, cartoon-style is the way to go.
Step 1: Start by drawing a large head and a smaller body, just like in the tutorial. The eyes should be big, round, and placed close to each other to enhance the cute factor.
Step 2: Draw the ears as elongated triangles, and add a small round nose and an exaggerated mouth with a wide smile or a silly expression. The arms and legs can be stubby and rounded.
Step 3: Add some fun details, such as a bowtie or a hat, to give your bear some unique character. Remember to keep the shapes simple and easy to recognize.
Step 4: Color your bear with bright and cheerful colors, using markers, colored pencils, or digital tools. The shading and highlights can be minimal or nonexistent, as the focus is on the cuteness factor.
Step 5: Share your creation with others and make them smile!
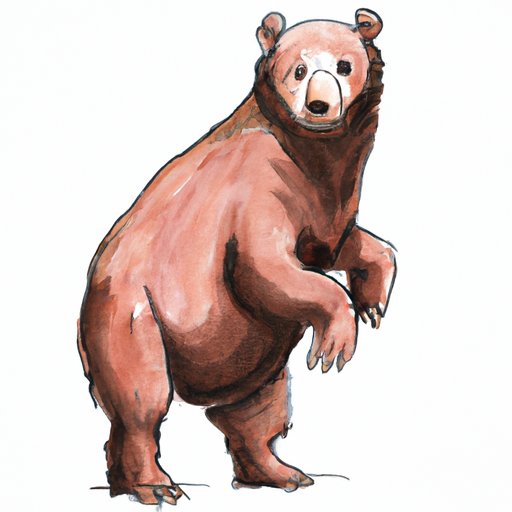
Realistic Portrayal
If you want to create a bear drawing that looks like it could roam the wilderness, a realistic portrayal is the way to go.
Step 1: Study images of real bears to understand their anatomy and muscle structure. Notice how the head is shaped, how the snout connects to the skull, and how the paws are structured.
Step 2: Sketch the basic shapes of the bear, but this time focus on creating the right proportions, such as the length of the snout, the size of the ears, and the shape of the paws. Use reference images to guide you.
Step 3: Add details such as the fur, the claws, and the nose bridge, using thin and precise lines. The shading and highlights should follow the direction of the fur and be layered lightly until the desired effect is achieved.
Step 4: Use a variety of pencils or pens to create a sense of depth and texture, such as a HB for sketching, a 2B for shading, and a 4B for highlights. Pay attention to the contrast between the light and dark areas of the bear.
Step 5: Step back and admire your realistic bear, and feel free to use it as a reference for future drawings.
Line Drawing
A line drawing is a minimalist technique that uses lines to create depth and texture. It is perfect for creating a simple yet striking bear drawing.
Step 1: Start with a rough sketch of your bear, using thin and light lines.
Step 2: Choose a thicker and darker pen or marker, and trace the outline of the bear, using bold and confident lines. Pay attention to the contours and curves of the bear’s shapes.
Step 3: Add details such as the fur, the eyes, and the nose, using a mix of thin and thick lines to create different textures. Vary the length and thickness of the lines to create a sense of depth and shadow.
Step 4: Use hatching, cross-hatching, or stippling techniques to create different shading effects. Pay attention to the direction and density of the lines to create a cohesive look.
Step 5: Admire your simple yet elegant line drawing, and use it as a starting point for more complex or colorful versions of your bear.
Watercolor Approach
Watercolors are a versatile and expressive medium that can create a beautiful range of colors and textures. Here’s how to use them to create a bear drawing.
Step 1: Start with a pencil sketch of your bear, using light and thin lines. Then, dip your brush in water and add light washes of color to create a base layer. Use lighter colors for the highlights and darker colors for the shadows.
Step 2: Let the first layer dry, and then add more layers of color, building up the intensity and contrast gradually. Pay attention to the direction of the fur and the contours of the bear’s shapes. You can also use a dry brush to create interesting textures and patterns.
Step 3: Use the tip of your brush or a fine-pointed pen to add details such as the eyes, the nose, and the fur. Be careful not to overload the paper with too much water or paint, as it can lead to bleeding or paper damage.
Step 4: Add a background if desired, using light washes of a complementary color or a contrasting color for a dramatic effect. Let the painting dry completely before framing it or hanging it on the wall.
Step 5: Admire your beautiful watercolor bear, and experiment with different styles and techniques to create your own unique art.
Collaborative Drawing
Collaborative drawing is a fun and engaging activity that allows people to contribute their own creativity to a shared project. Here’s how to start a collaborative bear drawing.
Step 1: Find a group of friends or family members who are interested in drawing or art. You can also join an online community that specializes in collaborative art projects.
Step 2: Start by drawing the basic outline of the bear, leaving some white space for others to add their own elements. Use light and thin lines to keep the drawing flexible and open to interpretation.
Step 3: Pass the drawing to the next person, who will add his or her own details, such as the eyes, the nose, or the fur. Encourage each other to be creative and playful, and to build on each other’s contributions.
Step 4: Continue passing the drawing around, adding new elements and details each time. You can also switch to different drawing mediums, such as markers or watercolors, to add more variety and excitement.
Step 5: When the drawing is complete, take a group photo or scan it and share it with others. Admire your collective creation and celebrate the power of collaboration and creativity.
Conclusion
Congratulations, you have now learned different approaches to drawing a bear, from cartoon-style to realistic, line drawing, watercolors, and collaborative techniques. Remember to keep practicing and experimenting with different styles and techniques, and to have fun while doing it. Bears are fascinating creatures that inspire us to unleash our creativity and embrace our wild side.