I. Introduction
If you’re an artist looking to add a powerful and majestic creature to your artwork, the tiger is a great choice. With its striking stripes and fierce features, the tiger is a favorite subject of many artists. However, drawing a tiger can be challenging, especially if you’re not sure where to start. That’s why we’ve put together this guide to help you learn how to draw a tiger step-by-step.
In this article, we’ll cover everything you need to know about drawing a tiger, from the materials you’ll need to the techniques for making your tiger look realistic. We’ll also include a video tutorial, tips for beginners, and insights into the cultural and anatomical perspectives of tiger artwork. By the end of this guide, you’ll be equipped with the skills and knowledge you need to create your own breathtaking tiger drawing.
II. Step-by-step guide
A. Introduction to the required materials
Before you start drawing, it’s important to have all the necessary materials on hand. Here are some of the things you’ll need:
- Paper (preferably sketch paper or watercolor paper)
- Pencils (graphite or colored pencils)
- Eraser
- Sharpener
- Blending tool (tortillon or blending stump)
- Ink (optional)
B. Drawing the basic shapes of the tiger
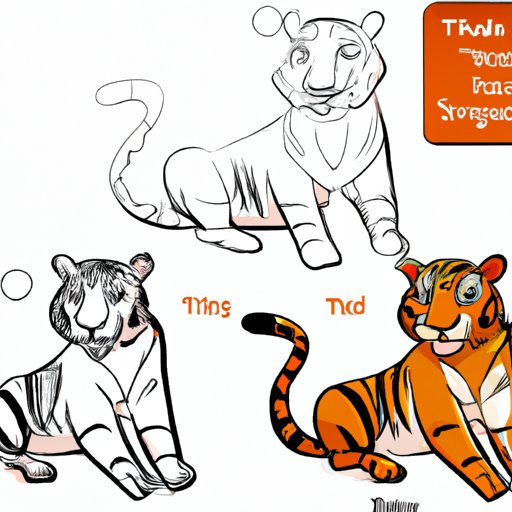
Begin by sketching the basic shapes of the tiger using light pencil strokes. Start with the head and draw a large circle for the face and two smaller circles for the ears. Then, draw a long oval for the body, and two more circles for the legs. Add a curved line for the tail.
C. Adding finer details to the sketch
Once you have the basic shapes, begin adding finer details to the sketch. Draw the tiger’s facial features, including the snout, eyes, and mouth. Next, add the stripes and patterns to the body and legs. Add the claws to the paws and the muscle definition to the legs, body, and tail.
D. Techniques for shading and highlighting
To make the tiger look more lifelike, use shading and highlighting techniques. Darken the areas on the tiger that are in shadow, and add highlights to areas that are catching light. Use a blending tool to create a smooth transition between light and dark areas. Add texture to the fur by creating short, overlapping pencil strokes.
E. Tips for adding final touches
When you’re nearly finished, step back and take a look at your drawing. Add any final touches to refine the details and make the drawing more realistic. Consider adding texture to the fur by using colored pencils or ink. Add more contrast to the shadows and highlights to create depth and dimension.
III. Visual guide: Video tutorial
A. Benefits of a video tutorial
For many artists, watching a tutorial can be more helpful than reading step-by-step instructions. That’s why we’ve included a visual guide in the form of a video tutorial. By watching an artist as they draw a tiger, you can see the techniques in action and get a better sense of how to apply them to your own drawing.
B. Explanation of techniques used in the tutorial
In the video tutorial, the artist starts with the basic shapes of the tiger and adds finer details using a variety of pencil strokes. They also use shading and highlighting techniques to create depth and texture. The artist adds ink to the drawing to create more contrast and definition in the final stages.
C. Commentary and tips for improved learning
Throughout the tutorial, the artist provides commentary on their process and offers tips for improved learning. They encourage viewers to experiment with different techniques and to not be afraid to make mistakes. They also offer advice on how to overcome common challenges, such as creating realistic-looking fur.
D. Accessibility of the video
The video tutorial is accessible online and can be watched at any time. It’s also free, making it an excellent resource for artists on a budget.
IV. Historical perspective
A. Significance of tigers in artwork
Tigers have played an important role in art for centuries. In many cultures, tigers represent strength, power, and courage, making them a popular subject for artwork. Tigers have appeared in traditional art forms from Asia, such as Chinese calligraphy and Japanese woodblock prints, as symbols of good fortune and prosperity.
B. Depictions in different cultures and styles
Tigers have also been depicted in art styles from other parts of the world. In the Western tradition, tigers have been featured in a variety of artworks, from oil paintings to sculptures. In African art, tigers have been depicted in a more abstract and stylized form, often as masks or totems.
C. Tiger symbolism in myths and stories
Tigers have also played a significant role in many myths and stories around the world. In Hindu mythology, the goddess Durga rode a tiger into battle. In Chinese mythology, tigers were believed to protect the dead and bring them into the afterlife. In Native American folklore, the tiger represents strength, courage, and independence.
D. Conclusion and relevance of cultural perspective to drawing a tiger
Understanding the cultural and historical perspectives of tigers in art can help you create a more meaningful and impactful tiger drawing. By incorporating traditional symbols and styles into your work, you can pay homage to the history of tiger art while also creating something unique and personal to you.
V. Anatomy of a tiger
A. Explanation of the tiger’s anatomy
Understanding the anatomy of a tiger is crucial for creating a realistic and accurate drawing. Tiger anatomy includes features such as the eyes, nose, mouth, ears, paws, legs, and tail. Familiarizing yourself with the shape and structure of each body part can help you create a convincing tiger drawing.
B. Identifying and drawing each body part
To begin drawing a tiger’s anatomy, start with the head and work your way down the body. Sketch the shapes of the eyes, nose, and mouth. Then, add the ears, paws, and legs. Pay attention to the muscle definition and joint placement to ensure accuracy. Finally, add the tail and any fur or stripe details.
C. How the anatomy captures unique tiger features
Tigers have several unique features that make them stand out, such as their stripes, sharp claws, and powerful legs. By understanding the anatomy of these body parts, you can develop techniques for emphasizing these features in your drawing.
D. Techniques for making the tiger look realistic
Use shading and lighting techniques to create depth and dimension in your drawing. Pay attention to the direction of light sources and add shadows where appropriate. Use a blending tool to smooth out any rough areas and add texture by creating short, overlapping pencil strokes.
VI. Tips for beginners
A. Best tools and medium to work with
When first starting out with drawing a tiger, it’s best to use a graphite pencil on sketch paper. A kneaded eraser and sharpener are also essential tools to have. If you’re comfortable with colored pencils or ink, you can experiment with those mediums as well.
B. Overcoming common challenges
When drawing a tiger, common challenges include creating realistic-looking fur, creating the correct shape of the head, and getting the stripes just right. To overcome these challenges, take your time, practice regularly, and refer to reference photos or videos for guidance.
C. Approaching complex parts of the drawing
If you’re struggling with a particular part of the drawing, break it down into smaller, more manageable pieces. For example, if you’re having trouble with the stripes on the tiger’s face, focus on drawing each stripe individually and building them up slowly.
D. Other tips and tricks for successful completion of a tiger drawing
Remember, creating a successful tiger drawing takes patience and practice. Don’t be afraid to make mistakes, and be willing to revise and refine your drawing as needed. Additionally, seek feedback from other artists and continue to learn from tutorials, books, and workshops.
VII. Conclusion
A. Recap of the topics covered in the article
In this article, we covered the step-by-step process for drawing a tiger, including the necessary materials, techniques for shading and highlighting, and tips for adding final touches. We also provided a video tutorial, insights into the cultural and anatomical perspectives of tiger artwork, and tips for beginners.
B. Final thoughts on drawing a tiger
Drawing a tiger requires patience, practice, and a willingness to learn. By following the step-by-step guide and incorporating these tips and techniques, you can create a unique and beautiful tiger drawing that captures the majesty and power of this incredible animal.
C. Encouragement for readers to begin their own tiger drawing or artwork
We encourage you to start your own tiger drawing or artwork today. Whether you’re a beginner or an experienced artist, there’s always more to learn and discover about this amazing creature. Use this guide as a starting point, and continue to experiment and explore your own unique style.