Introduction
Drawing spider webs can be a fun and challenging task for artists of all levels. Not only are spider webs intricate and complex, but they can also add a creepy-crawly aesthetic to your artwork. Whether you’re a beginner or an experienced artist, this guide will provide you with step-by-step instructions on how to draw spider webs, as well as tips and techniques for improving your skills.
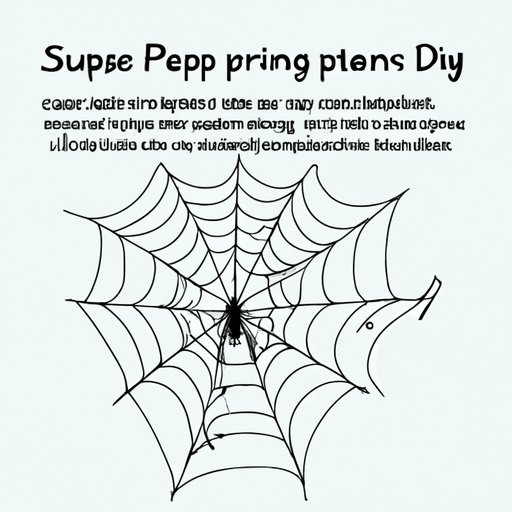
Step-by-Step Guide: How to Draw a Spider Web for Beginners
Before we begin, let’s go over the materials you’ll need for drawing spider webs. You’ll need a pencil, eraser, drawing paper, and a fine-tipped pen or marker.
Now, let’s get started with the step-by-step guide:
1. Begin by drawing a small dot in the center of your paper. This will be the starting point for your spider web.
2. Draw a straight line from the center dot to the edge of your paper. This will be the first spoke of your spider web.
3. Draw another spoke directly across from the first spoke. Continue drawing spokes until you have created a simple framework of lines that intersect at the center dot.
4. Connect the spokes with curved lines to create the basic shape of the web.
5. Erase any unnecessary lines.
6. Use a fine-tipped pen or marker to outline the spider web and add details such as strands of the web and the spider’s body.
7. Shade or color in the spider web to add depth and dimension.
If you are having trouble with proportions, start with a square piece of paper and use the diagonals to guide your placement of the spokes.
Remember, practice makes perfect. Don’t be discouraged if your first attempts are not perfect. Keep practicing and refining your skills.
10 Tricks for Drawing Realistic Spider Webs
If you want to create a more realistic spider web, here are some tips and techniques to achieve a more lifelike look:
1. Use reference photos of real spider webs to guide your drawing.
2. Vary the thickness and spacing of the web’s strands to create a more natural look.
3. Use a fine-tipped pen or marker to add small details such as tiny drops of dew or dust particles.
4. Add shadow and shading to the web to give it a three-dimensional look.
5. Don’t be afraid to experiment with different patterns and designs.
6. Use a white or light-colored pencil to create highlights on the strands of the web.
7. Use a darker shading pencil to create depth and contrast.
8. Create a spider’s web on a textured background to give it a realistic feel.
9. Use a light pencil to sketch out the web before you begin drawing with a pen or marker.
10. Blend pencils and use a soft brush to create soft edges and shadows.
Drawing Spider Webs: Tips and Techniques for Capturing a Creepy-Crawly Aesthetic
To create a creepy-crawly aesthetic in your spider web drawings, follow these techniques:
1. Use dark colors such as black or dark blue to create a spooky vibe.
2. Draw spider webs in unexpected places, such as a dark corner or a dimly lit room.
3. Use dramatic lighting to highlight the web’s strands and texture.
4. Add details such as a spider lurking in the shadows to add a spooky element to your drawing.
5. Emphasize the spider web’s intricate and delicate design to showcase its beauty and complexity.
6. Use a textured paper or background to add to the creepy-crawly effect.
Drawing with Spiders’ Instincts: How to Mimic Nature’s Best Web Design
Mimicking spider web designs can create a stunning effect in your artwork. Here are some tips on how to incorporate spider web designs into your creations:
1. Study the different types of spider webs, including orb, cobweb, and funnel webs, and use them as inspiration for your designs.
2. Mimic the overall shape of the spider web, but add your own unique twist with details and color.
3. Combine spider web designs with other patterns and motifs to create a one-of-a-kind aesthetic.
4. Use spider web designs as a backdrop for other elements in your artwork, such as insects or nature scenes.
5. Experiment with different materials and techniques, such as using white ink on black paper to create a stunning contrast.
Drawing Parallels: The Art of Drawing Spider Webs and the Science of Spider Silk
The science behind spider silk is fascinating and can be used as inspiration for your spider web drawings. Here are some techniques for incorporating scientific knowledge into your artwork:
1. Study the different types of spider silk and their properties, and use them to create unique designs.
2. Emphasize the strength and flexibility of spider silk in your drawings by using strong lines and creative designs.
3. Use scientific illustrations of spider silk as inspiration for your artwork.
4. Add details and text to your drawings that explain the science behind spider silk.
5. Combine different types of spider webs and silk to create a complex and fascinating design.
From Sketches to Shivers: How to Master the Art of Illustrating Spider Webs
To refine and improve your spider web drawings, here are some final tips:
1. Experiment with different materials and techniques to find your own style and aesthetic.
2. Build on the basics covered in this article to create more complex and detailed spider webs.
3. Study other artists’ work and incorporate their techniques and designs into your own artwork.
4. Use feedback from others to improve your skills and get new ideas.
5. Keep practicing and challenging yourself to become a master of illustrating spider webs.
Conclusion
Drawing spider webs can seem daunting at first, but with practice and patience, anyone can create stunning and intricate designs. Remember to use references, combine techniques, and experiment with different materials to find your own unique style. With these tips and techniques, you’ll be on your way to creating masterful spider web drawings in no time.