I. Introduction
For many people, drawing a sea horse might seem like a challenging task. Its unique shape, intricate details, and delicate features can be daunting to recreate on paper. However, with the right guidance and resources, anyone can learn how to draw a sea horse like a pro. This article aims to provide a comprehensive tutorial on how to draw a sea horse, including step-by-step instructions, visual aids, and expert tips and tricks. By following the guide, readers will be able to draw a realistic and beautiful sea horse and even develop their drawing skills further.
II. Step-by-step tutorial
To draw a sea horse, follow these step-by-step instructions:
- Start by drawing an elongated oval shape for the body of the sea horse.
- Then, add a smaller circle to the top of the oval shape for the head of the sea horse.
- Add a long and curved line from the head to the body to create the neck.
- Insert two small circles around the head, representing the eyes of the sea horse.
- Draw a small triangle shape below the head to create the snout of the sea horse.
- At the bottom of the oval shape, draw a thin and straight line for the tail of the sea horse.
- Add a few small fins to both sides of the body, giving it more depth and detail.
- Draw some lines inside and around the fins to add texture and dimensionality to the sea horse.
- Finally, add some intricate details, such as scales, bumps, and lines, to the body and the head of the sea horse.
Remember, your sea horse doesn’t need to look exactly like the reference; creating a unique and personal interpretation of the sea horse is part of the fun. Continuous practice will help to improve your drawing skills and confidence over time.
III. Video tutorial
Visual learning can be an effective way to learn how to draw a sea horse. If you prefer watching videos rather than reading tutorials, check out some of the excellent video tutorials available online. Search for “how to draw a sea horse” on Youtube, and you will find multiple options to choose from. Watch the videos and follow the instructions carefully. Pause and rewind whenever you need to catch up with the guide.
A good sea horse drawing tutorial video should include:
- Clear and concise instructions with proper and understandable pronunciation.
- Step-by-step guidance that shows the entire drawing process.
- Visual aids such as on-screen text, lines, and arrows to illustrate the steps.
The advantage of following a video tutorial is that you can see the drawing process in action and better understand the techniques involved.
IV. Infographic
Another useful visual tool for learning how to draw a sea horse is an infographic. Infographics are ideal for presenting information in a concise and engaging manner while incorporating visual design to enhance the message.
To create a sea horse drawing infographic, follow these tips:
- Choose a simple and readable layout that guides the viewer’s attention.
- Include all the main steps involved in drawing a sea horse.
- Use visual aids such as images, icons, and colors to illustrate the steps.
- Keep the content brief and informative.
- Ensure that the infographic is visually appealing and easy to understand.
An infographic is especially useful for visual thinkers who prefer to see information presented in a clear and accessible format.
V. Materials and tools needed
To draw a sea horse, you will need some basic art materials and tools, including:
- Pencils: Begin with a set of sketching pencils, including a 2H, HB, and 2B pencil. Experiment with different pencils to find one that suits your style and preference.
- Paper: For sketching, use acid-free paper or sketchbook paper. Don’t use paper that is too thin or too thick as it may affect the outcome of the drawing.
- Eraser: Choose a good quality eraser that removes marks without smudging or damaging the paper.
- Sharpener: A sharp pencil tip helps to create precise and delicate lines. Use a sharpener that doesn’t eat up too much of the pencil and doesn’t create too much mess.
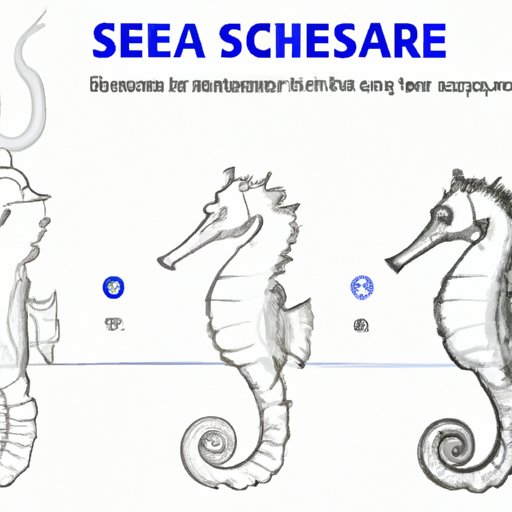
- Reference: Use a reference image of a sea horse to guide your drawing. You can find images online or in books.
You don’t need to buy the most expensive materials to start drawing a sea horse. Focus on purchasing affordable and quality materials that suit your style and level of expertise.
VI. Expert tips and tricks
To take your sea horse drawing skills to the next level, here are some expert tips and tricks:
- Break down the drawing process into simple shapes and lines. This approach makes the drawing process less daunting and more manageable.
- Practice shading and blending to create texture and depth in the sea horse. Use a tissue or blending stump to create soft and smooth lines.
- Pay attention to the sea horse’s unique details, such as its eye shape, snout, and fins, to create a realistic and accurate drawing.
- Experiment with different techniques, such as crosshatching, stippling, or smudging, to create different textures and effects.
- Be patient and don’t get discouraged if the first attempts don’t turn out perfectly. Drawing is a skill that requires time, practice, and dedication.
By incorporating these tips, you’ll be well on your way to mastering sea horse drawing and developing your unique style.
VII. Conclusion
Now that you’ve learned how to draw a sea horse with ease, it’s time to put your skills to the test. Drawing a sea horse can be a fun and satisfying experience, and it’s a great way to improve your art skills. Remember to use quality materials, follow step-by-step guides and tutorials, and practice regularly to achieve the best results. With patience, practice, and expert tips from this article, you can become a master in drawing sea horses and expand your knowledge of drawing.