Introduction
Drawing a school can be an exciting and rewarding experience, but it can also be intimidating for beginners. This article aims to provide an in-depth guide on how to draw a school, with step-by-step instructions, tips, and techniques for beginners and pros alike.
Section 1: Six Easy Steps to Draw a Realistic School Building
Before diving into the finer details, it’s important to get the basic framework of the school building down on paper. Here are six easy steps to get you started:
Step 1: Sketching the Basic Outline of the School
The first step in drawing a school is to sketch out the basic shape of the building. This can be done with a pencil and paper or any other drawing material of your choice. Start by drawing a simple rectangle to represent the main building.
Step 2: Drawing the Roof and Windows
Once you have the basic outline of the building, it’s time to add the roof and windows. Draw a triangular shape to represent the roof and add a line to divide it into two sections. Then, draw rectangular shapes for the windows and add details such as frames and panes.
Step 3: Detailing the Doors and Entrance
Add detail to the doors and entrance by drawing a rectangular shape for the door and adding details such as handles, hinges, and panels. Then, draw a small overhang above the entrance to create depth.
Step 4: Adding Details to the Exterior Walls
Add details to the exterior walls by drawing bricks or patterns to create texture. You can also add shutters or other decorative details to the windows.
Step 5: Drawing Trees and Landscaping Around the School
To add visual interest to your school building, draw trees and landscaping around it. Draw simple shapes for the trees and add texture with short, overlapping lines for the leaves.
Step 6: Adding Shade and Shadows to the Building
Finally, add shade and shadows to the building to create depth and dimension. Use different shades of grey or black to create shadows beneath the overhangs and around the windows.
Section 2: Get Creative with Your School Drawings – Tips and Tricks
Once you have the basic outline of your school building, it’s time to get creative. Here are some tips and tricks to help you bring your drawing to life:
Using Different Drawing Materials and Mediums
Experiment with different drawing materials and mediums to create unique effects. Try using charcoal for a bolder look or colored pencils for a more vibrant color palette.
Incorporating Color into the Drawing
Add color to your drawing to create a more lively and vibrant look. Experiment with different color palettes to create different moods and atmospheres.
Experimenting with Textures and Patterns
Don’t be afraid to experiment with different textures and patterns. Try adding cross-hatching, stippling, or other techniques to create depth and texture.
Adding People and Objects to the Drawing
Add people, cars, or other objects to your drawing to create a more dynamic and interesting scene. This can also help to establish the scale of the building and make it feel more real.
Section 3: Drawing for Beginners: A Guide to Drawing a School
If you’re new to drawing, here are some tips to help get you started:
Understanding Basic Shapes and Proportions
Before diving into more complex drawings, it’s important to understand the basics of proportion and scale. Practice drawing simple shapes and figures to get a feel for scale and perspective.
Developing Spatial Awareness
Developing spatial awareness is key to drawing a realistic school. Practice drawing three-dimensional objects and paying attention to the way they interact with their surroundings.
Tips for Freehand Drawing
When starting out, it’s best to avoid tracing or using tools like rulers or compasses. Practice freehand drawing to develop your skills and improve your accuracy.
Common Mistakes to Avoid
Common mistakes include drawing objects too small or too large, failing to take perspective into account, and drawing with too much pressure. Pay attention to these pitfalls and practice to avoid them.
Section 4: 10 Different Ways to Draw a School and Make It Unique
If you’re looking for some inspiration, here are 10 different ways to draw a school:
Drawing a School in Different Seasons and Weather
Try drawing a school in different seasons or weather conditions to create unique and engaging drawings.
Creating an Animated Version of the School
Create an animated version of the school by adding movement and motion to the drawing. This can be a fun and engaging way to bring your drawing to life.
Drawing the School from the Perspective of a Bird or an Ant
Take a unique perspective by drawing the school as if you were a bird or an ant. This can create a fun and whimsical drawing with a unique point of view.
Using Different Art Styles Like Cartoons, Abstract, and Impressionist
Experiment with different art styles to create unique and interesting drawings. Try using a cartoonish style, abstract art, or impressionist techniques to create something truly unique.
Section 5: Sketching a School Building: Techniques for Capturing an Accurate Likeness
For a more accurate and realistic drawing, here are some techniques to help you capture the likeness of a school building:
Using a Grid Method for Accuracy and Scale
Using a grid method can help you achieve better accuracy and scale in your drawing. Divide your paper into a grid and use it as a guide to draw the building in sections.
Measuring and Comparing Angles and Lengths
Pay close attention to angles and lengths to ensure that your drawing is accurate and proportionate. Use tools like rulers and protractors to help measure and compare different angles and lengths.
Tracing Techniques for Perfection
If you’re struggling to get your drawing just right, try tracing over a photograph or other reference image. This can help you achieve a more accurate and realistic look.
Using References and Inspiration for Accuracy
Finally, use references and inspiration to help you achieve a realistic and accurate drawing. Look at photographs, other drawings, and even the real school building to help guide your drawing.
Section 6: From Pencil to Paper: Drawing a School in Graphite
If you’re a fan of graphite drawings, here are some tips for drawing a school with graphite:
Choosing the Right Pencil and Paper
When drawing in graphite, it’s important to choose the right pencil and paper for your style. Softer pencils are best for shading and creating depth, while harder pencils are better for details and fine lines.
Shading Techniques and Styles
Experiment with different shading techniques and styles to create depth and texture in your drawing. Try cross-hatching, stippling, or blending for different effects.
Creating Depth and Dimension in the Drawing
To create depth and dimension in your drawing, pay close attention to shading and contrast. Add lighter tones to areas that receive more light and darker tones to areas that are in shadow.
Tips for Highlighting and Erasing
Finally, when working in graphite, it’s important to use the right tools for highlighting and erasing. Try using a kneaded eraser for finer details and a white charcoal pencil for highlights.
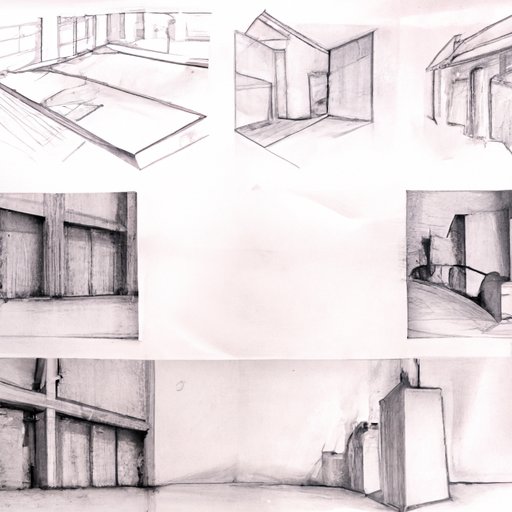
Section 7: Drawing a School in Perspective: A Step-by-Step Guide
Finally, for those interested in perspective drawing, here’s a step-by-step guide to drawing a school in perspective:
Understanding the Basics of Perspective Drawing
Perspective drawing is the art of creating the illusion of three-dimensional space on a two-dimensional surface. Understanding the basics of perspective drawing is essential to creating a realistic school building.
Drawing a Vanishing Point
The first step in drawing a school in perspective is to draw a vanishing point. This is the point at which all parallel lines in the drawing meet and should be placed somewhere within the drawing.
Creating Depth and Distance in the Drawing
By using the vanishing point as a guide, draw the school building so that the lines of the walls and roof converge towards the point. This will create the illusion of depth and distance in the drawing.
Tips for Perfecting the Details
Finally, pay close attention to details like windows, doors, and landscaping to bring your drawing to life. Use shadows and shading to add depth and dimension to the drawing.
Conclusion
Drawing a school can be a challenging but rewarding task. With these tips, tricks, and techniques, you’ll be on your way to creating impressive, realistic school buildings in no time.