Introduction
Drawing a cube may seem like a simple task, but it can be a challenge for beginners. Achieving the right proportions, angles, and perspective requires practice and attention to detail. In this article, we’ll guide you through the different steps to draw a perfect cube. We’ll also discuss common mistakes to avoid, techniques to add texture and shadow, and how to draw cubes from different angles. Whether you’re a beginner or an experienced artist, this guide will help you improve your cube-drawing skills.
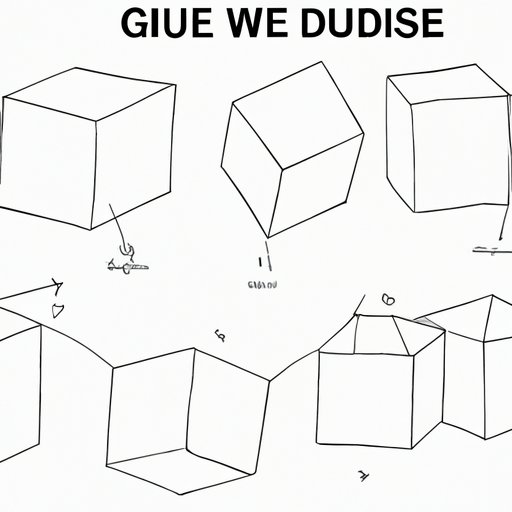
7 Easy Steps to Draw a Perfect Cube – A Beginner’s Guide
Drawing a cube can be broken down into manageable steps. Here’s an easy-to-follow guide for drawing a perfect cube:
Step 1: Draw a square
Start by drawing a square. Make sure the lines are straight and equal in length. This square will be the base of your cube.

Step 2: Divide the square in half
Draw a diagonal line from one corner of the square to the opposite corner. Then, draw another diagonal line from the other two corners of the square. You should end up with an “X” shape that divides the square in four equal triangles.
Step 3: Draw the vertical lines
Draw two vertical lines from the top corners of the square to the center of the bottom edge. These lines will be the height of your cube.
Step 4: Connect the lines
Connect the top ends of the vertical lines with a horizontal line. Then, repeat the process to connect the bottom ends of the vertical lines.
Step 5: Add the sides
Draw two lines connecting the top corners of the square to the top ends of the vertical lines. Then, repeat the process to connect the bottom corners of the square to the bottom ends of the vertical lines.
Step 6: Erase unnecessary lines
Erase the lines inside the cube that are not part of the final drawing.
Step 7: Add depth and shading
Add depth to your cube by shading in the sides that are farther away from the light source. You can also add texture by using a cross-hatching technique.

Common Mistakes to Avoid When Drawing a Cube
Sometimes, even the most experienced artists make mistakes when drawing cubes. Here are some common mistakes to avoid:
Mistake 1: Unequal sides
Make sure all the sides of your cube are equal in length. Otherwise, the cube will look distorted.
Mistake 2: Wrong angles
Pay attention to the angles in your cube. The sides should meet at right angles, otherwise the cube will look skewed.

Mistake 3: Lack of depth
A cube without depth will look flat and unrealistic. Make sure to shade the sides farther from the light source to give the cube a three-dimensional appearance.
Mistake 4: Incorrect shading
Shading is a powerful tool to give depth and texture to your cube. However, shading the wrong side of the cube or using inconsistent shading can ruin the effect.

To avoid these mistakes, always check your proportions, angles, and shading. Practice drawing different cubes from different angles to improve your skills.
Creating Three-Dimensional Drawings: How to Master the Cube
The cube is a fundamental shape that appears in many objects and scenes. Learning to draw cubes accurately is crucial to creating realistic three-dimensional drawings. Here are some key principles of perspective drawing to keep in mind when drawing cubes:
Principle 1: Foreshortening
Foreshortening is the distortion of an object’s shape when it is viewed at an angle. When drawing a cube from an angle, the sides that are closer to the viewer will appear larger than the sides that are farther away.

Principle 2: Vanishing points
Vanishing points are imaginary points where parallel lines converge. When drawing a cube in perspective, the sides of the cube will appear to converge towards a vanishing point.

Principle 3: Horizon line
The horizon line is the level line where the sky meets the ground. It is used as a reference point in perspective drawing. The height of the horizon line will determine the angle of the viewer’s perspective.

By understanding these principles, you can create realistic and accurate three-dimensional drawings that include cubes and other shapes.
Cube Drawing Techniques: Adding Texture and Shadow
Adding texture and shadow to a cube can make it look more realistic and lifelike. Here are some techniques to achieve these effects:
Technique 1: Cross-hatching
Cross-hatching involves drawing parallel lines that cross over each other at different angles. This creates the impression of texture and shadow.

Technique 2: Stippling
Stippling involves drawing small dots to create the impression of texture and shadow. The closer together the dots are, the darker the area will appear.

Technique 3: Blending
Blending involves using a smudging tool or your finger to soften the lines between light and shadow areas. This creates a more realistic and smooth transition between the two.

Experiment with these techniques to determine which one works best for you. You can also combine them for a more complex effect.
How to Draw a Cube from Different Angles
Drawing a cube from different angles can be a challenge, but it is essential to create realistic and dynamic drawings. Here are some tips for drawing cubes from different perspectives:
Tip 1: Use guidelines
When drawing a cube from an angle, use guidelines to help you determine the correct proportions and perspective. Start by drawing a rectangle that represents the front face of the cube, then extend lines from the corners to create the sides of the cube.

Tip 2: Experiment with angles
The angle from which you view the cube will affect its appearance. Experiment with different angles to see how the cube changes in shape and perspective.

Tip 3: Practice
The more you practice drawing cubes from different angles, the better you will become. Keep a sketchbook handy and draw cubes whenever you have a spare moment.
Drawing a Cube on Graph Paper: A Step-by-Step Guide
Drawing a cube on graph paper is a great way to achieve precise and accurate measurements. Follow these steps for drawing a cube on graph paper:
Step 1: Draw a square on the graph paper
Each unit of the graph paper represents one square. Start by drawing a square that measures the desired size of your cube.

Step 2: Divide the square in half
Draw a diagonal line from one corner of the square to the opposite corner. Then, draw another diagonal line from the other two corners of the square. You should end up with an “X” shape that divides the square in four equal triangles.