Introduction
Cowboy hats have become a worldwide symbol of the Wild West and country lifestyle. Whether it’s for a school project or just for fun, learning how to draw a cowboy hat has become a common challenge for many. In this article, we’ll take a detailed look at how to draw a cowboy hat with ease.
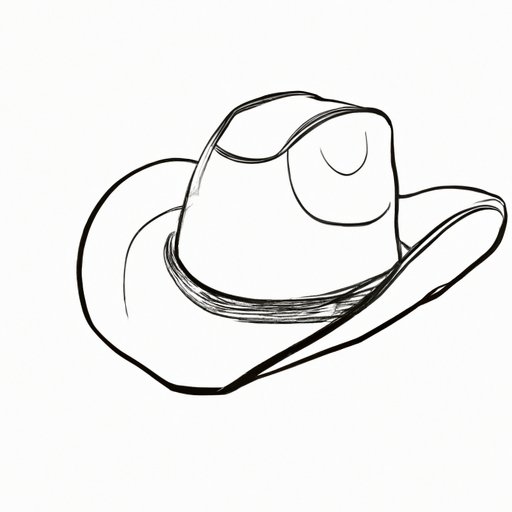
Step-by-Step Guide: How to Draw a Cowboy Hat in 5 Simple Steps
Before diving into the drawing process, it is essential to understand the basic steps involved. The first step when drawing a cowboy hat is to draw the brim. Next, the crown of the hat should be drawn, followed by detailing the hat’s features, including adding a band and a chin strap. Finally, adding shadows and textures to the hat will bring your drawing to life.
Let’s now break down these steps into more detail:
Step 1: Draw the Brim
The brim of the hat is the most significant part of Cowboy hats, providing shade from the sun and rain. Start by drawing an oval-shaped brim, making sure the shape is symmetrical. Draw a horizontal line in the center of the brim and another vertical line down the middle. This will create four sections, enabling you to adjust the size of the brim equally.
Step 2: Draw the Crown
The crown of the cowboy hat helps provide it with its characteristic shape. To draw the crown, add two lines, one longer than the other, along the top of the brim’s vertical axis. Then connect the lines with a curved line that extends from one side of the brim to the other. This will give you the basic shape of the crown.
Step 3: Detailing the Hat
Now that we have the basic structure of the hat, it’s essential to add the unique details that make a cowboy hat recognizable. Adding a band around the crown can provide some extra character to the hat. Also, consider adding a chin strap that wraps around the brim of the hat for a final touch.
Step 4: Shadows and Textures
Adding shadows and textures can take your cowboy hat from a simple outline to a more realistic drawing. Shade the areas where shadows are created when wearing a hat, and use different types of pencil strokes to create the illusion of texture.
Step 5: Final Touches
Once you have all the shading and textures in place, add any final touches that your drawing needs before calling it complete. Remove any unwanted lines that were left behind from the original sketch, and finalize your drawing by outlining your drawing with a darker pencil.
Beginner’s Guide: Tips and Techniques for Drawing a Cowboy Hat Like a Pro
If you’re still struggling with the basics of drawing a cowboy hat, don’t worry. Here are some tips and techniques that can help you draw a cowboy hat like a pro.
Tip 1: Start with a Light Sketch
Before diving in with the details, start with a light sketch of the cowboy hat’s basic structures. This sketch will serve as a guideline to help you place the elements of the hat accurately.
Tip 2: Take Your Time
Drawing a cowboy hat can be a challenging task, so take your time when working on your drawing. It’s better to work slowly and methodically than to rush and make mistakes.
Tip 3: Observe Real-Life Cowboy Hats
If you’re unsure about how to draw a cowboy hat, take a look at the hats in real life or photos, and take note of the unique features that make cowboy hats stand out.
Breaking Down the Anatomy of a Cowboy Hat: A Drawing Tutorial
In this section, we’ll explore the different parts of the cowboy hat and how to draw them accurately. Here’s a detailed breakdown of the steps involved in drawing a cowboy hat.
Step 1: Drawing the Brim
The brim of the cowboy hat is essential, as it provides shade and shape to the hat. First, draw an oval and divide it into four sections. This division will help you keep the brim equidistant on all sides.
Step 2: Drawing the Crown
Now that we have the brim, we can start with the crown of the hat. Draw two inverted U shapes above and below the center of the oval. Then connect the U-shaped lines with a curved line to form the crown’s umbrella shape.
Step 3: Adding the Band
Adding a band to a cowboy hat will help to create depth and give it a more distinctive form. Draw a band around the hat’s base, connecting the crown and brim together.
Step 4: Adding the Chin Strap
Lastly, consider adding a chin strap that goes around the outside of the brim. Make sure you draw it in a way that the chin strap looks like it’s clinging to the hat.
From Sketch to Finish: A Comprehensive Tutorial on Drawing a Cowboy Hat
The first step in drawing a cowboy hat is sketching out the basic shapes. Let’s start with a simple oval and then build upon that.
Step 1: Sketching the Brim
The first step is to sketch the brim of the cowboy hat. Start by drawing a perfect circle that will serve as the base of the brim.
Step 2: Sketching the Crown
Next, draw the crown on top of the brim by connecting two parallel lines on either side of the brim’s centerline. The lines should extend above the brim and peak to form an arrow-like shape.
Step 3: Adding Detail to the Hat
Now that you have the basic shapes of the cowboy hat, it’s time to add some detailing. Add a hatband around the base of the crown and a chin strap that wraps around the brim’s outside.
Step 4: Adding Shadows and Textures
Adding shadows and textures is crucial to make your drawing look realistic. Create depth and shadows by darkening the areas where they form under the hat. Texture can be added by using different types of pencils, such as a blending pencil or a texture pencil.
Think Outside the Box: Creative Tips for Customizing Your Cowboy Hat Drawing
Your cowboy hat drawing doesn’t have to be a basic representation. Get creative and customize your drawing by adding unique twists to it. One way to customize your cowboy hat drawing is by adding feathers, beads, or other decorations to the hatband. Consider adding a flavor of your own personality to make it stand out from the traditional cowboy hat models.
Mastering the Details: How to Incorporate Shadows and Textures in Your Cowboy Hat Drawing
In the previous section, we talked about adding shadows and textures to your cowboy hat drawing. Here are some more tips that can be helpful to create a more realistic image.
Tip 1: Work with Layers
When adding shadows and textures, always work in layers. This will give you more control over the pencil strokes and prevent your drawing from looking clumsy.
Tip 2: Use a Variety of Pencils
Using different pencils, such as blending and texture pencils, helps make your drawing look more polished and realistic.
Drawing Inspiration from Real Life: Observing and Recreating Cowboy Hats from Photographs and Movies
The Wild West has provided a wealth of inspiration for artists, including cowboy hats. If you’re looking for inspiration beyond the basics we’ve discussed in this article, try to observe real-life cowboy hats by browsing photos or watching movies. This exercise can be useful to improve your technical skills and inspire creativity.
Conclusion
Drawing a cowboy hat may seem challenging, but with the right guidance and tips, anyone can do it. Whether you’re a beginner or an advanced artist, there’s always room to improve your skills. Remember, take your time, work in layers, and add unique twists to your drawing to make it stand out from the crowd.