Learn to Draw a Cloud: A Step-by-Step Guide for Artists
Clouds have captured the imagination of artists for centuries, and it’s no surprise why. They add drama, depth, and dimension to any artwork, be it a landscape, a seascape, or even a portrait.
Moreover, learning to draw clouds can be a meditative and therapeutic experience. It allows one to observe the beauty of nature deeply and appreciate the play of light and shadow on a cloudy day.
In this article, we will guide you through the steps of drawing clouds, from the basic shapes and outlines to adding texture and details for a realistic and convincing effect. We’ll also cover different types of clouds, incorporating clouds into artwork, drawing clouds with different mediums, and more.
A Step-by-Step Guide to Drawing a Realistic Cloud
Before diving into the intricacies of drawing different types of clouds, it’s essential to understand the basic principles of drawing a cloud.
Follow the steps below for a simple yet effective cloud drawing:
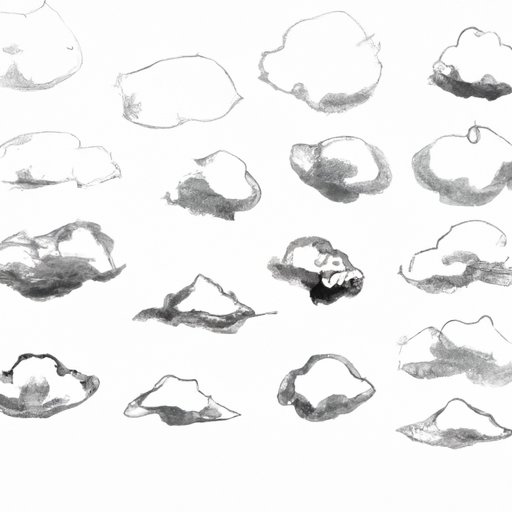
- Start with light pencil strokes to create a rough outline of your cloud. Use simple shapes and lines, like circles, ovals, and curves, to give the cloud volume and form.
- Once you have a basic outline, add more layers to your cloud by drawing more of the same shapes and lines, but in a more defined and detailed way. The goal at this stage is to create a 3D effect, where the cloud looks like it has varying contours and dimensions.
- The next step is to add texture to your cloud. Keep in mind that clouds are seldom flat or smooth; they have variations in tone and pattern that give them character. Use a range of hatching and cross-hatching techniques to create this effect, paying attention to the direction of the pencil strokes.
- Finally, add in the lighting and shading of your cloud. This is what makes your cloud look realistic and atmospheric. Observe the light source and the shadows it creates and use that as a guide to color your cloud realistically. Add highlights where necessary to give your cloud a luminous quality.
While these steps can be followed for a simple and whimsical cloud, this technique can be adapted to add depth and complexity to any type of cloud you’d like to draw.
Drawing Different Types of Clouds
While there are countless types of clouds that exist, there are several that are more commonly seen and used in artwork. Below are some of the most well-known types and how to draw them:
Cumulus Clouds
Cumulus clouds are the big, fluffy clouds that often look like cotton balls. They’re the most common type of cloud in any given sky and appear in various shapes and sizes. To draw a cumulus cloud, start with the basic cloud shape as described above. Add a few bumps and curves to the edges to give it a puffy, melt-in-your-mouth look. Finally, add some shading to give it a shadowy look, and you’re done!
Stratus Clouds
Stratus clouds are flat and featureless clouds that often form gray layers that cover the sky. They can be used in artwork for a moody, atmospheric effect. To draw a stratus cloud, use your pencil to make a series of wavy, parallel lines across your paper. Add another set of lines, going in the opposite direction, and continue until you’ve created a patch of abstract stripes. Blend the edges between each stripe and add some shading to create a uniform gray layer.
Cirrus Clouds
Cirrus clouds are wispy, feathery clouds that appear high in the sky. To draw a cirrus cloud, use light, thin lines and wispy strokes to create a pattern that looks like a bundle of feathers or spiderwebs. Allow your lines to curve and intertwine, making sure to vary your pencil pressure for a natural, organic look.
These are just a few examples of the types of clouds that an artist might want to draw. Use your research skills to find more cloud types and experiment with your style and techniques!
Drawing a Cloud-filled Sky
One challenge of drawing a full sky of clouds is making sure the clouds have different perspectives and believable depth. To achieve this, try to use different sizes, shapes, and densities for the various clouds. Add more layers and more textures to the clouds at the front of your scene, and use a lighter touch and more subtle strokes for those in the background. The farther the clouds are, the fainter and blurrier they must appear.
When shading your cloud-filled sky, consider where the light source is coming from. The sunlight or moonlight hitting the clouds will affect their hue, tone, and brightness. Play with the way the light interacts with the clouds and make your sky more believable and cohesive.
Incorporate these techniques into your cloud drawings, and you’ll soon have a sky that looks like you could step right into it!
Incorporating Clouds Into Your Artwork
Now that you know how to draw clouds, you might be wondering how to use them in your artwork. Below are some tips for enhancing your artwork with clouds:
Color blending
Clouds offer an excellent opportunity for color blending. Whether you’re using watercolors or colored pencils, blending different shades of blue, gray, and white can create a lifelike sky. Get creative and add a sunset effect by blending reds, yellows, and oranges into your clouds.
Composition
Think about how the clouds you are drawing will affect the rest of your artwork. Will they create a sense of balance or imbalance? Will they draw the viewer’s eye towards or away from your subject? Be intentional with your composition and know the impact your clouds will have.
Shading
Shading is crucial to give your clouds depth and make them look three-dimensional. Study the way light interacts with clouds and replicate it in your artwork to create a realistic and immersive effect.
By combining color blending, composition, and shading techniques, you can turn an average piece of art into something beautiful and captivating.
Drawing Clouds with Different Mediums
Clouds can be drawn with various mediums, each with its unique technique and style. Below are some of the most common mediums used for drawing clouds:
Graphite
The traditional medium for drawing clouds, graphite, offers a wide range of tones that can be used to create texture and depth in your artwork. Be careful not to smudge your graphite clouds with your fingers while drawing them, as that can create unwanted smears and blurbs. A good eraser is a must-have tool for precision and refinement.
Watercolors
Watercolors can be used to create a soft and romantic effect in your cloud drawings. Experiment with layering various shades of blue and gray and using a fine brush to create a wispy and tender look. Watercolors can be challenging to work with due to their transparent and fluid nature, so take your time and practice patience and precision.
Pastels
Pastels can be used to create vivid and bold clouds that stand out from their surroundings. Choose bright and bold colors, like orange or pink, for a dramatic sunset effect, or use deep and rich tones of gray or blue for a moody and melancholic atmosphere.
Charcoal
Charcoal is an excellent medium for creating dramatic and intense cloudscapes. Use different grades of charcoal and employ a variety of strokes and marks to create a dynamic and expressive look. Be mindful of the mess charcoal can create and use paper towels or tissues to clean up and smudge the drawing for a dreamy and ethereal vibe.
These are just some examples of the mediums you can use to draw clouds. The possibilities are endless, and the choice is up to you!
Conclusion
Drawing clouds can take your artwork to new heights, adding depth, drama, and dimension in ways that other elements cannot. With some basic techniques, an understanding of different cloud types, and an appreciation for nature’s beauty, you can create stunning and realistic cloudscapes that will awe and inspire your audience.
Remember to have fun with the process, experiment with different mediums, and let your creativity soar!
For more inspiration, check out some of the great cloud paintings by artists like John Constable, J.M.W. Turner, and Claude Monet.