Introduction
Drawing a chicken may seem like a daunting task, especially if you are not familiar with the anatomy and characteristics of this bird. However, with some guidance and practice, anyone can learn how to draw a chicken. This article will provide a step-by-step tutorial, as well as tips and examples, to help you create your first chicken drawing.
Step-by-Step Tutorial
The following steps will guide you through the process of drawing a chicken:
- Start by drawing a basic oval shape for the body.
- Add a smaller oval shape for the head, and connect it to the body with a curved line.
- Draw the beak by starting with a small triangle shape at the front of the head, then adding a curved line for the bottom part of the beak.
- Add the comb by drawing a jagged line on top of the head.
- Draw the eye using a small circle shape.
- Sketch in the wings by drawing two curved lines from either side of the body.
- Draw the legs by adding two long, skinny shapes at the bottom of the body, and adding claws at the ends.
- Finally, add some feathers to the bird by drawing short, curved lines around the body, especially on the wings and tail.
Remember, these are just basic guidelines, and you can adjust the proportions and details according to your own style and preference.
If you need more help visualizing the steps, you can check out some online tutorials, or watch a video tutorial that walks you through the process.
Anatomy of a Chicken
Understanding the anatomy of a chicken is crucial for drawing it realistically. Here are some key parts of a chicken’s body:
- Beak: the hard, pointed mouthpart that chickens use to dig and peck for food.
- Comb: the fleshy crest on the top of a chicken’s head, which helps regulate body temperature.
- Eyes: a small, dark circle that sits on either side of a chicken’s head.
- Wings: large, feathered limbs that allow chickens to fly short distances or glide.
- Legs: sturdy, scaly structures that support the chicken’s body weight and allow it to move around.
- Claws: sharp, curved nails at the ends of a chicken’s feet, which enable it to scratch and climb.
- Tail: a fan-shaped group of feathers at the end of a chicken’s body, which can be used for balance and communication.
When drawing a chicken, it’s important to pay attention to the size and position of these different body parts, as well as their shapes and textures. You may also want to study some real-life chicken photos to get a better sense of their appearance and movements.
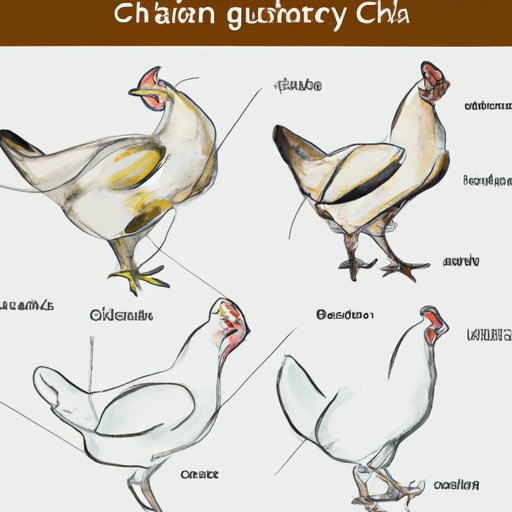
A Visual Guide to Chicken Breeds
Just like there are many different types of dog breeds, there are also numerous varieties of chicken breeds, each with their unique physical features and personalities. Here are some common chicken breeds, and tips on how to draw them:
- Leghorn: a streamlined breed with a tall, upright comb and thin legs. Draw them with long, slender bodies and sharp beaks.
- Orpington: a fluffy, gentle breed with a round body and a small comb. Draw them with plump bodies and fluffy feathers.
- Silkie: a small, fluffy breed with no visible comb and dark, beady eyes. Draw them with round, puffy bodies and a lot of feather detail.
- Brahma: a large, regal breed with a broad, flat comb and a heavy body. Draw them with a good size and proportion and broad chest feathers.
- Wyandotte: a medium-sized breed with a round body and a rose comb. Draw them with a slightly curved back and gentle facial features.
If you need more inspiration or guidance, you can look up photos or illustrations of different chicken breeds, or experiment with different drawing styles and techniques to capture their unique traits.
The Art of Sketching Chickens
Sketching chickens can be a great way to capture the essence and character of these birds, without worrying too much about realism or accuracy. Here are some tips to help you master the art of sketching:
- Use loose, flowing lines: try not to worry about a perfect lining. Start with a basic outline and build up from there.
- Experiment with different poses: try drawing chickens in different stances and movements, such as scratching the ground or flapping their wings.
- Focus on the overall shape: rather than getting bogged down in details, try to capture the general shape and gesture of the chicken.
- Use shading and texture: adding some subtle shading and texture can help bring your sketches to life, even if you keep them relatively simple.
Many famous artists have produced notable chicken illustrations, using sketching techniques. You can look up some of these artists online, or even join a sketching group or a community to find inspiration or share your own work.
Drawing Chickens with Kids
Introducing children to drawing can be a fun and rewarding activity, and drawing chickens is a great place to start. Here are some tips for teaching children how to draw a chicken:
- Start with basic shapes: help children draw a simple oval or circle for the body, then add details like the head, beak, and feathers.
- Encourage creativity: let children experiment with different colors, patterns, and styles to make their chicken unique and fun.
- Practice makes perfect: provide plenty of paper and pencils, and encourage children to keep practicing and refining their techniques.
You can also try some simple drawing exercises with children, such as drawing a chicken in different poses or using different materials like watercolors or pastels. Not only will these exercises help children improve their drawing skills, but they can also foster creativity and imagination.
Drawing Chickens in Different Art Styles
Chickens can be drawn in many different art styles, from hilarious cartoons to stunning watercolors or realistic sketches. Here are some tips for trying different art styles:
- Cartoon style: emphasize the chicken’s playful and expressive nature by exaggerating certain features like the comb or the wings. Often used for children’s books and comics.
- Realistic style: capture the precise details and textures of the chicken’s feathers, beak, and claws, emphasizing its natural beauty and grandeur.
- Watercolor style: use a light, flowing touch to create colorful and impressionistic images of chickens, blending different shades and hues for a soft and dreamy effect.
Try experimenting with different drawing materials and techniques to see which art style you enjoy the most. You can also search online for illustrations and examples of chicken drawings in different styles.
Conclusion
In conclusion, drawing a chicken can be a fun and rewarding activity for artists of all ages and skill levels. By following the step-by-step tutorial, studying the anatomy and characteristics of chickens, and experimenting with different styles and techniques, you can create your own unique and beautiful chicken drawings.
Remember to be patient, practice regularly, and don’t be afraid to make mistakes. Drawing is a process, and it takes time and dedication to improve and develop your own style.
If you enjoyed this article, please share your own chicken drawings on social media or in the comments section below. We’d love to see your creativity and inspire each other to keep learning and growing as artists.