I. Introduction
Learning how to draw a cheetah can be a rewarding experience for both beginners and advanced artists. Not only does it require an understanding of the cheetah’s anatomy, but it also challenges an artist’s skills of observing details. This article serves as a guide for those seeking to create an accurate and realistic cheetah sketch. Our main audience consists of artists and individuals who are interested in learning how to draw.
Drawing a cheetah can seem intimidating, but with the right skills and tools, it can be a fun and exciting experience. Let’s delve into the guide on how to draw this magnificent feline.
II. Step-by-Step Guide to Drawing a Cheetah
Before we dive into the details of drawing a cheetah, let us take a look at the materials we need to get started.
A. Materials Required
Sketching pencils, an eraser, paper, and a ruler are the basic requirements for drawing a cheetah. We recommend using an HB pencil for the initial sketch and a range of pencils from 2B to 6B for shading. A smooth paper surface helps the pencil glide, and a ruler enables us to draw straight lines with accuracy.
B. Basic Shapes and Lines to Sketch a Cheetah
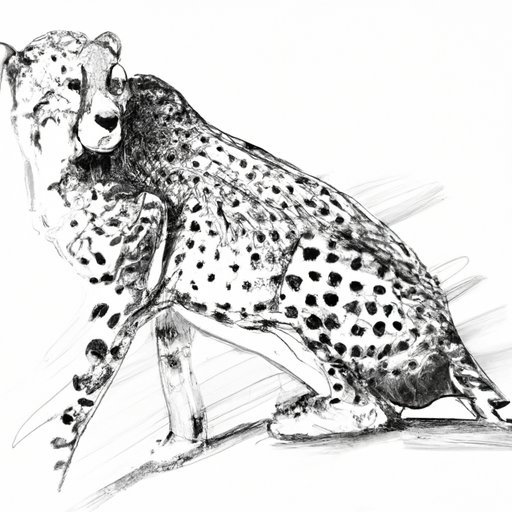
Begin by sketching basic shapes and outlines. A cheetah’s body is slender with a small head, elongated neck, and long legs. Draw the basic shape of the body and legs using a ruler for accuracy. Then create the head by drawing a triangle shape and add details such as the nose, eyes, mouth, and ears. Finally, add the tail as a curved shape.
C. Adding Details of the Cheetah’s Features
After sketching the basic shapes and outlines, it’s time to add the details. Observe the cheetah’s features carefully, and add them to the sketch starting with the eyes. Cheetahs have distinct tear-shaped markings under their eyes, which add to their expressive face. Add the black marking around the eyes, followed by the striped pattern around the mouth and the ‘tear’ marks under the eyes. Next, let’s work on the fur. Sketch the fur-textured marks on the cheetah’s cheeks, chest, and neck. When sketching the fur, remember to keep the direction in mind, which will be helpful in the shading process.
D. Finalizing the Sketch with Shading and Texture Techniques
Shading and texture techniques are what bring the cheetah to life. Use a range of pencils from 2B to 6B to create soft shadows and sharp contrast. Begin by shading the eyes and muzzle area, followed by the darker fur accents. Using the pencil’s tip, pencil marks can be made to create fur textures and define the cheetah’s muscles. Shading should follow the direction of the fur. The tail should be shaded to highlight its movement and poise. The background can be shaded to create contrast and give the cheetah a highlighted presence.
III. Mastering the Anatomy of a Cheetah for Accurate Drawings
Understanding cheetah anatomy is crucial to create an accurate and realistic drawing. Beautiful drawings are all about proportions and perspectives.
A. Understanding the Proportions of a Cheetah’s Body
Understanding the proportions of the cheetah’s body is key to drawing a realistic cheetah. Cheetahs have long legs, small heads, and slim bodies, which helps them run at high speeds. It’s essential to take note of the proportions and ensure that the anatomy is kept as accurate as possible.
B. Complete Study of the Cheetah’s Body Features
When drawing a cheetah, it’s essential to consider all the details that make them unique. Take time to study the sleek shape of their body, the muscles, and their facial structure with particular attention to the ears, nose, eyes, teeth, and whiskers. Learning these will help you better capture the essence of the cheetah’s image in your drawing.
C. Incorporating the Knowledge of Cheetah Anatomy When Drawing
Incorporating knowledge of the cheetah’s anatomy will help you achieve a more realistic and accurate drawing. Take note of the relative positions of the cheetah’s body parts. The legs should be longer than the torso. Also, keep your reference image nearby while drawing, to ensure you’re on the right track and not missing any essential details.
IV. Common Mistakes to Avoid While Drawing a Cheetah
A. Common Mistakes Made While Sketching a Cheetah
Common mistakes while drawing a cheetah include failing to observe reference images carefully, over exaggerating particular body parts, and creating the wrong proportions. Failing to add the right textures, shadows, or highlights can also result in a less than realistic drawing.
B. Strategies to Avoid Common Mistakes
To avoid these common mistakes, pay attention to the guidelines given in this article and any reference images you have available. Start with a light sketch first and gradually add more details. Pay attention to the proportions and the overall balance of the drawing. Look for constructive criticism to gauge how much progress you have made. Always remember that consistency and practice are key.
C. Tips to Correct Mistakes While Drawing
If you make a mistake while drawing, it is essential to correct it as soon as possible. Use your eraser to rub out the mistake. Then, ensure that the sketch is light and not affecting the quality of the shading process; otherwise, you may end up with a smudgy sketch. Try starting again with the same reference image or a different reference image for the same cheetah. This will help correct such errors and improve the quality of your artwork.
V. Tips and Tricks to Add Realistic Texture to Your Cheetah Drawing
A. Adding Texture to the Cheetah’s Fur and Skin
The fur and skin of a cheetah provide texture and make them stand out. The fur is short and dense, and its skin patterns make it unique. Start by focusing on the lighter areas of the skin, then work towards adding the darker patches. Add depth by using different pencils and using the directed strokes on the fur. The texture should appear like short hair and should be consistent to achieve realism.
B. Tips to Create a 3D-like Effect on the Cheetah’s Body
Adding a 3D-like effect on the cheetah’s body makes it appear more realistic. Start by adding shadows and shading in the right places, as it helps create depth and give the cheetah a 3D appearance. You can create an impression of reality by adding different shades of grey and black; this makes the drawing appear three-dimensional.
C. Techniques to Draw Realistic Stripes and Spots
Cheetahs have distinct spots and stripe patterns that add to their beauty. To draw some realistic spots and stripes, use a light pencil and create the outline. When you’re satisfied with the pattern, create deeper marks around the outline of the shape. Use a darker pencil next to it and carefully blend it into the lighter parts. This technique creates a realistic impression of the spots and stripes.
VI. Creating a Vivid Cheetah Scene with Background and Environment Detailing
A. Adding a Background to the Cheetah Drawing
Backgrounds give a cheetah sketch more life and take it beyond a plain drawing. It should complement the cheetah without being too overpowering. Start by sketching in the background, whether it’s grass, trees, or mountains. The cheetah should not blend in too much with the background. Add some shadows and highlights to the background to create depth and make it more vivid.
B. Incorporating Environment Detailing
To give the sketch a realistic feel, it’s essential to add some environment detailing. For example, grass, trees, or rocky terrain help create an ambience that adds value to the sketch. The environment should also complement the drawing without overpowering it. Use similar color schemes in the cheetah and environment to bring out a coordinated look.
C. Creating Depth in the Cheetah Drawing
To create depth in the cheetah sketch, add shadows and highlights to the fur, which gives it a realistic texture. Use light shading in the front of the cheetah’s body and darker shades at the back to create an illusion of depth. The background also affects the depth, so make sure that it complements the cheetah, and both are visible enough.

VII. Exploring the Artistic Interpretation of a Cheetah Drawing
A. Ways to Develop Creative Liberty When Drawing a Cheetah
You can develop creative liberty when drawing a cheetah by experimenting with various kinds of paper, pencils, and other drawing tools. You can switch up the lighting, texture, and even the colors for unique takes on the cheetah sketch.
B. How to Put a Spin on a Cheetah Drawing to Create Unique Artwork
To put a spin on a cheetah drawing, you can experiment with adding fantasy elements such as wings, alternate colors, or imaginary backgrounds to create unique artwork. A new approach to drawing cheetahs can also create fresh and unique sketches that would accommodate diverse perspectives.
VIII. Practicing Sketching and Shading Techniques for a Stunning Cheetah Sketch
A. Insight into the Different Sketching Techniques Used for Cheetah Drawing
To achieve impressive cheetah art skills, start by mastering sketching techniques. Different artists use different techniques, but some popular ones include cross-hatching, contour shading, stippling, and scribbling. Try using these techniques on different textures, shapes, and sizes, keeping in mind the light source and direction.
B. Tips to Improve Your Sketching Skills
The secret to improving sketching skills is practice. Draw different cheetah sketches using a reference image and focus on improving on specific areas that prove challenging. Experiment with different pencil strokes, pressure, and line types, and investing in a good quality set of pencils, paper, and erasers should make a significant difference in drawing quality.
C. Importance of Practice When It Comes to Drawing
Practice is important when it comes to drawing cheetahs or any artwork. Drawing regularly helps the artist improve the quality of their work over time. The more practice a person gets, the better they become at cheetah sketching. Practice provides a progress report showing how far the artist has come and acts as a source of motivation and encouragement to keep improving.
IX. Conclusion
of the Essential Elements to Create an Accurate Cheetah Drawing
The essential elements of an accurate cheetah drawing include understanding cheetah anatomy and developing observational skills, using the right materials to sketch, paying attention to the details, using proper shading techniques, and consistent practice. Follow these steps to create a detailed and realistic cheetah sketch accurately.
B. Motivation to Keep Practicing to Improve Drawing Skills
Creating a detailed cheetah sketch requires significant effort. However, with consistent practice, an artist can improve their cheetah sketching skills and eventually attain mastery. The benefits of practicing include general improvement in art skills as well as a sense of satisfaction from creating a beautiful piece of art.
C. Encouragement to Explore Creative Expression When Drawing a Cheetah
An artist can push themselves to explore the horizons of their creative expressions by experimenting, doing more research, and gaining more experience. Keep in mind that cheetah sketching is a creative process that permits an artist to express themselves artistically and best capture their essence. Therefore, an artist should get inspired to keep exploring their creative expressions while drawing cheetahs.