I. Introduction
Are you tired of attempting winged eyeliner and ending up with one perfect wing and one wonky mess? You’re not alone. Winged eyeliner can be challenging for beginners and even experienced makeup enthusiasts to perfect. However, with the right tools, techniques, and tips, anyone can achieve a flawless winged eyeliner look. In this article, we’ll cover everything you need to know to master winged eyeliner, from basic techniques to creative ideas.
II. 10 Steps to Perfect Winged Eyeliner: A Beginner’s Guide
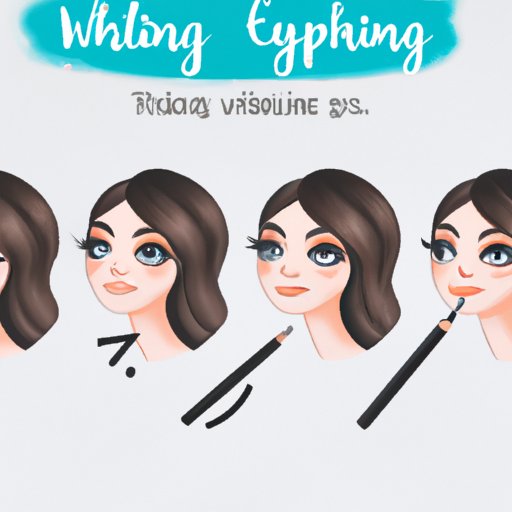
Before we dive into advanced techniques and creative ideas, let’s start with the basics. Here are 10 simple steps to creating a classic winged eyeliner look.
1. Start with a clean, dry eyelid. If you’re using eyeshadow, apply it before eyeliner.
2. Choose your eyeliner. Liquid or gel eyeliners are best for creating a sharp wing.
3. Place a dot or short line where you want your wing to end.
4. Draw a line from your upper lash line to the dot or short line, gradually getting thicker toward the outer corner.
5. If desired, angle the line slightly upward toward the end of your eyebrow.
6. Starting from the tip of your wing, draw a line connecting to your lower lash line.
7. Fill in any gap between the upper and lower lash line with eyeliner.
8. Clean up any mistakes or smudges with a pointed cotton swab and eye makeup remover.
9. Apply mascara to your upper and lower lashes.
10. Repeat on the other eye.
Remember, practice makes perfect. Don’t be discouraged if your first attempts aren’t perfect. Keep trying, and soon you’ll be a pro!
III. Mastering the Art of Winged Eyeliner: Tips and Tricks from Makeup Experts
To take your winged eyeliner skills to the next level, we reached out to makeup experts for their top tips and tricks.
“My top tip for achieving perfect winged eyeliner is to use scotch tape,” says makeup artist Samantha Johnson. “Place a small piece of tape diagonally from the outer corner of your eye to the end of your eyebrow. Draw your wing on the tape, then carefully remove the tape.”
Makeup artist April Lee recommends using a felt-tip liner for precise application. “The pointed tip allows you to create a sharp wing,” she says. “Start with small strokes, and gradually build up the thickness.”
Other expert tips include:
- Use a light hand and practice, practice, practice.
- Don’t be afraid to try different shapes and thicknesses until you find what flatters your eye shape.
- If your eyeliner smudges, set it with eyeshadow or a powder to prevent transfer.
- Invest in a good quality eyeliner brush and clean it regularly to avoid buildup.
IV. Winged Eyeliner Made Easy: Foolproof Techniques for Every Eye Shape
Your eye shape can affect how you create a winged eyeliner look. Here are some techniques for working with different eye shapes:
Round eyes: create a thicker line and a longer wing to elongate the eye.
Almond eyes: follow the natural shape of the eye, creating a tapered wing.
Small eyes: keep the line thin and close to the lash line, with a shorter wing.
Hooded eyes: create a higher wing to make the eyes appear more open.
Monolid eyes: create a thick wing that extends past the eyelid crease.
If you’re unsure of your eye shape or have a unique shape, experiment with different techniques until you find one that works best for you.
V. From Basic to Bold: 5 Creative Ways to Wear Winged Eyeliner
Once you’ve mastered the basic winged eyeliner look, it’s time to get creative. Here are five ways to vary your winged eyeliner look:
1. Thick wing: Instead of a thin line, experiment with a thicker wing for a more dramatic look.
2. Flicked wing: Add a small flick at the end of your wing for a subtle, sophisticated touch.
3. Double wing: Create a double wing by drawing a line from the inner corner of your eye to the end of your wing.
4. Colored wing: Get playful with color by using a brightly colored eyeliner for your winged eyeliner look.
5. Glitter wing: Add some sparkle to your eyes by using a glitter eyeliner for your winged eyeliner look.
Don’t be afraid to experiment with different colors, textures, and shapes until you find the perfect look for you.
VI. Winged Eyeliner for Every Occasion: Daytime, Nighttime, and Special Events
Winged eyeliner isn’t just for nighttime events. With a few adjustments, you can wear it any time of day. Here are some suggestions for different occasions:
Daytime: Keep the line thin and simple, without a dramatic wing. Pair with a neutral eyeshadow and a natural lip.
Nighttime: Go all-out with a thicker line and a dramatic wing. Pair with a bold lip or a smoky eye.
Special events: Add some sparkle with a metallic or glitter eyeliner. Pair with a glam eyeshadow and a statement lip.
Remember, the intensity of your winged eyeliner can be adjusted to suit any occasion.
VII. Conclusion
With these tips, techniques, and creative ideas, you’ll be a winged eyeliner pro in no time. Remember to have fun with it and experiment until you find what works best for you. Don’t forget to share your success stories and tag us in your photos!
For more beauty tips and tutorials, check out our website for product recommendations and video tutorials.