I. Introduction
Stick and poke tattoos are the DIY ink trend that is gaining significant popularity among tattoo enthusiasts. Unlike regular tattoos, which are done using a gun or machine, stick and poke tattoos are made using a needle and ink pricked manually into the skin. Stick and poke tattoos are also known as hand-poked or non-electric tattoos. They are more intimate, economical, and safer than traditional tattoos. However, like any other DIY activity, there are some safety guidelines to follow.
This article is a comprehensive guide to everything you need to know about the stick and poke tattoo technique. From the materials required, preparation, and actual tattooing process, to after-care and safety precautions. Additionally, we explore the history and culture behind the popular trend, showcase some of the most impressive designs, and answer some frequently asked questions.
II. Step-by-Step instructional article
Choosing the right materials
Several essential materials are required for doing a stick and poke tattoo:
- Needles: The needle should be sharp, sterile, and disposable. You can purchase needles from tattoo shops or online. The most common needle is the 3RL or 5RL needle, used for outlining and shading, respectively.
- Ink: Tattoo ink should be sterile, high-quality, and alcohol-free. Do not use India ink or any other ink that is not specifically designed for tattoos.
- Sanitation: Ensure that you have gloves, disinfectant, and clean boxes to avoid contamination.
Prepping the area and skin for the tattoo
Clean the area of skin that you want to tattoo with disinfectant and ensure it is free from hair. Wax or shave the area to make the tattooing process easier. It is also essential to avoid using lotion or any moisturizer on the skin before the tattooing process. Doing this will prevent the skin from stretching during the tattoo process and making it less painful.
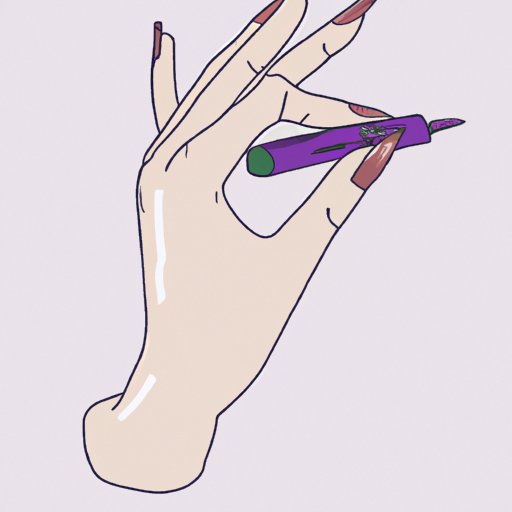
Actual tattooing process
The actual tattooing process involves inserting ink into the skin by repeatedly poking the needle at a specific depth into the skin.
- Prepare the ink and needle: Use a small amount of ink on a tray and dip the needle into it. Avoid touching the needle tips while doing this to avoid bacterial contamination.
- Tattooing: Hold the needle with your thumb and index finger, and make sure to get a firm grip. Punctuate the skin with the needle’s tip, and pull it out quickly. Repeat this process to create a line of varying thickness, depending on the needle and ink used.
- After each line: Gently wipe away any excess ink or blood with a cotton ball or tissue. Then, moisten the skin with a small amount of ointment or petroleum jelly to make the tattoo application easier.
- Switch out needles: You should use a different needle for each new line or area to avoid contamination.
- The Shading process: Shading creates texture and depth in tattoos. To accomplish this, use a circular motion with a needle dipped in ink. Vary the needle depth to create different shades.
After-care instructions
After the tattoo process is complete, rinse the area with warm water and an antimicrobial soap to remove the excess ink and disinfect the skin. Gently pat dry and avoid rubbing or scratching the area despite the itching. Apply petroleum jelly or another ointment for the first few days to avoid cracking or dryness. Cover with sterile gauze or a bandage to protect it from the sun or other external factors.
III. Tips and Tricks article
Tips on how to hold the needle effectively
Hold the needle tightly but avoid applying too much pressure as this may cause the needle to bend or warp. The needle should move smoothly across the skin, applying gentle and consistent pressure to create the desired results.
Tricks to stretch the skin to avoid smudging
To tattoo areas that move or bend, like the wrist or elbow, stretch the skin to create a flat, smooth surface for the tattoo needle. Use a spacious grip and stretch the skin between the fingers to ensure that the ink penetrates deeply and evenly. This technique also prevents smudging of the tattoo.
Techniques for filling in ink evenly
For complete ink coverage, use a needle with more tips, such as the 5RS or 7RS. Take your time to ensure the lines and contours match perfectly. Do not rush, as this may cause the ink to smear or become uneven.
IV. Safety Precautions article
Sanitation practices and safety gear
Sanitizing your work area is essential. Make sure to use only sterile needles and ink. Wear protective gloves to avoid contact with your skin or possible infection from your clients. Disinfect the area before and after the tattoo. Use a skin barrier film like cling film to avoid contamination of ink containers by dirty surfaces or areas.
Safe disposal of needles and ink
Discard used needles in a plastic container that can be safely disposed of, preferably something with a hermetical seal. The container should be labeled as bio-pollution to ensure safe disposal. Also, ensure that you are using safe, easily disposable ink and supplies.
Dealing with complications and infections
If you experience any of the following, you should seek medical attention immediately: redness or inflammation, fever, excessive bleeding, excessive pain, puss, discomfort, or difficulty breathing. With proper care and precautions, the likelihood of complications is low.
V. History and Culture article
Brief history and evolution of stick and poke tattoos
Stick and poke tattoos date back to ancient times, where they were used in cultural and religious ceremonies. They first became popular in the Western world in the early 1900s. As the tattooing industry has gained popularity, hand-poked ink is now being used more often, especially as micro-tattoos and delicate designs rise in fashion popularity.
Comparison with traditional tattoos
Traditional tattoos are mostly done with gun or machine and can achieve more variety, including detailed designs, and fill shading. Stick and poke offers a more personal touch and is ideal for smaller or delicate designs. They are also more economical and less painful.
Cultural significance of stick and poke tattoos
Stick and poke tattoos have significant cultural, spiritual, and social meanings in different parts of the world. Examples include naval tattoos done by sailors and seamen. In some cultures, they are done to mark a rite of passage to adulthood or as spiritual protection.
VI. Inspirational Gallery article
Showcase some of the best stick and poke tattoos
The stick and poke genre offers plenty of exhilarating and inspiring tattoo designs for enthusiasts. Here are some of the most creative, inspiring, and trending hand-poked tattoos that you can use for inspiration.
VII. Frequently Asked Questions article
Popular questions regarding stick and poke tattoos
1. Is it safe to do your stick and poke tattoos?
Yes, it is safe to do your stick and poke tattoos. However, you need to follow the necessary hygiene protocols.
2. How long will a tattoo last?
Stick and poke tattoos usually last up to three years, but it depends on the aftercare and the skin type of the person tattooed
3. How long does it take to do a stick and poke tattoo?
The tattooing process will depend on the design and size. However, compared to traditional tattoos, hand-poked tattoos may take longer to finish it.
VIII. Conclusion
Stick and poke tattoos are a beautiful, intimate, and creative way to express yourself. With proper care and precautions, it is safe to do your stick and poke tattoos. Remember to use only fresh needles and sterile ink, and ensure that the skin area is adequately disinfected to avoid bacterial infections. We hope this comprehensive guide has helped you learn how to make your stick and poke tattoo safely and creatively.
As you go ahead to explore the world of DIY ink, we encourage you to start with simple designs and to embrace the unique, personal, and expressive nature of hand-poked ink.