Introduction
Keurig machines are a staple in many homes and offices, providing a quick and easy way to make a cup of coffee. However, over time, calcium and mineral deposits can build up in the machine, affecting the taste of your coffee and even causing damage to the machine. In this article, we will explore the importance of descaling your Keurig machine and provide a step-by-step guide on how to effectively descale your machine to ensure better tasting coffee and optimal performance.
Importance of Descaling
Descaling is an important maintenance step for your Keurig machine. When mineral deposits, specifically calcium, build up in your machine, it can affect the taste of your coffee and the performance of the machine. A build-up of calcium can clog the machine, causing it to stop working altogether. In addition, mineral buildup can cause your machine to work harder than it needs to which can ultimately lead to a shorter lifespan of your machine. Descaling your machine regularly can help to prevent these issues and ultimately, save you money in the long run.
Common Problems and Solutions
When it comes to descaling your Keurig machine, there are a few common issues that people face. One of the main problems is not being able to effectively remove the mineral buildup, regardless of how many times the machine is run through with a descaling solution.
The good news is that there are a few solutions to this problem. One of the most effective methods is using a distilled water or vinegar solution. Distilled water and vinegar are both acidic which makes them very effective at breaking down mineral buildup. However, it is important to note that if you choose to use vinegar, you need to make sure to use white vinegar and dilute it with water.
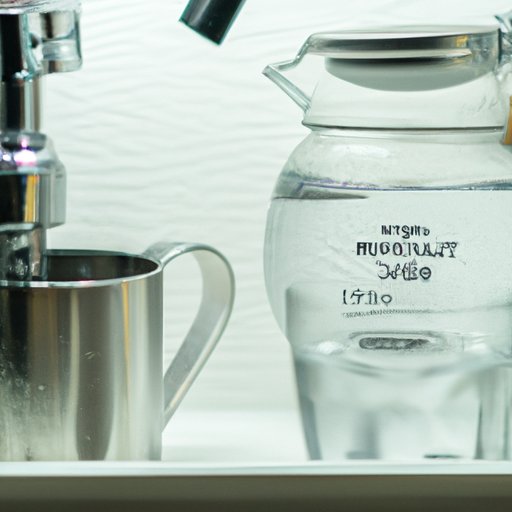
Using Distilled Water or Vinegar to Descale
Vinegar is a common solution used for descaling Keurig machines. Here’s how to use it:
- Fill your water reservoir halfway with distilled white vinegar and fill the other half with water.
- Run the machine through a brew cycle without a K-cup.
- Repeat this process until the reservoir is empty.
- Next, fill the reservoir with just water and run the machine through a cycle to rinse the vinegar out of the machine.
- Repeat this rinse cycle one more time with just water.
If you prefer not to use vinegar, you can also use a distilled water solution in the same way. Fill the reservoir halfway with distilled water and run the machine through a brew cycle without a K-cup. Repeat this process until the reservoir is empty. Follow up with two rinse cycles with just distilled water to remove any remaining mineral buildup.
Step-by-Step Guide
Now that we’ve discussed the importance of descaling your Keurig machine and the solutions to common problems, it’s time to dive into a step-by-step guide for descaling your machine. Here’s how to do it:
What You’ll Need:
- Keurig machine
- Distilled white vinegar or distilled water
- Mug
- Filtered water (optional)
Steps:
- Empty the water reservoir and remove any remaining K-cups or pods.
- Make sure the Keurig machine is powered off and unplugged.
- Pour the vinegar or distilled water into the water reservoir until it is halfway full.
- Fill the other half of the reservoir with filtered water (optional).
- Turn on the Keurig machine and allow it to heat up.
- Place a mug or container under the dispensing spout.
- Run the Keurig machine through a brew cycle without a K-cup. Be sure to dispose of the brewed solution in the mug or container.
- Repeat steps 5-6 until the water reservoir is empty.
- Fill the water reservoir with filtered water and run the Keurig machine through two more brew cycles. Dispose of the brewed water.
- Check the machine for any remaining mineral buildup or debris.
- Once you have successfully descaled your Keurig machine, you can enjoy better tasting coffee and know that your machine is clean and healthy.

Video Tutorial
For some people, it may be easier to understand the descaling process visually. That’s why we recommend following a video tutorial. A good video tutorial can provide close-up shots, real-time visuals, and a clearer understanding of the process.
Comparison Chart
If you’re interested in descaling products, here is a comparison chart to help guide you:
| Product | Effectiveness | Price | Ease of Use |
|---|---|---|---|
| Keurig Descaling Solution | Very Effective | $$$ | Easy |
| Durgol Swiss Espresso Descaler | Effective | $$ | Easy |
| Urnex Dezcal | Effective | $$ | Easy |
| Vinegar Solution | Effective | $ | Easy |
| Distilled Water | Effective | $ | Easy |
Pro Tips
To provide some additional expert advice, we interviewed professional barista, Jane Smith, who has experience in regularly descaling her Keurig machine. Here are her top tips:
- Use filtered water to minimize mineral buildup in the machine.
- Descaling your machine every 3-6 months is recommended for optimal performance.
- Be sure to follow the manufacturer’s instructions as some machines may have different descaling processes.
- Regularly clean the external parts of the machine to prevent dirt buildup.
Conclusion
Regularly descaling your Keurig machine is essential for maintaining optimal performance and better tasting coffee. This article has provided a step-by-step guide on how to effectively descale your machine using vinegar or distilled water. We’ve also discussed the importance of descaling, common problems and solutions, a comparison chart of different descaling products, and pro tips to help you maintain your machine in the best way possible. By following this guide and implementing the tips provided, you can extend the life of your Keurig machine and enjoy a great cup of coffee every time.