Introduction
Have you ever felt that your computer’s mouse cursor is boring or difficult to see on your screen? Do you struggle with finding it amid cluttered desktops or multi-monitor setups? If so, you’re not alone! Many computer users want to change their cursor’s appearance or behavior, but they don’t know how or where to start. This article will guide you through the steps of customizing your mouse cursor to suit your preferences and needs. Whether you want to change the cursor’s size, color, shape, animation, or create your custom visual style, this guide has it all.
Step-by-Step guide for changing the mouse cursor
Introduction to cursor customization
Before we dive into the nitty-gritty details of cursor customization, let’s take a moment to review its benefits. Customizing your mouse cursor can enhance your productivity, comfort, and style. By adjusting the cursor’s size, color, or animation, you can make it easier to spot or track on your screen, especially for users with vision impairments or less accurate navigation. Furthermore, customization can personalize your computer experience, add some uniqueness to your interface, and express your creativity or mood.
How to set a custom cursor in Windows or Mac
The first step to customizing your mouse cursor is to choose a new cursor and apply it to your operating system. Both Windows and Mac offer built-in options to change the cursor’s design, such as shape, size, and color, and also enable users to choose from a library of pre-installed cursor sets. Here’s how to set your custom cursor in Windows and Mac:
In Windows:
1. Open the Start menu and go to Settings.
2. Click on Personalization.
3. Select Themes and go to Cursor.
4. Browse the list of available cursors and choose the cursor you want to use.
5. Click on Apply, followed by OK.
In Mac:
1. Click on the Apple menu and go to System Preferences.
2. Click on Accessibility.
3. Choose Display.
4. Go to Cursor.
5. Select the cursor size and turn on Shake mouse pointer to locate.
6. Click on OK to save the new settings.
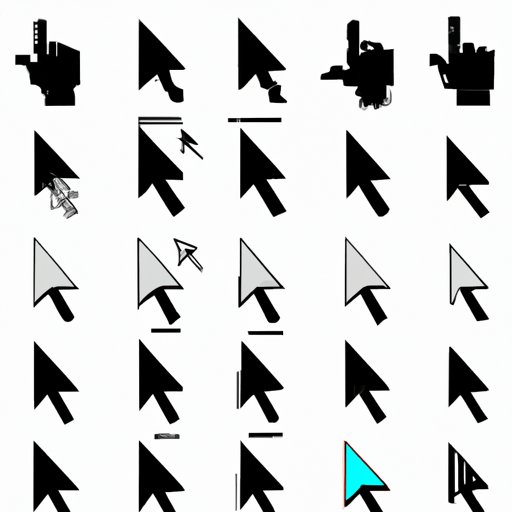
Different ways to customize the cursor, such as changing the size, color, and shape
Once you’ve set your cursor, you may still want to tweak it further. Here are some customization options you can use to tailor your cursor experience:
– Size: You can modify the cursor’s size to make it bigger or smaller with ease. In Windows, navigate to the Cursor settings page, and select the cursor size to adjust it. On a Mac, you can change the cursor size from the Display tab under Accessibility.
– Color: In addition to size, color is a vital aspect of the cursor’s customization. You can choose a cursor color that complements your desktop background or a color that stands out from it. Windows offers color customization of the cursor under the Cursor tab in Personalization settings. On a Mac, the only default option for cursor colors is black and white.
– Shape: Cursor shape is another essential aspect of customization. You can select from different cursor styles like an arrow, a hand, an hourglass, and more in either Windows or Mac OS. There are many available cursors on the internet that you can download according to your preference. You can also draw your cursor using different software and import it to your operating system.
Tips and tricks for adjusting cursor settings for optimal visibility and functionality
Here are some simple but effective tips for optimizing your cursor’s visibility and functionality:
– Turn on cursor trails: Windows also has an option to extend the cursor trail on the screen, making it easier to locate the cursor.
– Adjust font smoothing: Font smoothing is a setting that helps make fonts clearer and easier to read on the screen. This can be beneficial for users who have difficulty distinguishing small images and icons on the desktop or they have visual problems.
– Enable enhanced pointer precision setting: Enhanced pointer precision will help you move the cursor with more precision and accuracy. This is helpful for graphic designers, gamers, and anyone who requires precise cursor navigation.
Using third-party applications for cursor customization
Introduction to third-party cursor software
If the built-in custom cursor options aren’t enough, you can extend your cursor customization capabilities by using third-party software solutions. Many cursor applications are available in the market that can help you create, edit, animate or design your custom cursor from scratch. Here are some examples of popular cursor software products.
Installing, setting up, and configuring third-party cursor software
Here are general instructions for installing and using third-party cursor software:
– Choose a cursor software package that is compatible with your operating system.
– Download the installer file from the software developer website or third-party download sites.
– After the download is complete, run the installer and follow the on-screen prompts to install the software.
– Launch the software. From here on, follow the prompts shown on the software.
Highlight some unique features and benefits of using third-party applications for customization
The main benefits of using third-party cursor software are:
– Packed with extra features: As compared with native cursor customizing options, third-party applications offer a vast array of advanced features. For instance, users can add in sound effects, animation, etc. with cursor software.
– Greater choice and flexibility: Using a third-party cursor editing software allows users to have more control over their cursor design choices.
– Customization’s versatility: The cursor customization software comes for every case whether it’s a modification of system cursors, creating your cursor from scratch, or animating your cursor.
Address any risks or drawbacks of using third-party software and offer cautionary advice
While there are numerous benefits of using third-party cursor software, there are also some risks and drawbacks that you should be aware of before you start using it. Here are some essential precautions you should take when considering third-party software:
– Don’t download from unverified third-party sites: It’s best to download cursor software from authentic sources or manufacturer websites to reduce the chance of downloading malware or viruses.
– Ensure compatibility with your system: Be sure to read the product specifications before purchase to confirm that the cursor software you choose is compatible with the particular version of your operating system for best results.
– Warranty and support: It’s essential to ensure that the cursor software comes with a warranty or technical support in case of any errors.
Using built-in options for cursor customization
Introduction to built-in cursor options in Windows or Mac
Both Windows and Mac have built-in cursor options that allow you to change the cursor shape, size, color, and speed. Additionally, Windows offers the option to turn on pointer trails or enhance pointer precision, while Mac provides the option to Shake mouse pointer to locate.
Highlight some hidden or lesser-known cursor features and options
Some hidden or lesser-known cursor features and options are:
– You can enable the cursor to jump to the default button when pressing the enter key: On Windows, you can turn on the “Activate a window by hovering over it with a mouse” option in Mouse settings.
– You can change the cursor blink rate: On Windows, navigate to advanced Mouse properties and choose the “Blink rate” option to increase or decrease the cursor’s speed.
– You can customize the cursor to change color when clicking: On Mac, go to the Display tab under the Accessibility preferences.
Offer tips for using built-in options to achieve different cursor effects
Here are some tips for using built-in options to achieve different cursor effects:
– Adjust cursor speed: Changing the cursor’s speed can help you control it more easily. Slow speed is best for precise navigation, while faster speed is excellent for rapid work. Adjust cursor speed in the Mouse settings on Windows, and Trackpad settings on Mac.
– Turn on pointer trails or enhance pointer precision: These features can help make the cursor more visible and accurate on the screen. Adjust them in the Mouse settings in Windows, and Accessibility preferences in Mac.
– Shake and Magnify cursor function: Shake your computer mouse or wiggle the cursor to find it quickly. Use the Magnifier in Windows to make the cursor more prominent and visible on high-resolution displays.
Creating custom cursors
The process for creating custom cursors
Suppose you’re unable to find the cursor design that you love, or if you’re a graphic or UI/UX designer who wants to create a custom cursor, you can use different techniques and programs. Here’s a brief overview of the steps involved:
1. Choose your design software: Microsoft Paint, Adobe Photoshop, and other image editors can all be utilized for cursor creating.
2. Design your cursor: Using the design software of your preference, start designing your new cursor according to your taste, mood, or brand.
3. Set a correct size: Make sure the cursor size is standard, especially if you want your cursor to look good on other screens.
4. Save your cursor as .cur format: To make use of your cursor in the operating system, save the file as a cursor file (.cur).
Different methods for creating cursors, such as using image editors or cursor design software
There are plenty of ways to design a custom cursor. Here are a few methods:
– Image editing software: Graphic designers can use software like Adobe Illustrator, Photoshop, or GIMP to design custom cursors from scratch. These programs come loaded with various drawing and designing tools to let you create your unique cursor design.
– Cursor designer software: Several dedicated cursor designer software is available on the market that offers an intuitive interface, making it easy to design custom cursors, animation, and effects. Some popular software programs for Windows and Mac users include Axialis, CursorFX, and RealWorld Cursor Editor.
– Online cursor generators: Some popular cursor generators include RealWorld Graphics, Northborn, and Snipperclips. They provide users with an online facility to design a custom cursor from scratch without installing any software.
Offer step-by-step instructions for creating custom cursors using different methods
Here are some general instructions that can help guide you through the process of creating custom cursors using the methods described above:
– Creating cursors using an image editor:
1. Open your software and create a new file with the same size you want your cursor to be.
2. Start designing your cursor using the available tools.
3. Choose the .cur file type to save your cursor design, then select the version of your Windows operating system.
4. Save the design and move it to your applicable directories.
– Creating cursors using cursor designer software:
1. Download and install the preferred software.
2. Open the software and choose a basic shape for your cursor.
3. Customize your cursor by adding particular coloring, animation, and effects of your choice.
4. Save your cursor design and move it to the appropriate directories.
– Creating cursors using online cursor generators:
1. Open your web browser and visit the desired websites to generate your custom cursor.
2. Choose a cursor style or import a custom image to your software.
3. Customize further by adding animation and effects of your preference.
4. Download the generated design and move it to the appropriate directories.
Address any technical requirements or challenges for creating custom cursors
Creating custom cursors can be fun, but it can also come with some technical challenges. Here are some things to keep in mind when you start designing your custom cursor:
– Cursor size: Make sure to choose the correct cursor file size to ensure that the cursor looks good on all screens.
– Cursor format: While saving your cursor design, make sure to save your file as a .cur file format for compatibility with different operating systems.
– Cursor animation: Animating your cursor will add some personality and attractiveness to the customized cursor, but it can also be more technically challenging than a static cursor.