I. Introduction
Is your shower head not working correctly or looking outdated? Don’t worry; you don’t need to hire a professional plumber to fix it. Changing a shower head is a relatively simple task that you can do yourself with some basic tools and know-how. In this article, we will guide you step by step on how to change your shower head, the benefits of doing so, and how to choose the right one for your needs. We will also provide some maintenance tips and creative DIY hacks to make the installation process even more manageable. Get ready to transform your shower experience and bathroom appearance with our useful tips and advice!
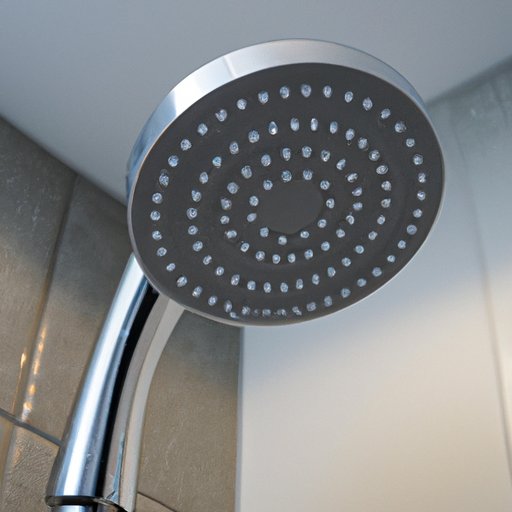
II. A Step-by-Step Guide on Changing a Shower Head
Before you begin, gather the necessary tools, such as an adjustable wrench, plumber’s tape, and a new shower head. It’s also essential to turn off the water supply to avoid any accidents or leaks.
Here are the basic steps to follow:
- Remove the old shower head by turning it counterclockwise with the wrench.
- Clean the threads of the shower arm with a rag and apply plumber’s tape around them to ensure a tight seal.
- Attach the new shower head by screwing it onto the shower arm clockwise. Be sure to hand-tighten it first and then use the wrench to finish tightening it further. Avoid over-tightening to prevent damage or leaks.
- Turn on the water supply and test out your new shower head. Congratulations, you did it!
If you need a visual guide, check out some handy videos or images available online to help you understand the process even better.
III. The Benefits of Changing Your Shower Head
Why bother changing your shower head? Here are some great reasons:
- Improved water pressure and flow: A new shower head can provide better water pressure and adjustability, allowing you to enjoy a more refreshing and rejuvenating shower experience.
- Reduced water usage: Low-flow shower heads can save water and reduce your utility bills, while still offering enough pressure and coverage to make your shower comfortable and functional.
- Enhanced bathroom appearance: You can upgrade your bathroom’s overall look and feel by choosing a new shower head that complements your decor, such as a modern or vintage-style design.
IV. A Comparison of Different Types of Shower Heads
Not all shower heads are created equal. Depending on your needs, bathroom size, and budget, you may prefer one type over another. Here are some of the most popular types of shower heads and their pros and cons:
- Rain shower head: Provides a luxurious, rainfall-like shower experience and often has a larger diameter for wider coverage. However, it may require higher water pressure and a bigger shower enclosure to prevent water splashing.
- Handheld shower head: Offers more flexibility and convenience, especially for those with mobility issues or for cleaning purposes. However, it may require a separate holder or bracket and may not have as much pressure as a fixed showerhead.
- Dual-function showerhead: Offers multiple spray patterns and settings, such as massage, mist, or rain, for a customizable and versatile shower experience. However, it may require more space and may be more expensive than a single-function showerhead.
Consider the features, functionality, and cost of each type before making a decision.
V. How to Choose the Right Shower Head for Your Needs
When selecting a shower head, you need to consider several factors:
- Water pressure: Check your home’s water pressure to determine if you need a low-flow or high-pressure shower head. Some shower heads may require a specific pressure range to function correctly.
- Fixture compatibility: Ensure that your new shower head can fit your existing shower arm or valve without any modifications. If you have an older bathroom, you may need to upgrade your plumbing first.
- Style and finish: Choose a shower head that matches your bathroom’s design and complements your other fixtures and finishes. Popular finishes include chrome, stainless steel, brushed nickel, and oil-rubbed bronze.
- Budget: Determine how much you are willing to spend, keeping in mind that a higher-priced shower head may offer better quality, features, and durability.
Research online or visit a showroom to compare different models and read reviews from other customers. Don’t forget to account for any installation costs or DIY efforts.
VI. The Importance of Proper Shower Head Maintenance
To ensure that your shower head lasts and functions correctly, you need to follow some basic maintenance tips:
- Clean the shower head regularly: Remove any mineral build-up or debris from your shower head to prevent clogging or reduced water flow. You can soak it in vinegar or use a toothbrush and mild soap to scrub it gently.
- Avoid using abrasive cleaners or tools: Harsh chemicals or scouring pads can damage the shower head’s finish or nozzles and affect its performance. Stick to mild soap, white vinegar, or baking soda instead.
- Check for leaks or drips: If you notice any leaks or drips from your shower head, check the connections and the thread sealant. Tighten them if necessary or reapply some plumber’s tape to ensure a proper seal.
If you encounter any other issues with your shower head, such as strange noises or low pressure, consult a professional plumber or call the manufacturer’s customer service for assistance.
VII. DIY Hacks for Installing a New Shower Head
If you want to make the process even more straightforward and enjoyable, try some of these creative DIY hacks:
- Use a rubber band: Wrap a rubber band around the shower arm, then place the new shower head over it before tightening it. The rubber band will provide friction and prevent the shower head from slipping or scratching.
- Apply water-resistant adhesive: Apply some adhesive tape or putty around the thread sealant to help seal and reinforce the connection better. Be sure to use waterproof and heat-resistant material for safety purposes.
- Clean the shower arm: Before attaching the new shower head, clean the shower arm’s threads thoroughly to ensure a clean and tight seal. You can use a toothbrush or a cotton swab to reach the smaller areas.
VIII. Conclusion
Changing a shower head is an easy and affordable way to enhance your bathroom experience and appearance. By following our step-by-step guide and tips, you can select the right shower head for your needs, maintain it correctly, and try some DIY hacks to make the installation process smoother.