I. Introduction
Flat tires can happen at any time and can cause a lot of stress and frustration. Knowing how to change a flat tire is an essential skill that could save you time and money. In this article, we’ll provide you with a comprehensive guide on how to change a flat tire and offer tips and tricks to make the process easier. Additionally, we’ll discuss how to properly maintain your tires to prevent future flats.
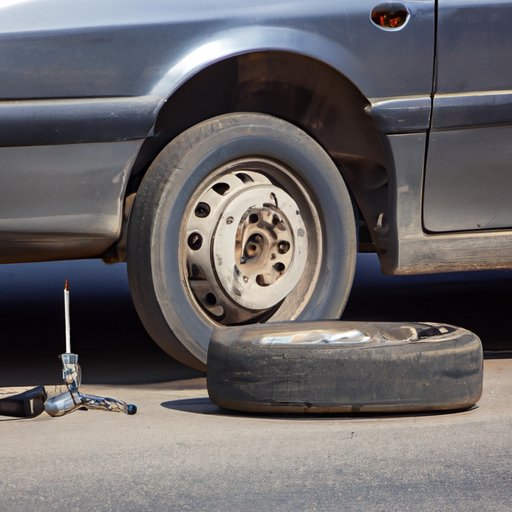
II. Step-by-Step Guide: How to Change a Flat Tire in 10 Minutes or Less
The process of changing a flat tire can be intimidating, but it’s relatively simple once you know the steps. Here’s a step-by-step guide to changing a flat tire in no time.
- Find a safe location: If you have a flat tire, safely move your vehicle to the side of the road away from traffic. Make sure the ground is flat and stable before proceeding.
- Remove hubcap or wheel cover: Use a screwdriver or the flat end of your lug wrench to gently pry off the hubcap or wheel cover.
- Loosen the lug nuts: Use the lug wrench to turn the lug nuts counterclockwise until they’re loose. Don’t remove them yet.
- Place the jack under the vehicle: Position the jack directly under the car’s frame near the flat tire. Use your owner’s manual for guidance on where to place the jack.
- Secure the jack: Once positioned, turn the jack handle clockwise until it’s secure and no longer moves.
- Raise the vehicle: Use the jack to lift the vehicle just enough to remove the flat tire.
- Remove the lug nuts: Use the wrench to remove the lug nuts completely.
- Remove the flat tire: Grab the flat tire and pull it straight out towards you.
- Mount the spare tire: Place the spare tire onto the hub and align the rim with the wheel bolts.
- Tighten the lug nuts: Tighten the lug nuts by turning them clockwise as much as you can by hand.
- Lower the vehicle: Use the jack to lower the vehicle to the ground.
- Tighten the lug nuts again: Use the lug wrench to tighten the lug nuts as much as you can in a star pattern.
- Replace the hubcap or wheel cover: Gently tap the hubcap or wheel cover back in place with your wrench or hand.
Congratulations! You have successfully changed your flat tire. Remember to have your flat tire professionally repaired or replaced as soon as possible.
III. Changing a Flat Tire: Tips and Tricks for Effortless Tire Replacement
While the process of changing a flat tire may seem straightforward, it can become more manageable with these tips and tricks.
- Be prepared: Keep your spare tire, lug wrench, and jack in good condition in your trunk or vehicle at all times.
- Practice tire changes at home: Get familiar with the steps involved in changing a flat tire by practicing at home when you’re not in an emergency situation.
- Use wheel chocks: Use wheel chocks or a wedge to secure the wheels on the opposite end of the car to prevent rolling.
- Check your spare tire’s pressure: Your spare tire may lose air over time, so check its pressure regularly to ensure it’s ready for use in an emergency.
- Know your car’s tire type: Different types of tires require different methods for repair, so be familiar with your car’s tire type.
IV. The Essential Tools You Need to Change a Flat Tire: A Comprehensive Guide
To change a flat tire, you’ll need a few essential tools. Here’s a comprehensive guide to the tools you’ll need and how to use them correctly.
- Spare tire: A properly inflated spare tire is the first tool you need to change a flat tire.
- Lug wrench: A lug wrench is used to remove and tighten the lug nuts that hold your tire in place. Always make sure you have the correctly-sized lug wrench for your car.
- Jack: A jack is used to raise and lower your vehicle to change a flat tire. Make sure you know where to place it on your car and how to properly secure it.
- Wheel chocks: Wheel chocks prevent your car from rolling while you change a flat tire. Place them on the opposite end of your car and remove them after lowering your vehicle.
- Gloves: It’s always a good idea to wear gloves while changing a tire to prevent injury and keep your hands clean.
Before attempting to change a flat tire, it’s important to ensure your tools are in good condition and stored properly in your vehicle. Check your car’s owner’s manual for guidance on how and where to store your tools.
V. Don’t Panic! What to Do When You Get a Flat Tire on the Road
Getting a flat tire on the road can be a scary experience, but it’s important to remain calm and take the necessary steps to stay safe.
- Turn on your hazard lights: As soon as you realize you have a flat tire, turn on your hazard lights to signal to other drivers that you’re having an issue.
- Find a safe place to change your tire: Look for a flat and stable surface away from traffic. Avoid hills or busy roads.
- Apply the parking brake: Once you’ve found a safe spot, apply the parking brake to prevent your car from rolling.
- Keep your car visible: Place reflective triangles or flares around your vehicle to make it more visible to other drivers.
- Call for help: If you’re unable to change the tire yourself or don’t feel safe doing so, call a roadside assistance service or a friend for help.
VI. Expert Advice: How to Properly Maintain and Care for Your Tires
To prevent future flat tires, it’s important to properly maintain your tires.
- Check your tire pressure regularly: Properly inflated tires can prevent blowouts and extend the lifespan of your tires. Use a tire pressure gauge to check your tire pressure regularly and adjust as necessary.
- Rotate your tires: Rotating your tires every six months or 6,000 to 8,000 miles can prevent uneven wear and tear.
- Check your tire treads: Uneven tread wear can indicate alignment issues or other problems with your car. Use a penny to check your tire treads and replace your tires if necessary.
- Inspect your tires: Regularly inspect your tires for any punctures, bulges, or cuts that could lead to a flat tire. Replace your tires as necessary.
- Choose the right tires: Different types of tires are designed for different driving conditions. Research and choose the right tires for your vehicle and driving needs.
VII. Roadside Survival Guide: How to Change a Flat Tire and Get Back on the Road Safely
Changing a flat tire can be a stressful experience, but being prepared can make all the difference. Here’s a summary of the key takeaways from this article to help you get back on the road safely.
- Be prepared with a spare tire, lug wrench, and jack that are in good condition and stored properly in your vehicle.
- Know how to change a flat tire by practicing at home and following our step-by-step guide.
- Use additional tips and tricks to make the process of changing a flat tire faster and easier.
- Maintain and care for your tires to prevent future flats.
- If you get a flat tire on the road, stay calm and follow our tips to stay safe. Call for assistance if necessary.
- Keep emergency items such as reflective triangles, flares, and a flashlight in your car in case of a roadside emergency.
For further education on changing a flat tire and other roadside survival guides, check out our recommended additional resources below.
VIII. Conclusion
Changing a flat tire may seem daunting at first, but with practice and the right tools, it can be a straightforward process. Remember to stay safe, prepared, and properly maintain your tires to prevent future flats. With this comprehensive guide, you can change a flat tire with ease and confidence.