Introduction
Are you tired of looking at your old and worn-out furniture? Replacing them can burn a hole in your pocket, but what if we told you that there’s a way to give your furniture a new lease of life without breaking the bank? Enter chalk paint – an innovative way to transform your furniture in a jiffy.
Step-by-Step Guide
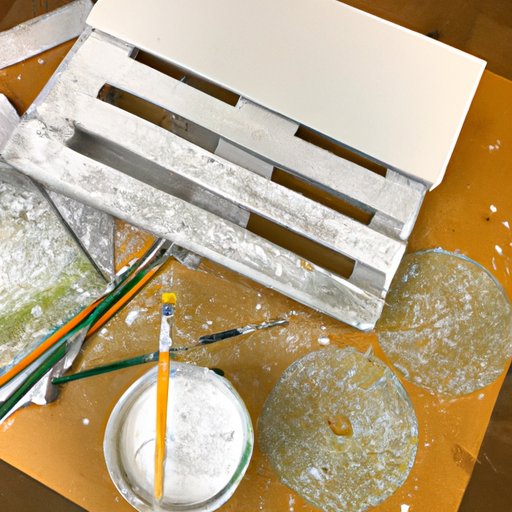
Before you get started with your chalk painting project, it’s essential to collect the necessary tools and materials. Chalk paint typically requires the following things:
- Chalk paint
- Paintbrush
- Sandpaper or sanding block
- Clean rags
- Wax or varnish (optional)
Prepping Your Furniture for Paint
Before you begin painting, ensure that the furniture is free of dirt and grime. Use a clean cloth to remove any dust or debris from the surface. If the piece is particularly old or has a glossy finish, lightly sand it with 220-grit sandpaper. Make sure to clean the surface again to remove any dust that may have accumulated while sanding.
Application of Chalk Paint
Now comes the fun part – applying chalk paint. Dip your paintbrush into the chalk paint container and remove any excess paint by wiping it against the edge of the container. If you want to achieve a thick and textured look, apply the paint directly to the furniture in a crosshatch pattern. If you prefer a smoother look, apply the paint in thin coats, allowing each layer to dry before applying another one. Be sure to thoroughly cover the furniture while applying the paint.
How to Achieve a Smooth Finish
If you’re after a smooth and consistent finish, lightly sand the surface of your furniture with 400-grit sandpaper after each coat of paint. After finishing sanding, wipe off any sanding dust with a clean rag. Another way to achieve a beautiful smooth finish is to add a protective coat of wax or varnish on the furniture once the paint is dry.
Tips and Tricks
How to Properly Sand and Prep Furniture
The key to achieving a perfect finish with chalk paint is to properly sand and prep your furniture before painting it. Use a sanding block or sandpaper to remove any bumps or rough spots from the surface. Start with a heavier grade of sandpaper, such as 120-grit, and then progress to a finer grade sandpaper, such as 220-grit. This process will help the paint adhere better and give a more even finish.
Techniques for Achieving Different Looks
Chalk paint can be used to create a range of different looks and styles. If you want to achieve a vintage or shabby chic look, use a candle to apply a thin layer of wax on the areas where you want the paint to look worn out. If you’re after a distressed look, sand the edges of your furniture with sandpaper after applying the paint.
Tips for Achieving a Flawless Finish
When you paint the furniture, make sure to work in a well-lit and well-ventilated area. This will help you avoid any uneven or blotchy paint patches, and the ventilation will help the paint dry faster. Make sure to take your time and apply thin, even coats of paint. This method will help you avoid drips and uneven coverage.
Best Practices
Choosing the Right Paint for Your Project
Not all chalk paint brands are created equal. When selecting your paint, look for brands that offer a range of colors and finishes. Some brands even offer specialty finishes like metallic or textured.
Testing out Different Colors and Finishes
Before you start painting your furniture, it’s essential to test out the paint on a small, hidden area to ensure that you’re happy with the color and finish. This process will give you the opportunity to experiment with different color combinations and finishes before diving into your actual project.
Storing and Caring for Your Painted Furniture
Once you’ve finished your project, make sure to store your painted furniture in a cool, dry place. Avoid placing hot or heavy items on the surface of the furniture. When cleaning the furniture, use a damp cloth and refrain from using any harsh chemicals or abrasive cleaning agents.
Before and After

To inspire you, here are some examples of furniture transformations achieved through chalk painting. A vintage dresser was given a modern twist with a coat of deep blue chalk paint. Another example is a plain side table that was transformed into a shabby-chic style furniture that looked like it was plucked straight off Pinterest.
Chalk Paint vs Traditional Paint
Benefits and Drawbacks of Each Type of Paint
The major benefit of using chalk paint is its ability to adhere to most surfaces without requiring any extensive surface prep. Chalk paint also dries quickly and is easy to sand. However, it is slightly more expensive than traditional paint and can have a chalky texture. Traditional paint, on the other hand, gives a smoother finish, is more durable, and comes in a wider range of colors.
When to Use Chalk Paint vs. Traditional Paint
Chalk paint is ideal for furniture and decor items that will not be exposed to excessive wear and tear, such as picture frames, decorative boxes, or accent tables. Traditional paint is better suited for items that will require frequent washing or cleaning, such as kitchen cabinets or outdoor furniture.
Troubleshooting
How to Correct Common Issues such as Brush Strokes, Drips, and Uneven Coverage
In case your furniture does not turn out as expected, fear not. Most issues are fixable. Brush strokes can be sanded or smoothed out by wet sanding, drips can be sanded away, and uneven coverage can be corrected by applying another coat of paint.
Tips for Fixing Mistakes and Creating a Flawless Finish
To fix mistakes, gently sand away the problem areas and blend the paint with the surrounding area. The sanding can then be followed by repainting. To achieve a flawless finish, always apply thin, even coats and ensure that each coat is completely dry before applying another one.
Conclusion
Chalk painting your furniture can be a fun and rewarding project that transforms your old pieces into unique and customized works of art. Remember to take your time and prepare your furniture properly before getting started. Experiment with different techniques and finishes to create a customized look that’s perfect for your home.