I. Introduction
Whether you’re a Halloween fanatic or simply enjoy a good fall tradition, carving a pumpkin is a fun and creative activity for all ages. This step-by-step guide will show you the best tips and tricks to make your pumpkin shine this season. We’ll cover everything from choosing the best pumpkin and carving techniques to creative ideas, safety tips, and more.
II. Step-by-Step Guide
A. Choosing the Right Pumpkin
Before you start carving your pumpkin, you need to choose the right one. It’s essential to select a pumpkin that’s ripe, healthy, and has a flat base to ensure stability while carving. Keep in mind that size and shape matter, so consider the design you plan to carve, and buy a pumpkin that suits your needs.
When choosing a pumpkin, look for one with a smooth, evenly-colored skin. Avoid buying pumpkins with any dents, cuts, or bruises, as they may spoil faster and be more challenging to carve. Also, check for mold or soft spots, which are signs of decay.
B. Selecting a Pattern
Before you start carving, you’ll need to select a pattern. You can find free patterns online or in specialty stores depending on your design preference. Traditional jack-o’-lantern faces, spooky silhouettes, or favorite characters are all excellent options.
If you’re feeling adventurous, design your pattern and create a unique masterpiece. Keep in mind that intricate designs require more carving skills and take some time to complete.
C. Making the Initial Cuts
To start carving, use a sharp serrated knife or a specially designed pumpkin carving tool. Begin by cutting off the top of the pumpkin. Make sure to cut at an angle to expose more of the pumpkin’s flesh, allowing for easier access when scooping out the insides.
Next, use a large spoon or an ice cream scoop to remove the seeds and pulp inside your pumpkin. Scrape the inside walls of the pumpkin until they’re clean and smooth. Set aside the seeds for later use in the kitchen.
D. Cleaning Out the Inside of the Pumpkin
After removing all the insides, you’ll need to clean the pumpkin’s interior further. Use a scraper or a pumpkin carving tool to level the inside walls, removing any bumps or high spots. This will provide a smooth surface for your pattern, making it easier to carve and shine better when lit up.
E. Adding Finishing Touches
You’re almost done. Once you’ve cleaned the inside, it’s time to carve your design. The easiest way to transfer your pattern onto the pumpkin is by using a marker. You can use it to trace the design onto the pumpkin’s surface, and you’re ready to start cutting.
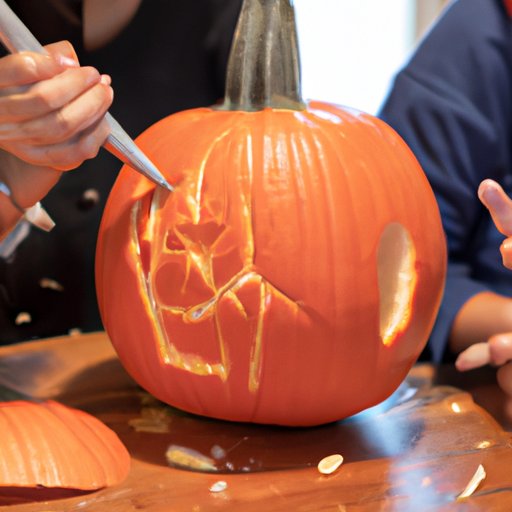
Be sure to cut carefully and follow your pattern. Use a small saw or pumpkin carving tool to make precise cuts, and don’t rush. Take your time, and if needed, make adjustments to the design as you go.
III. Creative Carving Ideas
A. Carving a 3D Portrait
If you want to create a unique pumpkin carving, try a 3D portrait. This technique involves carving different layers, creating a more lifelike image. It’s challenging and requires more time, but it’s worth the effort. Choose an image with plenty of depth and dimension, and you’re ready to start.
B. Carving Movie or TV Characters
If you’re a movie or TV buff, creating your favorite character on a pumpkin is a great idea. From classic horror movies to animated cartoons, the options are endless. There are many free patterns available online, or you can create your own for personalized touch.
C. Creating a Zombie Pumpkin
Zombie pumpkins are a popular trend in recent years. They’re fun to carve, and the possibilities are endless. You can create a traditional zombie face or try something unique by using props like fake knives, limbs, or other parts to make them look like they’re crawling out of your pumpkin.
D. Using Stencils and Templates
If you’re new to pumpkin carving, using stencils and templates is an excellent option. There are numerous free patterns available online, ranging from simple to complex designs. You can print the pattern, trace it onto your pumpkin, and follow the lines to create your perfect pumpkin.
IV. Safety Tips
A. Handling Carving Tools Safely
When handling carving tools, it’s essential to keep safety in mind. Always keep your hands and fingers away from the blade, using a designated tool instead. It’s also advisable to wear gloves when handling sharp objects.
B. Avoiding Injuries
Pumpkin carving requires concentration and sharp tools. To avoid injuries, keep children away from the carving area and use proper lighting. Also, never leave your carving tools unattended, and store them safely after use.
C. Safe Lighting Techniques
A common way to light up your pumpkin is by using a candle inside. It’s essential to keep the candle away from flammable objects and never leave it unattended. A battery-operated light is a safer alternative, preventing any risk of fire.
D. Tips for Children and Pets
Ensure children and pets remain safe during carving. Use child-friendly tools like plastic knives, or involve them in the cooking or cleaning process. Always supervise them throughout the process.
V. Kitchen Creations
A. Roasting Pumpkin Seeds
After cleaning your pumpkin, don’t throw away the seeds. They’re delicious and make a great snack. Rinse the seeds, dry them, and season them with your favorite spices. Then bake them in the oven for 20-30 minutes at 375 degrees Fahrenheit or until golden brown.
B. Making Pumpkin Soup
Pumpkin soup is a classic fall recipe that’s easy to make. Roast your pumpkin in the oven, adding your favorite spices, herbs, and stock, then blend until creamy. Serve with crusty bread for a heartwarming meal.
C. Adding Pumpkin to Dessert Recipes
Pumpkin is a versatile ingredient in many desserts, from pies to cookies, cakes to cheesecakes, and more. You can add some pumpkin puree or spice mix to your favorite recipe and create delicious treats for your loved ones.
D. Creative Uses for Pumpkin Flesh
If you have extra pumpkin flesh left, don’t throw it away. It’s perfect for many recipes, such as pumpkin bread, pumpkin curry, quiches, or stews, and more. Experiment with different flavors and create something new.
VI. Family Fun
A. Hosting a Pumpkin Carving Party
Pumpkin carving is a fun activity to do with friends and family. Host a pumpkin carving party, and let everyone create their unique masterpiece. Provide all the necessary tools and have some snacks and drinks ready for a fun and memorable night.
B. Involving Kids in the Carving Process
Carving a pumpkin with children is an excellent way to spend quality time with them. Give them child-friendly tools and let them have fun carving their designs or helping clean the pumpkin. Take photos of their work and create lasting memories.
C. Creating a Family Tradition
Carving a pumpkin can become a family tradition. Start a new tradition by carving a pumpkin every fall, and make it something to look forward to every season. Involve the family in designing the pumpkin, and let each member take turns in carving it.
D. Making Memories and Having Fun
Pumpkin carving is more than just a fun fall activity. It’s an excellent way to create memories and enjoy quality time with your loved ones. Put on some spooky music, light up your pumpkin, and enjoy a fun and relaxing evening together.
VII. Conclusion
Carving a pumpkin is an exciting and enjoyable fall tradition that everyone can enjoy. This guide has provided you with step-by-step instructions, creative ideas, safety tips, and many other suggestions to make your pumpkin carving experience a success. Remember that carving a pumpkin is more than just making spooky faces; it’s about creating memories with loved ones and expressing your creativity.