Introduction
Canning green beans is an excellent way to preserve this delicious vegetable all year round. Whether you’re looking for a way to save money or want to enjoy the taste of fresh green beans long after their season ends, canning is an ideal solution. In this article, we will provide a comprehensive guide for beginners to canning green beans, including step-by-step instructions, helpful tips, and delicious recipes.
A Beginner’s Guide to Canning Green Beans: Step-by-Step Instructions
Canning green beans is not as complicated as it may seem, but it does require careful attention to detail. Follow these step-by-step instructions to ensure success:
Prepare the Jars and Lids
Before getting started on the canning process, prepare your jars and lids. Wash them in hot, soapy water, and rinse thoroughly. Sterilize the jars by boiling them in a large pot of water for ten minutes. Keep the jars hot until you’re ready to fill them. Also, check the lids for any dents or defects and sterilize them in boiling water for a few minutes. Remember, lids must be new and of high quality to ensure that the jars seal correctly.
Prepare the Beans
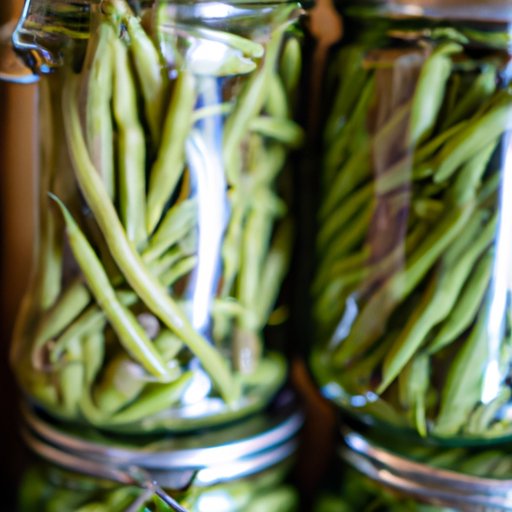
After the jars are ready, prepare the beans. Wash and trim the ends of the beans, cutting them into the desired length, and pack them tightly into the sterilized jars. Leave about 1 inch of headspace at the top to allow for expansion during the canning process.
Add Salt and Boiling Water
Add salt to the beans if desired, then fill the jars with boiling water, leaving the 1 inch of headspace. Make sure that the beans are entirely covered by the water and free of any trapped air bubbles.
Process the Jars
Wipe the rims and threads of the jars with a clean, damp cloth, then place the lids on the jars, followed by the bands, tightening them firmly. In a large pot of boiling water, place the jars, making sure they are entirely covered with water. Bring them to a rolling boil, and process pint-size jars for 20-25 minutes, and quart-size jars for 25-30 minutes.
Cool and Test the Seal
After processing the jars, remove them from the pot using jar tongs, and place them on a towel to cool. Once they are cooled, test the seal by pushing down on the center of the lid. If the lid does not move, the jar has a good seal. If it does move, the jar is not sealed correctly, and you must refrigerate and consume the beans within a few days.
Top 5 Mistakes to Avoid When Canning Green Beans
While canning green beans isn’t exceptionally complicated, there are a few common mistakes that beginners often make. Here are five top mistakes to avoid:
Using Old Lids
Using old lids is a big mistake because the rubber seal on the lid becomes ineffective after use. Always use new lids to ensure that the jars seal correctly.
Under-processing the Jars
Under-processing the jars results in undercooked beans, which can harbor bacteria. Always process the jars for the recommended amount of time to kill all bacteria and achieve optimal results.
Not Using Enough Salt or Acid
Using enough salt is essential to prevent bacterial growth and assist in preserving the beans. If you prefer not to use salt, use acid, such as white vinegar, to achieve the same results.
Overcrowding the Jars
Overcrowding the jars with beans can lead to uneven processing, which can result in spoiled beans. Fill the jars with the recommended amount of beans, leaving the recommended headspace.
Storing Jars Incorrectly
Jars must be stored in a cool, dark place to maximize shelf life and maintain optimal quality. Heat and light can cause the jars to spoil or lose their nutritional value.
The Benefits of Canning Your Own Green Beans
Canning your own green beans has several benefits. Not only does it provide cost savings, but it is also an excellent way to reduce waste and eat healthier.
Cost Savings
Canning large quantities of green beans when they’re in season and readily available is an excellent way to save money. You can buy beans in bulk, which is cheaper than purchasing them pre-canned from the store. Canned green beans also last longer, reducing the need for frequent grocery store trips.
Fewer Additives
Canned green beans purchased from the store often contain added salt or preservatives. Canning your green beans allows you to control the amount of salt added and eliminates the need for preservatives.
Reduced Waste
Canning your green beans reduces waste by preserving food that would otherwise spoil and be thrown away. You can also reuse jars, reducing the need to purchase new ones continually.
10 Delicious Recipes for Canned Green Beans
Canned green beans are incredibly versatile and can be used in many recipes. Here are ten delicious recipes to try:
1. Green Bean Casserole
A classic recipe that’s perfect for any occasion. Mix canned green beans, cream of mushroom soup, and fried onions for a tasty and easy side dish.
2. Bacon Wrapped Green Beans
This simple recipe involves wrapping canned green beans in bacon and roasting them in the oven for a crispy and savory side dish.
3. Green Bean Salad
Mix canned green beans, cherry tomatoes, sliced red onions, and crumbled feta cheese for a refreshing and easy salad.
4. Vegetable Soup
Canned green beans add flavor and nutrition to homemade vegetable soup.
5. Green Bean and Potato Salad
Canned green beans and potatoes make the perfect combination for a hearty and healthy salad. Mix in some dill, garlic, and lemon juice for a Mediterranean twist.
6. Green Bean and Mushroom Stir Fry
Canned green beans, mushrooms, and bell peppers tossed in a savory soy sauce make for a quick and easy stir fry dish.
7. Green Bean Fries
Batter and fry canned green beans to make a delicious and healthy alternative to french fries.
8. Green Bean and Tuna Salad
Mix canned green beans, tuna, chopped onion and celery, and mayonnaise for a protein-packed and flavorful salad.
9. Green Bean and Tomato Stew
Canned green beans, tomatoes, and onions simmered together make a delicious and flavorful stew.
10. Green Bean and Cheese Casserole
Mix canned green beans, cream of celery soup, and shredded cheese for a comforting and delicious casserole.
How to Store Canned Green Beans
Proper storage is essential to maintain the quality and shelf life of canned green beans. Store the jars in a cool, dark, and dry place. Avoid areas with high humidity or temperatures above 90°F. If you notice any signs of spoilage, such as mold, off smells or colors, or bulging lids, discard the beans.
Canning Green Beans: Frequently Asked Questions (FAQ)
Here are some common questions beginners often have about canning green beans:
1. How long will canned green beans last?
Canned green beans will last for up to one year when stored properly. However, it’s best to consume them within six months for optimal quality.
2. Do I need special equipment to can green beans?
No, you can use a large pot and jars, bands, and new lids. However, a canner with a lid and jar rack makes the process easier and more efficient.
3. Are there any safety concerns when canning green beans?
Yes, it’s important to follow the recommended processing times and to use new and high-quality lids. Additionally, you must be careful not to add too many beans to the jars or to underprocess them.
Conclusion
Canning green beans is a great way to preserve this versatile vegetable all year round. By using our beginner’s guide, you can achieve success by following the step-by-step instructions and avoiding common mistakes. With your newfound knowledge and confidence, start canning your green beans and try out our delicious and easy recipes.