Introduction
Are you looking for a way to spruce up your home decor while also adding some much-needed storage? Building your own wall shelves might be just the solution you’re looking for! While the task may seem daunting at first, it’s actually a fairly simple DIY project that even beginners can tackle. In this article, we’ll provide you with a step-by-step guide on how to build wall shelves, the necessary tools, materials, and some clever storage hacks to inspire you.
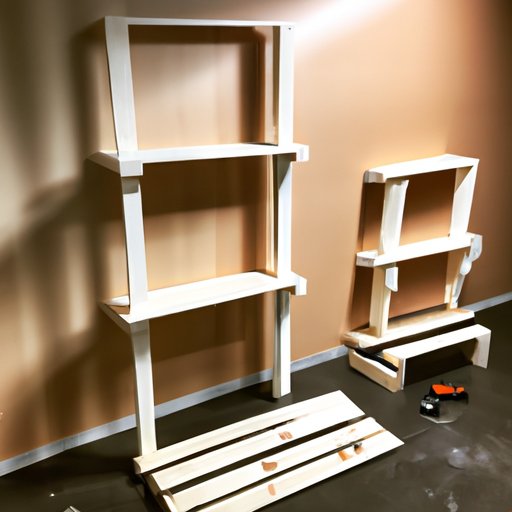
Step-by-Step Guide to Measuring and Cutting Wood
Before you get started on building your wall shelves, it’s essential to have all the necessary tools and materials on hand. These include:
- Wood (choose a type that suits your style and needs)
- Tape measure
- Table saw or circular saw
- Level
- Drill and screws
- Sanding block or sandpaper
Once you have all the tools, it’s time to start measuring and cutting your wood. Follow these simple steps:
- Measure the wall space where you want your shelves to go. Mark this length on your wood with a pencil.
- Measure the depth you want for your shelves (usually around 10-12 inches) and mark the wood.
- Use a saw to cut your wood along the marked lines. Be sure to cut carefully and keep your saw blade straight.
- Sand the edges of the wood to smooth out any rough spots.
Now you have your wood cut and ready to go! You can move on to the next step: attaching your brackets to the wall and your shelves to the brackets.
Beginner’s Guide to Building Wall Shelves
Building wall shelves may seem intimidating if you’re new to DIY projects, but it’s actually a very doable project. One of the best things about wall shelves is that the options for customization are endless, which means you can tailor the project to your skills and style.
To start, it’s best to choose your bracket type. Traditional L-shaped brackets can provide the necessary support for heavier items, while floating shelf brackets give a sleek, modern look, and can often be disguised within the shelf itself.
Once you have your brackets chosen and installed (make sure they’re level!), it’s time to attach your shelves to the brackets. Start by placing your wood shelf on top of the brackets, and use screws to secure it to the brackets from the bottom. Make sure to pre-drill the holes in the wood to avoid splitting it.
Once your shelves are securely in place, you can add your decorative touches and accessories to make them your own.
Exploring Materials for Building Wall Shelves
When it comes to building wall shelves, one of the biggest decisions you’ll have to make is what material to use. The most common materials for shelves are wood, metal, and glass, and each comes with its own set of pros and cons.
Wooden shelves are perfect for a classic and rustic look, and they’re relatively easy to work with. They can be stained or painted to match your decor. Metal shelves are perfect for a more modern, industrial look, but they can be trickier to work with, especially if you’re not experienced with metalworking. Glass shelves provide a sleek, elegant look, but they can be challenging to install and may require specialty hardware.
Ultimately, the decision comes down to your personal style and the function of your shelves. If you’re using them to display fragile items, glass shelves might not be the best choice.
Customizing Wall Shelves
One of the best things about building your own wall shelves is the ability to customize them to your heart’s desire. Here are a few ideas to get you started:
- Paint your shelves a fun color that matches your decor.
- Add decorative paper or wallpaper to the underside of the shelves for a pop of pattern.
- Use vinyl decals to create a unique design or pattern on your shelves.
The options for customization are endless, so have fun with it and make it your own!
Common Mistakes to Avoid When Building Wall Shelves
While building wall shelves is a relatively straightforward process, there are some common mistakes you’ll want to avoid:
- Not measuring accurately: Make sure you measure the space where you’ll be installing the shelves carefully.
- Not leveling your brackets: Nothing’s worse than a crooked shelf! Take the time to ensure your brackets are level before attaching your shelves.
- Not using the proper hardware: Make sure you have the proper screws and supports for your specific shelf and wall type.
- Not sanding your shelves: Sanding your shelves ensures they’re smooth and free of splinters that could cause injury.
- Not using the correct tools: Make sure you have all the necessary tools on hand and that you’re using them correctly.
By avoiding these common mistakes, you can achieve a professional-looking finish that will enhance your decor for years to come.
Types of Brackets and Supports for Wall Shelves
Choosing the right bracket or support for your wall shelf is essential for both function and style. Here are a few different types of brackets and supports to consider:
- L-shaped brackets: These are traditional brackets that provide sturdy support for heavy items. They come in various sizes and materials, including metal and wood.
- Concealed floating shelf brackets: These brackets give the illusion that the shelf is floating on the wall, and often come in inconspicuous designs that won’t detract from your decor. They’re ideal for small items or decorative objects.
- Decorative brackets: If you’re looking to add an extra touch of style to your shelves, decorative brackets can be a great way to do so. From intricate metal designs to vintage wooden brackets, there are plenty of options to choose from.
Take the time to research and choose the bracket or support that best suits your needs and style.
Clever Storage Hacks with Wall Shelves
Wall shelves are a great way to add storage to your home while also creating a stylish display. Here are a few clever storage hacks to inspire you:
- Organizing a home office: Use wall shelves to store supplies, files, and books while keeping your desk clutter-free.
- Creating a display for a collection: If you have a collection of figurines, books, or other small objects, use a wall shelf to display them in an attractive way.
- Creating a bedside table: Don’t have space for a traditional bedside table? Use a wall shelf to hold your lamp, phone, and other essentials within arm’s reach.
Wall shelves are a versatile and practical addition to any home, so get creative and think outside the box!
Conclusion
Building your own wall shelves is a rewarding and fun DIY project that can enhance the decor of any room. From the initial measuring and cutting to the finishing touches of customization, there are many steps involved in the process. However, with the right tools, materials, and a bit of patience, anyone can build their own wall shelves. Take your time, and don’t be afraid to experiment with different materials, finishes, and designs.