Introduction
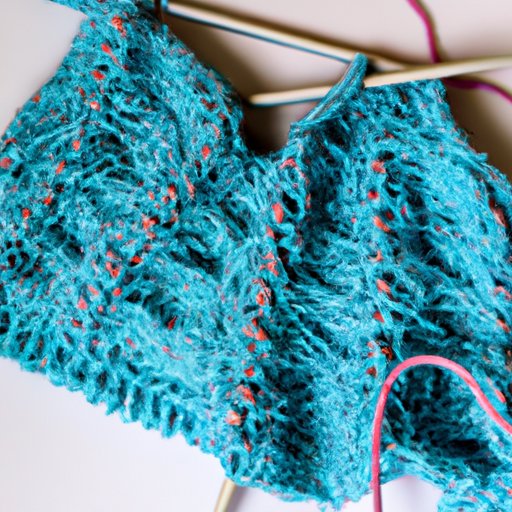
As any experienced knitter will tell you, binding off is a crucial final step in any knitting project. Not only does it help to create neat and tidy edges, but it also ensures that your hard work doesn’t unravel. If you’re new to knitting or looking to improve your skills, then mastering the art of binding off is a must. In this comprehensive guide, we’ll explore 7 different techniques and provide you with all the tips and tricks you need to achieve the perfect bind-off.
7 Easy and Effective Ways to Bind Off Your Knitting Project
There are countless ways to bind off your knitting, but we’ve narrowed it down to seven of the most popular and effective methods:
Method 1: Basic Knit Bind-Off
Also known as the Standard Bind-Off, the Basic Knit Bind-Off is the most commonly used method of binding off. It creates a sturdy, flat edge that works well for most projects.
Method 2: Purl Bind-Off
The Purl Bind-Off is a variation of the Basic Knit Bind-Off that is used to create a stretchier edge. It’s common in projects like ribbing and seed stitch.
Method 3: Three-Needle Bind-Off
The Three-Needle Bind-Off is a method used to join two separate pieces of knitting, like shoulder seams or the top of a hat. It creates a clean, sturdy seam that eliminates the need for sewing.
Method 4: Elastic Bind-Off
The Elastic Bind-Off, also known as the Sewn Bind-Off, is a stretchy bind-off method suitable for projects that require a lot of give, like socks or mittens.
Method 5: I-Cord Bind-Off
The I-Cord Bind-Off is a decorative method of binding off that creates a braided edge. It’s often used in projects like scarves or shawls.
Method 6: Lace Bind-Off
The Lace Bind-Off is a delicate, decorative bind-off method that works well in lace or other openwork projects. It creates a scalloped edge that complements the lace pattern.
Method 7: Picot Bind-Off
The Picot Bind-Off is a decorative method that creates a picot edge, which is a small, pointed loop. It’s a popular choice for shawls and blankets.
Comparison of the Seven Methods
Each of these seven bind-off methods has its pros and cons. Some create a stretchier edge, while others are sturdier. Some are easy to memorize, while others require more focus. Consider the needs of your project and experiment to find what works best for you.
The Ultimate Guide to Binding Off Your Knitting: Tips and Tricks for Every Knitter
Binding off can be a tricky process, but with these tips and tricks, you’ll be able to achieve the perfect finish every time.
Preparation Before Binding Off
Before you start binding off, make sure you have enough yarn and that your work is evenly spaced on your knitting needles. You may also want to consider using a larger needle size than you used for the project to help loosen up your bind-off.
Maintaining Tension During Binding Off
When binding off, it’s important to keep your tension consistent to ensure a neat and tidy edge. If you find that you’re pulling too tightly or too loosely, adjust your tension or use a larger needle size.
Making the Bind Off Look Neat and Tidy
The key to a perfect bind-off is consistency. Make sure your stitches are even and uniform, and avoid letting any loops slip off your knitting needle. To keep your edge from curling or puckering, block your finished piece before wearing or gifting it.
Adjusting the Bind Off for Different Knitting Projects
Not all bind-offs are created equal, and some projects may require a specific type of bind-off. Consider the needs of your project when choosing a bind-off method. For example, if you’re binding off the edge of a sweater, you may want to use a sturdier method like the Basic Knit Bind-Off.
Troubleshooting Common Bind-Off Errors
If you notice that your edge is too loose or too tight, try adjusting your tension or needle size. If you accidentally drop a stitch, you may be able to fix it with a crochet hook. And if you find that your stitches are slipping off your knitting needle, try using a blunt-tipped needle to help keep your stitches in place.
Saying Goodbye to Your Knitting Project: Here’s How to Bind Off Like a Pro
As the final step of your knitting project, binding off is an important process that should be done with care and attention. Here are some techniques to make binding off easier and more efficient:
Overview of Binding Off as the Final Step of a Knitting Project
Binding off is the last step in any knitting project, and it’s an important one. Taking your time and paying attention to detail can make all the difference in achieving a professional-looking finish.
Importance of Taking Time and Care with Binding Off
Don’t rush the binding off process! Take breaks if needed, and don’t hesitate to restart if you notice any mistakes. The extra time and effort you put into binding off will be well worth it when you see how beautifully your project turns out.
Techniques to Make Binding Off Easier and More Efficient
If you find that binding off is a tedious or difficult task, try using different types of knitting needles or experimenting with different bind-off methods. And don’t be afraid to ask for help or guidance from more experienced knitters.
Unlocking the Secrets of the Perfect Bind Off: 7 Different Methods to Choose From
To fully master the art of binding off, it’s important to understand and experiment with different methods. Here is an in-depth guide for each of the seven methods introduced in Section II:
Method 1: Basic Knit Bind-Off
To do a Basic Knit Bind-Off, you’ll need to know how to knit and purl. Here are the basic steps:
- Knit the first stitch.
- Knit the second stitch.
- Pass the first stitch over the second stitch and off the end of the needle.
- Knit one stitch.
- Pass the previous stitch over the new stitch and off the needle.
- Repeat steps 4 and 5 until you’ve bound off all your stitches.
Method 2: Purl Bind-Off
To do a Purl Bind-Off, you’ll need to know how to purl. Here are the basic steps:
- Purl the first stitch.
- Purl the second stitch.
- Pass the first stitch over the second stitch and off the end of the needle.
- Purl one stitch.
- Pass the previous stitch over the new stitch and off the needle.
- Repeat steps 4 and 5 until you’ve bound off all your stitches.
Method 3: Three-Needle Bind-Off
To do a Three-Needle Bind-Off, you’ll need 3 knitting needles. Here are the basic steps:
- Hold the two pieces of your knitting together, right sides facing each other.
- With a third needle, knit the first stitch from one piece of knitting together with the first stitch from the other piece of knitting.
- Knit the second stitch from each piece of knitting together in the same way.
- Pass the first stitch over the second stitch and off the end of the needle.
- Repeat steps 3-4 until you’ve bound off all your stitches.
Method 4: Elastic Bind-Off
To do an Elastic Bind-Off, you’ll need a tapestry needle or crochet hook. Here are the basic steps:
- Knit the first two stitches together through the back loop.
- Insert your left needle through the resulting stitch from right to left.
- Knit this stitch again from the back.
- Insert your left needle through the resulting stitch from right to left.
- Repeat steps 2-4 until you’ve bound off all your stitches.
Method 5: I-Cord Bind-Off
To do an I-Cord Bind-Off, you’ll need a tapestry needle or crochet hook. Here are the basic steps:
- Knit 3 stitches.
- Slip the first 2 stitches over the third stitch and off the right needle.
- Knit the next 2 stitches.
- Slip the first 2 stitches over the third stitch and off the right needle.
- Repeat steps 2-4 until you’ve bound off all your stitches.
Method 6: Lace Bind-Off
To do a Lace Bind-Off, you’ll need to know how to do yarnovers. Here are the basic steps:
- Knit or purl the first 2 stitches together.
- Yarnover.
- Knit or purl the next stitch.
- Pass the first stitch over the second stitch and off the end of the needle.
- Repeat steps 2-4 until you’ve bound off all your stitches.
Method 7: Picot Bind-Off
To do a Picot Bind-Off, you’ll need to know how to do yarnovers. Here are the basic steps:
- Knit or purl 2 stitches together.
- Yarnover.
- Knit or purl the next stitch.
- Pass the first stitch over the second stitch and off the end of the needle.
- Repeat steps 2-4 until you’ve bound off all your stitches.
- Bind off the last stitch by knitting or purling two stitches together.
From Loose Ends to Perfect Edges: Mastering the Art of Knitting Bind Off in 7 Steps
The Basic Knit Bind-Off is the most commonly used method of binding off. Here are step-by-step instructions:
- Knit the first two stitches together.
- Knit the third stitch.
- Pass the second stitch over the third stitch and off the end of the needle.
- Knit the next stitch.
- Pass the previous stitch over the new stitch and off the needle.
- Repeat steps 4 and 5 until you’ve bound off all your stitches.
- Cut the yarn, leaving a tail that is roughly three times the width of your work.
Some tips and tricks for a perfect bind-off:
- Use a blunt-tipped needle to help keep your stitches in place.
- Don’t hesitate to take breaks if you’re feeling fatigued.
- Experiment with different types of knitting needles or try different bind-off methods.