I. Introduction
For many bakers, measuring flour can be one of the trickiest parts of baking. Depending on how you measure it, the amount of flour you use can vary greatly. Knowing how to measure flour correctly can make all the difference in your baked goods. In this ultimate guide, we will explore how many ounces are in a cup of flour, the importance of measuring flour accurately, and tips and tricks for measuring flour correctly every time.
II. The Ultimate Guide to Measuring Flour: How Many Ounces in a Cup?
A cup of flour is a standard measure used in baking. Traditionally, it is measured by simply scooping a measuring cup into a bag or container of flour and leveling it off with a knife. However, this method can lead to varying amounts of flour, as it is affected by factors such as how compacted the flour is, and how much air is pushed into it.
One cup of all-purpose flour is equivalent to 4.25 ounces or 120 grams. This can vary slightly depending on the type of flour being used. For example, one cup of bread flour weighs 4.5 ounces, while one cup of cake flour weighs 4 ounces.
It is important to know how many ounces are in a cup of flour to ensure that you are using the correct amount in your baking recipes. Using too little or too much flour can result in baked goods that are dry, dense, or undercooked.
III. A Baker’s Delight: Understanding Flour Measurements
There are many different types of flour, each with its own unique properties that affect the final result of your baked goods. Some common types of flour include all-purpose, bread flour, cake flour, whole wheat flour, and pastry flour.
It is important to measure flour correctly depending on the type of baked good you are making. For example, bread flour is higher in protein and absorbs more liquid than all-purpose flour, which means that it requires more precise measuring to ensure the correct amount is used. Cake flour, on the other hand, is much lighter and requires a lighter touch when measuring.
Measuring flour correctly can also affect the texture of your baked goods. Too much flour can result in a dry and tough texture, while too little can result in a flat and dense texture. By understanding flour measurements and using the appropriate measuring techniques, you can create baked goods with the perfect texture and taste.
IV. Why Measuring Flour by Weight is More Accurate Than by Volume
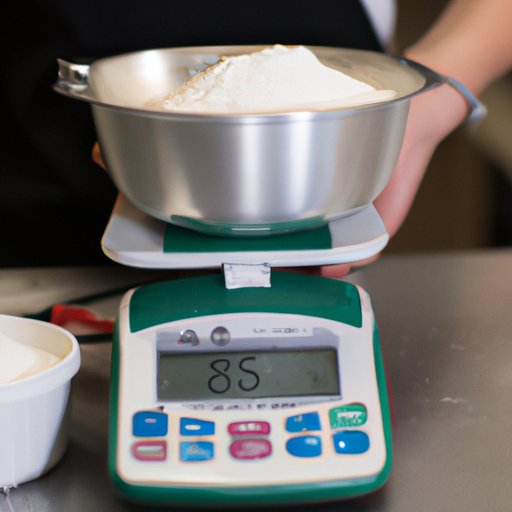
Measuring flour by weight is more accurate than measuring by volume. This is because the weight of flour can vary greatly based on how compacted it is. Using a kitchen scale to weigh flour ensures that you are using the exact amount required for your recipe.
Additionally, measuring flour by weight can save time and mess. No longer do you have to sift flour or worry about packing it too tightly into a measuring cup. Simply weigh it out and move on to the next ingredient.
If you don’t have a kitchen scale, it is recommended that you use the spoon and level method. Using a spoon, scoop flour into a measuring cup until it is overflowing. Use a knife to level off the top. This method is more accurate than simply scooping flour into the cup without leveling it off.
V. Mastering The Art of Baking: Knowing How Many Ounces in a Cup of Flour
Measuring flour accurately can take some practice, but there are several tips and tricks to help ensure that you are getting the right amount every time. First and foremost, make sure to fluff up your flour before measuring it to ensure that it is not compacted.
Additionally, use a straight-edged tool, such as a knife or spatula, to level off the top of your measuring cup. Don’t tap or shake the cup as this can cause the flour to settle and result in an incorrect measurement.
If you are unsure about the type of flour a recipe calls for, it’s best to measure it by weight. This ensures that you are using the exact amount required for the recipe.
If you find that your baked goods are consistently coming out too dense or too dry, try adjusting the amount of flour. A good rule of thumb is to start with slightly less flour and gradually add more until the dough or batter reaches the desired consistency.
VI. From Cups to Ounces: Converting Flour Measurements and Getting it Right Every Time
Converting flour measurements from cups to ounces is a simple process. Simply multiply the number of cups of flour by the weight of one cup. For example, if a recipe calls for 2 cups of all-purpose flour, which weighs 4.25 ounces per cup, you would need 8.5 ounces of flour.
It’s important to note that different types of flour have different weights per cup, so be sure to adjust your measurements accordingly. For example, if a recipe calls for 2 cups of bread flour, which weighs 4.5 ounces per cup, you would need 9 ounces of flour.
VII. Bake Like a Pro: Unlocking The Mystery of Flour Measurements in Baking Recipes
Measuring flour accurately is a crucial step in creating the perfect baked goods. By understanding how many ounces are in a cup of flour, measuring techniques, and tips for adjusting flour amounts, you can create delicious baked goods that are sure to impress.
Remember, if you want the most accurate measurements, invest in a kitchen scale and weigh your flour in grams or ounces. If that’s not an option, make sure to fluff up your flour and level off the measuring cup with a straight-edged tool.
By taking the time to measure your flour accurately, you can avoid common baking mistakes and create baked goods that are not only delicious but also beautifully textured.
The next time you embark on a baking project, try measuring your flour by weight and see the difference it can make!
VIII. Conclusion
Measuring flour accurately is one of the most important steps in creating delicious baked goods. By understanding how many ounces are in a cup of flour, the importance of measuring it correctly, and the tips and tricks for getting it right, you can ensure that your baked goods turn out perfectly every time.
Don’t be afraid to invest in a kitchen scale for the most accurate measurements, and make sure to adjust your measurements based on the type of flour you are using.