I. Introduction
Cricut Iron On Vinyl presents an exciting opportunity for those who love DIY projects, crafting, and customizing T-shirts. While working with this vinyl material is fun and innovative, it comes with its own set of unique challenges. And perhaps one of the most important aspects of using this material is understanding which side to put down when cutting and applying it to your projects. In this article, we’ll take a closer look at how to master working with Cricut Iron On Vinyl, starting with how to get the right side down.
II. A beginner’s guide to Cricut Iron On Vinyl – which side down?
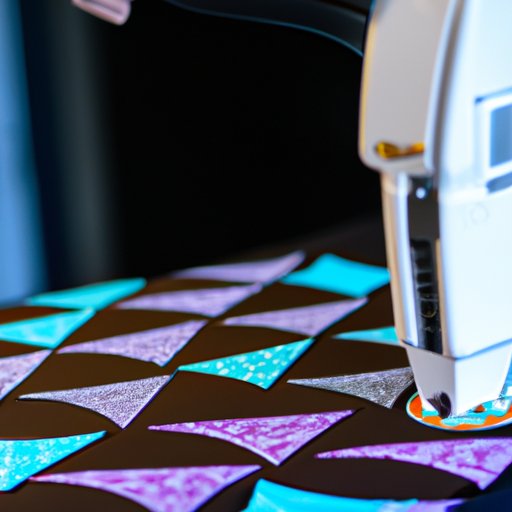
Cricut Iron On Vinyl is a versatile material that is easy to cut and can adhere to a variety of surfaces, including fabric, wood, and paper. However, to get the best results, you need to understand which side to put down when cutting. The material comes with a shiny side and a dull side, which can often be difficult to distinguish from each other.
To identify the right side of the vinyl, hold it up to the light, and look for the dull, matte finish. The shiny side should be placed face down on the cutting mat. It’s also important to note that the vinyl comes with a backing sheet that should not be removed until after the vinyl has been cut and weeded.
Another important note for beginners is to ensure they are cutting the vinyl with the correct settings. The cut pressure, speed, and blade depth will differ depending on the material thickness and type, so it’s essential to double-check the settings before cutting.
III. The ultimate checklist for using Cricut Iron On Vinyl – Don’t forget to flip!
When working with Cricut Iron On Vinyl, it’s crucial to follow a step-by-step checklist to ensure you get the best results. The first step in this checklist is to flip the image or design horizontally or vertically before cutting so that the vinyl is cut in reverse. This ensures that when it’s applied to the shirt or other surface, it will be facing the correct way.
Once the vinyl has been cut, weeded, and transferred to the shirt or surface, it’s time to apply heat to activate the adhesive. The most critical aspect of this step is to ensure that the press or iron is set to the correct temperature and that enough pressure is applied for the vinyl to adhere correctly to the surface.
Aligning the design with the shirt or surface is also important, so it’s essential to measure and mark the shirt before starting. Finally, peeling the backing sheet away from the vinyl while the transfer is still warm is the best way to ensure that the vinyl adheres smoothly.
IV. The top mistakes to avoid when using Cricut Iron On Vinyl – Start with the right side!
One crucial mistake that beginners often make when working with Cricut Iron On Vinyl is starting with the wrong side. This mistake can cause wasted vinyl materials and time. Other common mistakes include cutting the vinyl with incorrect settings, not flipping the design or image properly, using too much heat, or applying too much pressure which can cause the vinyl to come off quickly.
Using the wrong type of shirt or surface can also cause issues. For example, if the shirt or surface has a textured surface, the vinyl may not adhere correctly, and the design may peel off quickly. Understanding the different types of vinyl and surface materials to use is essential to avoid costly mistakes.
V. Pro Tips on how to use Cricut Iron On Vinyl for your DIY projects- Mastering the right side
Once you’ve got the basics covered, it’s time to dive into some useful pro tips that can help you get better results with Cricut Iron On Vinyl. One pro tip is to perform a “test cut” on a small piece of vinyl to ensure that the settings are correct, and the blade is not too dull or too sharp.
Another great tip is to place a cloth over the vinyl before ironing to avoid melting the vinyl or staining the shirt or surface. Finally, mastering the right side of the vinyl can significantly improve project outcomes. It’s essential to hold the vinyl up to the light and ensure you are cutting and weeding the dull side.
VI. A Cricut Iron On Vinyl Troubleshooting guide – Fixing common mistakes including flipping the wrong side
Despite your best efforts to avoid mistakes when working with Cricut Iron On Vinyl, sometimes issues arise. However, many problems can be fixed with a bit of troubleshooting. For example, if you have flipped the vinyl the wrong way, it’s not the end of the project. You can still flip the transfer and reapply it to the shirt or surface, ensuring the shiny side is now facing down.
If you’re having trouble with the vinyl sticking to the shirt or surface, try adding more heat or pressure, or even using a towel or cloth to apply added pressure. Finally, if the vinyl edges start to peel off prematurely, try reapplying heat and pressure to the area or using a vinyl sealer.
VII. Beyond beginner: Advanced techniques in using Cricut Iron On Vinyl for customizing T-shirts
Once you have mastered the basics of working with Cricut Iron On Vinyl, it’s time to experiment with more advanced techniques. One technique is layering vinyl to create more complex designs and patterns. This can be achieved by cutting and weeding each layer separately and then lining them up on the shirt or surface before applying heat.
Another advanced technique is using heat transfer vinyl to create custom designs on other materials, such as hats, tote bags, or canvas. The key to mastering these advanced techniques is trial and error, experimenting with different materials, colors, and designs.
VIII. A comprehensive guide to Cricut Iron On Vinyl & Layering – Flipping the right side is key!
Cricut Iron On Vinyl layering adds depth and personality to your DIY projects. However, to achieve the best results when layering, it’s essential to understand how to flip the vinyl correctly. When layering multiple colors of vinyl, flipping the vinyl is crucial to ensure a clean look with no overlap or cracks in the design.
It’s also essential to consider the order of the layers. The bottom layer should always be the first to adhere to the shirt or surface, followed by each layer on top of it. Finally, it’s important to apply heat and pressure as evenly as possible to achieve the optimal results.
IX. Conclusion
Mastering Cricut Iron On Vinyl is an excellent way to let your creative juices flow and make amazing DIY projects. It’s essential to understand the basics of how the vinyl works and how to get the right side down first. From there, you can build up your skills with advanced techniques, troubleshooting tips, and layering methods. We encourage you to experiment and share your work because, with Cricut Iron On Vinyl, the possibilities are endless.